
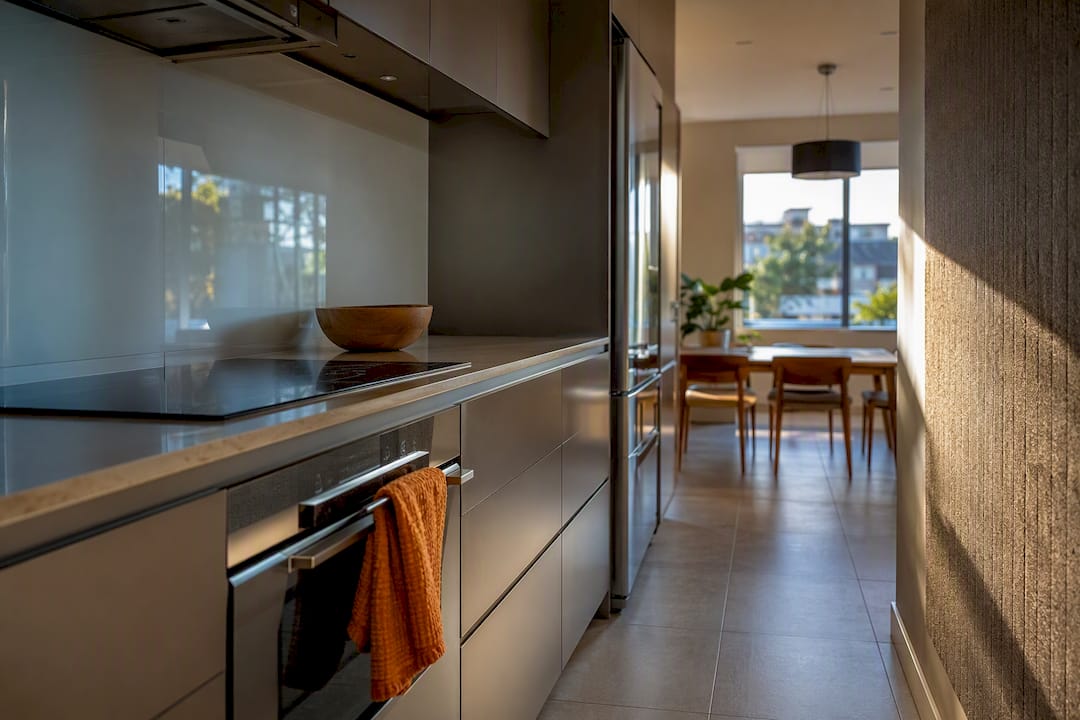
The fastest way to reduce echo in a kitchen is to break up hard, flat surfaces with soft materials: a runner on the floor, cushions on dining chairs, and a wall panel on the dining wall or the wall opposite your counters. These three moves absorb the mid and high frequencies that make kitchens sound harsh, and most renters can do all three in a weekend. This will not soundproof the room. It will make everyday conversation, radio, and clattering pans noticeably easier on the ear.
TL;DR:
- Soft textiles like rugs, cushions, and curtains provide immediate and cost-effective sound absorption in kitchens, especially for small to medium-sized rooms.
- Acoustic wall panels are most effective when placed on the dining wall, opposite counters, or behind islands, with proper distance from heat and moisture sources.
- Ceiling treatments such as fabric shades, suspended baffles, or temporary tiles significantly reduce overhead reflections, particularly in larger or vaulted ceiling kitchens.
- Upgrading cabinet hardware to soft-close and lining interiors with felt diminishes impact noise from door slams and rattling, easing overall acoustic clutter.
- Prioritizing interventions based on cost and disruption, starting with textiles and progressing to panels and ceiling work, ensures the best results for the smallest investment.
Table of Contents
- What causes echo in a kitchen, and what actually fixes it?
- Quick wins you can do today
- Acoustic panels for kitchens: where to put them and why
- Ceiling treatments that outperform a single wall fix
- Cabinetry and small furnishing fixes that cut impact noise
- Appliance and layout tweaks that stop noise before it starts
- A simple plan: what to fix first, and how to check it worked
- Why DwellForms™ panels suit a kitchen-adjacent wall
- Explanation of common causes of echo in kitchens
- How kitchen layout and materials shape sound reflection
- A note from Michelle
- Where to start with DwellForms™
- Sources
- FAQ
What causes echo in a kitchen, and what actually fixes it?
Kitchens echo because they are, by design, hard rooms. Tile, glass, stainless steel, laminate benchtops and bare plaster all reflect sound rather than absorb it, so noise bounces between surfaces instead of dying out. That bouncing is reverberation, and it is what you are hearing when a kitchen feels loud even when nobody is shouting.
The fix follows a hierarchy: soft textiles first, targeted panels and ceiling treatments next, cabinetry and appliance changes if you want to go further. This sequence gives the best result for the least cost and effort, and it is the order Fix It Homestead’s guide to echoey kitchens recommends for anyone tackling the problem room by room rather than all at once.
Below, each stage gets its own section, starting with what you can do today.
Quick wins you can do today
You do not need a renovation to soften a kitchen. Soft textiles such as runners, curtains and upholstered seats provide immediate, low-cost relief simply by breaking up the flat, reflective surfaces that send sound bouncing back at you.
Here is where to start:
- Lay a runner or rug on the floor between the bench and the dining table, but keep it clear of the stove and any splash zones.
- Swap hard dining chairs for upholstered ones, or add seat pads, cushions, and a fabric-backed bench cushion where you eat.
- Hang a curtain or a woven blind if your kitchen window is bare glass, since glass is one of the worst reflectors in the room.
- Fit felt bumpers under appliances, silicone mats in cupboards, and lid bumpers on pots to cut small percussive noises before they add to the din.
- Use a magnetic utensil rail instead of a metal holder that rattles every time a spoon goes in.
Textiles are brilliant for absorbing chatter and clatter, but they run out of puff once a room is genuinely large or double height. If your kitchen still sounds hollow after these changes, the next move is a dedicated panel or a ceiling treatment, not another cushion.
Acoustic panels for kitchens: where to put them and why
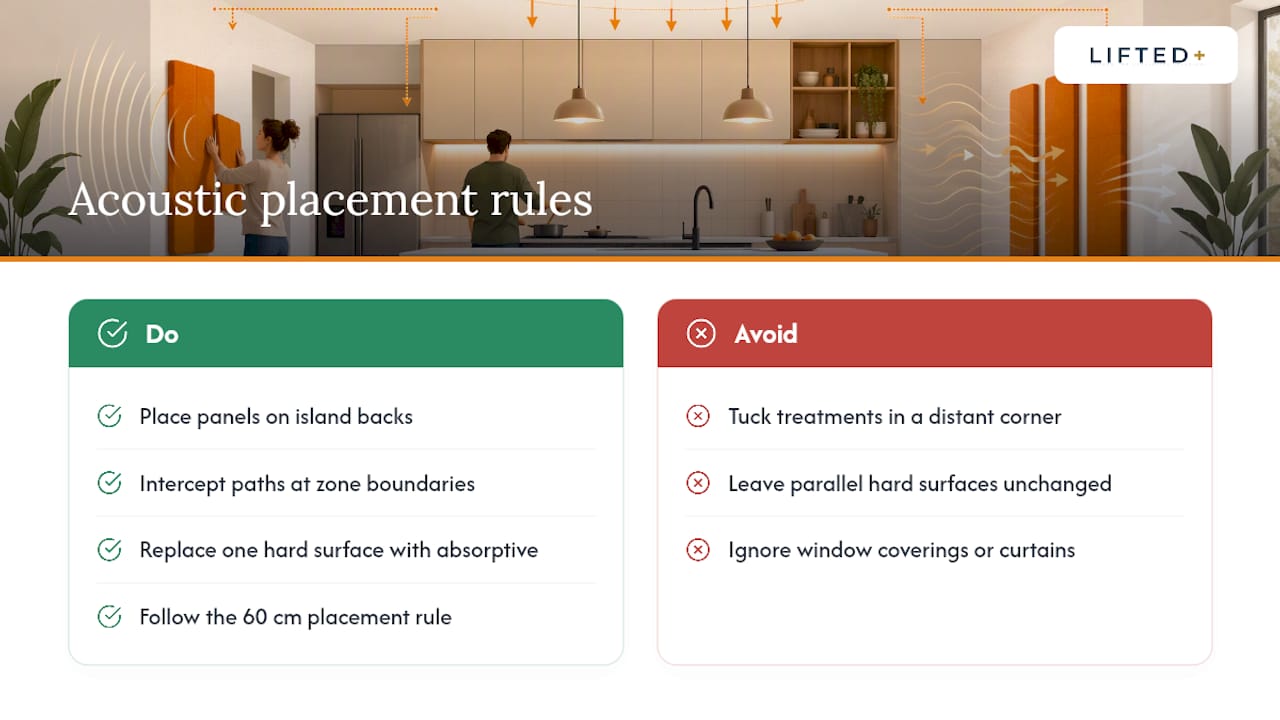
Acoustic wall panels work by trapping sound energy in a porous material instead of letting it bounce straight back into the room, and they are most effective against the mid and high frequencies that make voices and clatter sound sharp. Panels perform best on the dining wall, the wall opposite your counters, or the back of an island, because that is where the loudest reflections travel between the cook and whoever is sitting at the table.
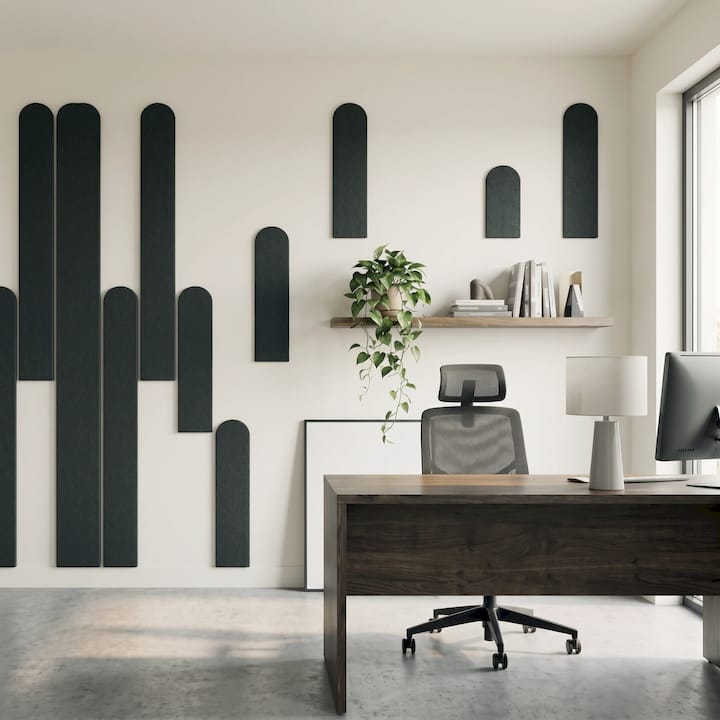
Placement matters more than how many panels you hang. One well-positioned panel on a transitional wall outperforms three scattered around a splashback.
That said, kitchens are humid, and steam and grease are not kind to soft materials. Keep any panel at least 60 centimetres from cooking steam, sinks and hobs, and favour walls that see foot traffic and conversation rather than direct heat.
A few practical notes for kitchen-adjacent placement:
- Choose panels with a wipeable or washable surface if they sit near a doorway to the cooking zone.
- Decorative felt panels can double as art, so a sculptural arrangement does double duty as both a feature wall and a sound absorber.
- Dust with a soft brush attachment monthly; avoid soaking felt materials, since trapped moisture can affect how they perform over time.
Ceiling treatments that outperform a single wall fix
The ceiling is often the single most effective surface to treat in a kitchen, because it intercepts overhead reflections that a wall panel simply cannot reach. Design writers covering kitchen acoustics point to ceiling work as delivering a disproportionate benefit for the area treated, which matters if you have limited wall space or an open-plan layout.
Renters have real options here that involve no drilling:
- A fabric-shade pendant light scatters and softens reflections far better than an exposed bulb or a hard glass fixture.
- Suspended felt or fabric baffles hung from existing hooks or picture rails add absorption without touching the ceiling itself.
- Temporary acoustic tiles positioned above the dining zone target the space where conversation actually happens.
Prioritise the ceiling once textiles have done their job and the room still sounds hard, especially in kitchens with high or vaulted ceilings where sound has more room to build up before it reflects back down.
Cabinetry and small furnishing fixes that cut impact noise
A surprising share of kitchen noise is not echo at all. It is percussive: cupboard doors slamming, drawers rattling, pans clanging against each other. Reducing that baseline noise means there is simply less for your panels and ceiling treatments to absorb later.
Designers increasingly specify soft-close hardware at the design stage, and soft-close hinges and solid-core doors materially cut the sharp bangs that make a kitchen feel chaotic even when it is not loud in the traditional sense.
- Fit soft-close hinges or drawer runners where your cabinetry allows retrofitting.
- Line cabinet interiors with felt pads or adhesive liner to stop crockery and cutlery from clattering.
- Use silicone drawer mats and pan dividers so pots do not knock together every time a drawer opens.
- Swap bar stools for upholstered seating, or add seat pads to what you already own.
Appliance and layout tweaks that stop noise before it starts
Appliances are a major, often overlooked source of kitchen noise, and the fix is partly about what you buy and partly about where you put it. Extractor fans and dishwashers carry sone or decibel ratings, so checking those figures before replacing an appliance lets you choose a genuinely quieter model rather than guessing.
A few layout principles help regardless of your appliance age:
- Favour integrated or panelled installations, which muffle compressor hum compared with a fully exposed unit.
- Keep loud appliance motors as remote as practical, since an externally mounted extractor motor is noticeably quieter than one sitting directly above the hob, a point quiet kitchen design guides raise repeatedly.
- Position the dishwasher, fridge and extractor away from seating areas or shared walls where possible.
- Hide frequently used noisy items, like a kettle or blender, inside a pantry or cabinet rather than leaving them on open shelving.
A simple plan: what to fix first, and how to check it worked
Work through interventions in order of cost and disruption rather than tackling everything at once.
- Immediate (under $100): Runners, cushions, curtains, felt bumpers, silicone mats. Same-day results.
- Moderate ($100 to $800): Acoustic or decorative wall panels, a fabric pendant light, suspended ceiling baffles. A weekend project.
- Longer-term (over $800): Soft-close cabinetry retrofits, quieter appliance replacements, integrated installations. Weeks to plan and fit.
These bands are indicative only and will vary with the products you choose. Following this order, starting with soft textiles before moving to panels and ceiling work, gives the best cost-to-impact ratio according to practical guidance on echoey kitchens, rather than jumping straight to the most expensive fix.
Pro Tip: Test before and after every stage with a simple clap test or a 30-second smartphone recording from the same spot. A live conversation check, standing where you’d normally chat while cooking, tells you more than any spec sheet.
Why DwellForms™ panels suit a kitchen-adjacent wall
DwellForms™ by Liftedplus are modular PET felt wall panels made from recycled plastic, cut into sculptural shapes that soften a room visually while the felt itself absorbs sound. Because the material is porous rather than hard and reflective, it works the same way any acoustic textile does: it interrupts sound waves instead of bouncing them back into the room.
The bigger draw for renters is how they go up. DwellForms™ use tested adhesive pads rather than drilling, so a rental kitchen wall gets a genuine feature wall without a single hole, a landlord conversation, or a bond risk.
- Best placed on the dining wall, opposite the counters, or behind an island, echoing the same placement logic as any acoustic panel.
- Keep panels at least 60 centimetres from steam, splashes and direct heat, the same safety margin that applies to any absorptive material near a stove.
- They reduce reverberation and add colour. They are not a substitute for structural soundproofing between rooms.
Browse the PET felt panel range to see how the shapes work as both art and treatment.
Explanation of common causes of echo in kitchens
Three things determine how echoey a kitchen sounds: its surfaces, its shape, and its size. Hard surfaces are the obvious culprit. Tile splashbacks, stone benchtops, glass windows, stainless appliances and bare plaster ceilings all reflect sound rather than absorbing it, so a fully tiled, glass-heavy kitchen will always sound harsher than a room with a rug, curtains and upholstered seating.
Shape plays a subtler role. Galley kitchens with two parallel hard walls create flutter echo, a rapid back-and-forth bounce that sounds like a metallic buzz rather than a single reflection. Open-plan kitchens attached to a living or dining area behave differently again, since sound has more room to travel before it hits a surface, which can make voices sound distant and clattering sound sharp at the same time.
Size interacts with both. A large kitchen with a high or vaulted ceiling gives sound more distance to build reverberation before it reflects back down, which is part of why the ceiling treatments covered earlier tend to matter more in bigger rooms. A small, boxy kitchen might not need ceiling work at all. A runner and some cushions may be enough once the hardest surfaces are softened.
Understanding which of these three factors dominates in your own kitchen helps you skip straight to the fix that will do the most work, rather than layering on textiles that a shape problem will not solve.
How kitchen layout and materials shape sound reflection
Layout determines where reflections travel, and materials determine how much of that sound bounces back rather than dissipating; for design and layout thinking that can inform acoustic zoning decisions, see Unique Solutions to Your Outdoor Living Dilemmas – Unique Companies. An island kitchen sends sound in more directions than a single-wall galley, which is one reason island backs are recommended as panel placements. They intercept reflections that would otherwise travel straight across the room to a dining or living area.
Material choice compounds the effect. A kitchen with a full-height tile splashback, a glass window, and open shelving has three hard, flat, parallel-ish surfaces working against you simultaneously. Swap even one of those for something absorptive, a curtain over the window or a felt panel on an adjacent wall, and the improvement is often more noticeable than the size of that single surface would suggest, because you are breaking up a reflection path rather than just adding softness in isolation.
Open-plan layouts connecting kitchen to living space add another variable: sound from the kitchen travels further before it meets a soft surface, so treatments placed at the boundary between zones, on a dining wall or a transitional wall, tend to do more work than treatments tucked into a corner of the kitchen itself. This is the same logic behind the 60 centimetre placement rule: the goal is intercepting the sound’s path, not just adding material anywhere convenient.
A note from Michelle
I’ve spent years watching renters talk themselves out of good design because they assume anything acoustic has to be permanent, ugly, or both. It doesn’t. A colour-led, removable approach solves the sound problem and the “this doesn’t feel like mine” problem in the same afternoon.
If you’re weighing up where to start, our installation guides and mood library are worth a browse before you commit to a wall.
— Michelle
Where to start with DwellForms™
Liftedplus is the practical alternative to a full acoustic renovation for anyone whose kitchen echoes and whose walls still need to feel like home. Instead of hiring someone to fit fixed panelling or living with bare rental walls, DwellForms™ gives you a colourful, sculptural feature wall that goes up with tested adhesive pads and comes down again cleanly when you move.

If you’re not sure which shape or colourway suits your kitchen’s dining wall, start with a sample kit rather than committing to a full run straight away. Sample purchases credit toward a full kit order, so testing colour against your light and layout costs you nothing extra in the long run. For anyone ready to commit, the Skyline Kit is a strong starting point for dining and transitional walls, and the Linear Feature Kit suits a bolder island-back statement. Either way, the next step is simple: pick a wall, order a sample, and see how it feels before you decide.
Sources
For more on placement physics and material choice, see how acoustic panels reduce echo in open-plan kitchens, quiet kitchen design principles, and ceiling-focused acoustic treatment. Each covers technical detail beyond the scope of a renter-friendly fix list.
- How acoustic panels reduce echo and noise in open-plan kitchens
- How to make your kitchen quieter | Livingetc
- The sound of a kitchen: why acoustics may be the last overlooked
FAQ
How do I make a kitchen less echoey?
Start with soft textiles, a runner, curtains, upholstered seating, then add a wall panel on the dining wall or the wall opposite your counters if the room still sounds hard.
What can I do to make my whole house less echoey?
Apply the same hierarchy room by room: rugs and soft furnishings first, then targeted panels or ceiling treatments in the rooms with the hardest surfaces, such as kitchens, bathrooms and entryways.
What are some ways to absorb sound in a kitchen?
Rugs, curtains, upholstered chairs, and acoustic or decorative felt panels like DwellForms™ all absorb sound by replacing hard, reflective surfaces with soft, porous ones.
How do I get rid of an echo for good?
You reduce reverberation rather than eliminate it entirely, since a kitchen will always have hard surfaces like benchtops and tile; layering textiles, panels and ceiling treatments brings the sound down to a comfortable level rather than removing it completely.
Do acoustic panels actually work in a kitchen?
Yes, when placed correctly. Panels on the dining wall or opposite the counters intercept the reflections that make voices and clatter sound sharp, provided they sit at least 60 centimetres from steam, splashes and direct heat.