
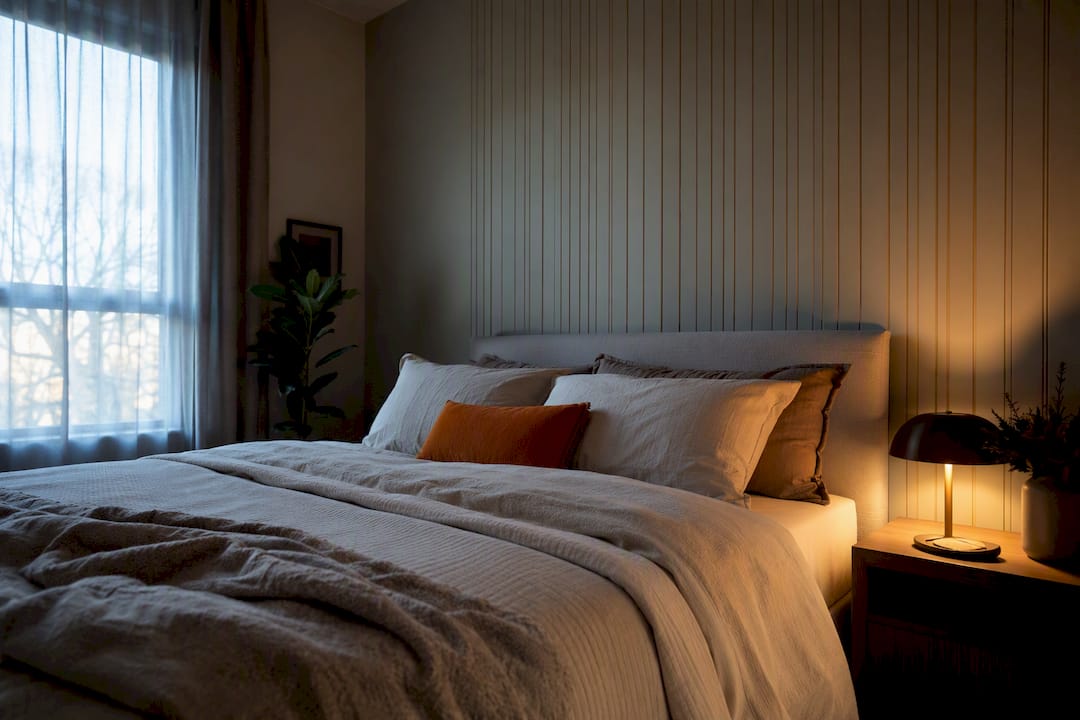
The bed wall wins almost every time. It’s the wall your eye finds the second you walk in, which is exactly why it’s the recommended default for a bedroom feature wall, and if that wall is broken up by doors or windows, the wall facing your window is the next best pick. For a small room, favour low-contrast colour or vertical texture over busy pattern, and if you’re renting, removable options like peel-and-stick paper or modular adhesive panels get you there without a single hole.
TL;DR:
- Choosing the wall behind the bed is almost always best because it is the primary sightline from both standing and lying positions.
- For small bedrooms, low-contrast or colour-drenched walls can make the space appear larger by softening edges and creating visual harmony.
- Removable options like peel-and-stick wallpaper, fabric panels, or modular panels are ideal for renters, provided the wall surface is smooth and properly prepared.
- When selecting patterns and textures, small-to-medium repeats and vertical emphasis enhance depth without overwhelming the room’s limited space.
- Proper sizing, mock-up testing, and coordinating the feature wall with existing room tones ensure a balanced and intentional design.
Table of Contents
- Why the bed wall usually wins: placement and sightline rules
- Colour strategies that make a small bedroom feel larger
- Pattern, scale and texture that suit compact rooms
- Renter-friendly, removable feature-wall options
- Sizing, composition and styling: how wide and tall should the feature be?
- Simple installation and move-out care for renters
- DwellForms™: a colour-led, renter-friendly removable panel solution
- Author perspective: practical priorities when designing a small bedroom feature wall
- How to get started with removable panels
- Sources
- FAQ
Why the bed wall usually wins: placement and sightline rules
Stand in your bedroom doorway and look straight ahead. Wherever your eye lands first, unprompted, is your feature wall. Nine times out of ten, that’s the wall behind the bed, because it’s the surface you and any visitor face without trying.
Lie on the bed too. This sounds like a strange piece of homework, but it’s the second half of the test. The wall behind you doesn’t matter to how the room feels when you’re using it, but the wall you’re facing while lying down does. If the headboard wall is interrupted by a door, a wardrobe, or two mismatched windows, the room’s real focal point may actually be the wall opposite the window, since that’s the surface both a standing visitor and a resting occupant will register.
A few walls disqualify themselves before you even reach for a swatch:
- Walls broken by a door swing or a robe entrance, because the feature gets visually chopped in half.
- Walls with two or more windows, since there isn’t enough continuous surface to hold a composition.
- Walls where furniture placement is fixed and blocks more than a third of the surface.
- Any wall you can’t view from the doorway without turning your head more than 45 degrees.
Once you’ve picked a candidate, don’t commit yet. Mask out the rough dimensions of your planned feature with painter’s tape, or pin up sheets of butcher’s paper to approximate size and placement, then leave it there for a few days. Designers rely on exactly this mock-up-and-wait method before recommending a final scheme, because a colour or shape that reads well for five minutes under showroom lighting can feel entirely different once you’ve walked past it fifteen times in dim evening light. If you still like it after four or five days of ordinary living, you’ve found your wall.
Colour strategies that make a small bedroom feel larger
The mistake most people make in a small bedroom is treating the feature wall like a spotlight, a bold, high-contrast punch that’s meant to grab attention from across the room. In a genuinely small space, that approach usually backfires, because a wall that shouts louder than the room it sits in tends to shrink the box around it rather than open it out.
Colour drenching is the opposite move. Rather than picking one wall for saturated colour and leaving the rest neutral, you paint or style the wall and its surrounding trim, and sometimes the ceiling, in the same or a closely related tone. The technique softens the visual line between wall, ceiling, and skirting, so the eye moves across the room instead of stopping hard at a border. In a small bedroom, that lack of a hard stop is what makes the room read as bigger than it measures.
Whether you drench or keep to a single accent wall, contrast is the variable that decides whether the room feels calm or cramped. Designers generally work with Light Reflectance Value (LRV), a scale from 0 (absolute black) to 100 (pure white) that measures how much light a colour bounces back:
- Very low contrast (5–10 LRV points difference) between wall and trim reads as moody and enveloping, good for a bedroom you want to feel like a retreat.
- Low contrast (10–20 LRV points difference) is the sweet spot most small rooms land on, enough definition to register as a “feature” without the wall visually advancing into the room.
- Medium contrast (20–30 LRV points difference) starts to create a genuine focal punch, useful if your bed wall is large and unbroken, but it can make a tight room feel like it’s closing in if the space is under about nine square metres.
Keeping that gap around 10 to 20 LRV points is a reliable starting rule if you’re not confident reading paint charts by eye.
Before you buy a tin or a roll, test properly. Hold swatches against the wall in both morning and evening light, since the same colour can look warm at 8am and grey by 7pm. Prop them next to your bedding and curtains, not just the bare wall, and view them under the globe you’ll actually use at night, not the shop’s fluorescent tube. It’s also worth pulling your colour from something already in the room, a thread in the quilt cover or a tone in a framed print, rather than introducing something that has no relationship to anything else in the space. It keeps the wall looking chosen rather than bolted on.
Pattern, scale and texture that suit compact rooms
Big murals are seductive in a showroom and punishing in a nine-square-metre bedroom. Large-scale, busy repeats tend to overwhelm compact rooms, because the pattern reads as one dense block rather than a texture the eye can rest on. Small-to-medium repeats, fine botanicals, geometric grids, or subtle woven-look prints do the opposite: they add depth without ever fighting for volume the room doesn’t have.
Vertical emphasis is the other reliable trick worth knowing. A full-height strip, a vertical wallpaper run, or a set of upright slats pulls the eye upward, which makes a low ceiling feel a touch higher and a narrow wall feel a touch taller. This is a genuinely useful move in older apartments or converted rooms where ceiling height is the real constraint, not floor area.
If you’re drawn to a slatted or ribbed texture, scale matters more than most people expect:
- Slat thickness: keep individual battens around 12 to 18 millimetres thick. Anything chunkier starts to eat into the room visually.
- Slat width: aim for 20 to 30 millimetres wide per slat, a proportion designers favour for small rooms because it reads as rhythm rather than bulk.
- Gap spacing: leave 10 to 15 millimetres between each slat, tight enough to look considered, wide enough to still show shadow lines.
- Projection depth: keep the profile shallow, ideally under 20 millimetres off the wall, so the texture doesn’t physically shrink the usable floor space around the bed.
For finishes beyond paint and slats, grasscloth, suede-effect wallcoverings, and slim plaster moulding all add tactile interest without the visual weight of a mural. Save bold, large-format murals for bigger rooms or for a wall you view from a distance, like a hallway, rather than the wall you’re two metres from every night.
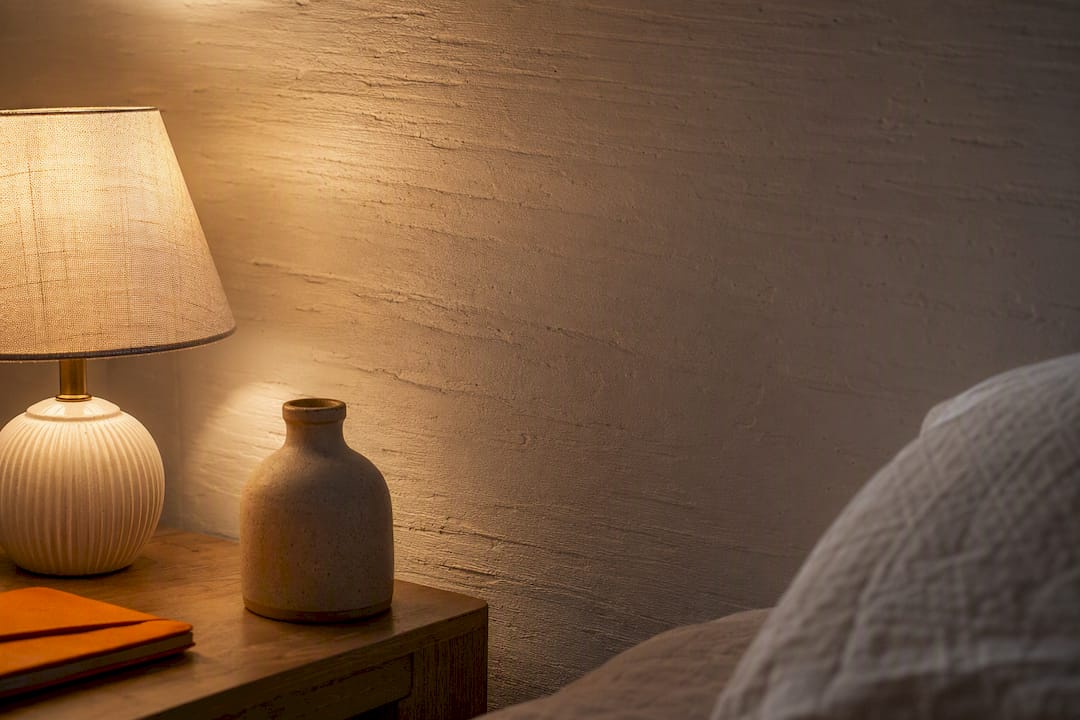
Pro Tip: If you’re torn between a mural and a textured finish, picture the wall lit only by a bedside lamp at 9pm. Texture throws shadow and reads as depth in low light; flat printed pattern often just goes dark and disappears.
Renter-friendly, removable feature-wall options
If you’re renting, permanence isn’t really on the table, and that’s not a compromise so much as a design brief. The best small-bedroom feature walls for renters tend to fall into three categories.
Peel-and-stick wallpaper is the most familiar option, and it works best as a single contained panel behind the bed rather than wall-to-wall coverage. A single wallpaper panel creates a defined focal point that reads as intentional, and peel-and-stick versions remove cleanly when the wall underneath is smooth and properly primed. Rough plaster, textured “popcorn” finishes, or old flaking paint are the usual culprits when peel-and-stick fails on removal, so check the surface before you order a roll, not after.
Fabric panels and ceiling-mounted curtain tracks bring soft texture into a bedroom without touching the wall at all. A length of fabric hung from a slim track fixed higher up, or stretched over lightweight frames that lean or hook rather than screw in, gives you colour and drape with essentially no risk to the plaster. It’s a particularly good option if you want to change the look with the seasons, since swapping a curtain panel takes minutes.
Modular adhesive-backed wall panels, like DwellForms™ from Liftedplus, sit in a category of their own because they combine the sculptural depth of a slatted or moulded wall with the reversibility renters actually need. Rather than wallpaper’s flat print or fabric’s softness, these are dimensional PET felt panels that click or press together into a pattern, held to the wall with tested adhesive pads rather than screws or construction adhesive. A few things make them worth considering over the other two routes:
- They reconfigure. If you move flats or simply get bored of the layout, you can lift the panels down and rearrange them, which peel-and-stick paper genuinely can’t offer.
- They travel. Because the panels aren’t glued to the wall permanently, they generally come with you to the next rental rather than staying behind as sunk cost.
- They add real texture and shape, not just colour, which suits a small bedroom that already has colour on the bedding and needs some architectural interest instead.
- They avoid the surface-prep gamble of peel-and-stick paper on an uncertain wall finish, since the adhesive pads are designed for a broader range of interior surfaces.
None of these three options are damage-guaranteed on every wall type, textured or heavily painted plaster still needs a patch test first, but all three sit well inside what most rental agreements consider reversible decoration rather than renovation.
Sizing, composition and styling: how wide and tall should the feature be?
Getting the proportions right is what separates a feature wall that looks designed from one that looks like an afterthought, and the maths is simpler than it sounds.
For artwork above the bed, size the piece, or the combined width of a small cluster, to roughly 60 to 75% of the bed’s width. A single large piece at this scale calms the wall far more effectively than scattering several small frames across the same space, which tends to look busy in a room that has little else going on around it.
For wallpaper panels, keep the printed section to roughly one bed-width, edge to edge, rather than running paper the full length of the wall. It contains the pattern to the zone that matters and avoids the busy-mural problem discussed earlier.
For slats or modular panels, cap the composition at bed width too, or size it to sit symmetrically around the headboard with equal margin on both sides.
| Element | Width guidance | Height guidance |
|---|---|---|
| Artwork above bed | 60–75% of bed width | Centre at 145–155 cm from floor; leave 15–20 cm above headboard |
| Wallpaper panel | Roughly one bed-width | Headboard height + 15–24 cm, or full wall to ceiling |
| Slats / modular panels | Bed-width, centred | Full wall to ceiling for vertical emphasis |
| Wall sconces | Positioned 15–20 cm outside headboard edges | 100–110 cm from floor to centre |
Lighting is what makes the sizing actually land once it’s on the wall. Slim wall sconces mounted 15 to 20 centimetres outside each edge of the headboard, at roughly 100 to 110 centimetres from the floor, frame the feature without competing with it. A slim LED strip run along the top or side edge of a slatted panel throws a soft wash of light across the texture at night, which is when a small bedroom is arguably lived in the most.
Coordinate the finished wall with what’s already in the room rather than treating it as a separate project. If your bedding has a warm terracotta thread through it, a feature wall in the same family ties the whole room together instead of competing with it. The same logic applies to furniture tone, a pale timber bedframe against a deep, saturated wall reads very differently to the same bedframe against a low-contrast, tonal one.
If the wall also needs to earn its keep functionally, in a genuinely small bedroom, few walls get to be purely decorative, some slatted and modular panel systems can incorporate slim floating shelves or hooks within the same composition, giving you a spot for a reading lamp or a small plant without adding another fixture to an already tight room.
Simple installation and move-out care for renters
Getting a removable feature wall right is less about tools and more about sequencing. Rush the order and you risk marks on the wall or wasted materials.
- Mock it up first. Use painter’s tape to mark out the exact width and height you’re planning, then leave it in place for a few days. Living with the mock-up before buying anything catches sizing mistakes while they still cost you nothing.
- Check the wall surface. Smooth, clean, properly primed walls are what peel-and-stick paper and adhesive-backed panels are designed for. A patch test in an inconspicuous corner tells you how the surface responds before you commit the whole area.
- Follow the manufacturer’s removal steps. For peel-and-stick wallpaper, that usually means a slow, low-angle pull rather than a sharp yank. For modular panels using tested adhesive pads, it means removing panels the way the instructions specify, generally a steady, even pull rather than prying from one corner.
- Keep your offcuts and packaging. Leftover wallpaper, spare adhesive pads, and the original box all make a future touch-up or a full removal far less stressful, especially if you’re planning to take the feature wall with you to a new address.
Pro Tip: Photograph the bare wall before you start and again once everything’s up. If a landlord inspection ever raises a question, having a clear before-and-after on your phone settles it in seconds.
None of this guarantees a mark-free result on every wall type, some older or heavily painted surfaces are simply more sensitive than others, but following the manufacturer’s own steps and testing first gives you the best odds of a clean finish either way. For more on planning a wall feature without permanent works, this guide to a feature wall without renovation walks through the same reversible-first thinking applied to a living room.
DwellForms™: a colour-led, renter-friendly removable panel solution
Once you’ve settled on the bed wall, decided your contrast level, and worked out roughly how tall and wide the feature should run, the next question is simply what to put on it. DwellForms™ by Liftedplus was built around that exact brief: colour and shape on a rental wall, without paint, drilling, or a landlord conversation.
The panels are precision-cut from PET felt, made from 100% recycled plastic, and arranged into modular kits that click or arrange together into a sculptural, dimensional composition. Rather than a flat printed surface, you get real shadow and texture on the wall, installed using tested adhesive pads rather than screws, nails, or construction adhesive. Because the panels are modular, they come apart the same way they went up, which matters if you’re the sort of person who repaints their mental picture of a room every year or two.
DwellForms™ tends to suit your bedroom better than paper or fabric in a few specific situations:
- You want to change the layout occasionally without buying new material each time.
- You’re after genuine dimensional texture, not just a printed pattern, to sit behind a fairly plain bed and bedding set.
- You’d rather test a colour and shape combination in person before committing to a full wall.
- You’re moving within the next year or two and want the feature wall to come with you.
Planning one is straightforward. Measure your bed wall width and the height you’re aiming for using the sizing guidance above, order a sample or colour kit to see the finish and shade in your own light, then test the layout in place with painter’s tape before the panels go up. Installation itself is a matter of pressing the adhesive-backed panels into position following the kit’s layout guide, and aftercare is light, a soft dust or vacuum brush occasionally is generally all a felt panel needs.
| What you get | Why it matters for a small bedroom |
|---|---|
| Recycled PET felt panels | Genuine texture and shape, not just a flat print |
| Tested adhesive pads | No drilling, screws, or wall damage risk from fixings |
| Modular, reconfigurable layout | Rearrange or take the panels to your next home |
| Sample kits available | Test colour and finish in your actual light before buying |
Author perspective: practical priorities when designing a small bedroom feature wall
If there’s one thing worth taking from all of this, it’s to stop trying to make a small bedroom look bigger by hiding it. Colour drenching and low-contrast blocking work precisely because they stop fighting the room’s actual dimensions and instead soften where one surface ends and another begins. That’s a fundamentally different strategy to the high-contrast “statement wall” advice that gets recycled everywhere, and in a genuinely small room, the louder approach usually loses.
The mistake I see most often isn’t a bad colour choice. It’s skipping the mock-up stage entirely and going straight from a shop swatch to a finished wall, then living with a feature that never quite settled. Tape it out, walk past it for four or five days, and trust that instinct over a paint chip held under fluorescent light. The second most common mistake is sizing artwork or panels to the wall instead of the bed. The bed is the anchor in this room, not the wall behind it, and every proportion should be worked out from there.
— Michelle
How to get started with removable panels
If you’ve settled on the bed wall and you’re leaning toward colour and texture without the risk of a permanent finish, the simplest next step is testing before you commit to a full kit. Liftedplus offers sample and colour kits precisely so you can see a panel’s shade, texture, and shadow depth on your own wall, in your own light, before ordering enough panels to cover the whole feature.

For a small bedroom, a compact Linear kit works well for a vertical, slatted look behind a headboard, while a Skyline kit suits a bolder, more sculptural block if your bed wall is fully unbroken. Both are designed to go up with tested adhesive pads, no drilling, no screws, and no permanent change to the wall underneath, which makes them a genuinely renter-friendly feature wall option rather than a scaled-down renovation. Start by measuring your bed wall using the sizing guidance above, then browse the DwellForms™ Skyline modular wall panel kit or the Linear feature wall panels to see which layout suits your wall shape. If you’re still deciding between a slatted, vertical look and a bolder block composition, the removable wall panel ideas guide walks through both directions in more depth.
Sources
A few more resources worth bookmarking as you plan your wall. For general finish and material inspiration beyond wall panels, this guide to making a home look more considered covers finishes and detailing that pair well with a feature wall. For non-paint options specifically, the nine creative feature wall ideas without paint roundup and the bedroom statement wall guide both go deeper into layout examples than this article had room for.
- Feature wall ideas NZ — Zeal Painters
- Colour drenching interiors — Resene decorating blog
- Accent wall ideas for small bedrooms — HomlyIdeas
- Wallpaper behind bed ideas — Space Styled
FAQ
What are some good accent wall ideas for a small bedroom?
A single peel-and-stick wallpaper panel behind the bed, a low-contrast colour-drenched wall, or a slim slatted or modular panel feature all work well, provided the pattern stays small-to-medium scale and the contrast stays gentle.
Do feature walls make a room look smaller?
They can, if the colour or pattern is high-contrast or oversized for the space, but a low-contrast block or colour-drenched treatment tends to do the opposite by softening the room’s visual edges.
What wall should be a feature wall in a bedroom?
The wall behind the bed is the recommended default because it’s the room’s natural focal point; if that wall is broken up by doors or windows, the wall facing the window is the next best choice.
What are some 2026 bedroom trends worth knowing?
Vertical emphasis through slats or full-height panels, tonal colour drenching instead of single bold accent walls, and reconfigurable, renter-friendly options like modular adhesive panels are all shaping how small bedrooms are being styled this year.
How wide should artwork be above a bed?
Aim for roughly 60 to 75% of the bed’s width for a single piece or a tightly grouped cluster, centred at about 145 to 155 centimetres from the floor to the middle of the piece.