

The short answer: you cut the panel to frame the switch, you never cover it, and you leave the electrical fitting exactly where it is. A switch or power point is the one part of a feature wall that has to keep working every day, so the best layouts treat it as part of the design rather than an obstacle. If you rent, or simply don’t want to commit to a renovation, a removable panel system with adhesive pads lets you do all of this without touching the wiring.
Key takeaways
- Frame the switch, don’t bury it: leave a clear margin around the plate so it stays easy to see, reach and operate.
- Moving, extending or altering a switch or socket to suit a thicker wall is electrical work. In New Zealand that means a licensed professional, not a weekend job.
- Contrast is a design tool: a plate that stands apart from the surrounding panel reads as intentional and is easier to find in low light.
- Removable, no-drill panels let you plan around fittings without screws, battens or construction adhesive near live wiring.
- Measure and mock up with paper templates before you cut or stick anything.
Table of Contents
- Why switches decide the layout
- Switch or socket: know which you are working around
- Frame it, don’t recess it
- Don’t move the fitting yourself
- Contrast: let the plate stay visible
- A step-by-step approach for adhesive panels
- Why we use adhesive pads, not fixings
- Colour and texture around a fitting
- Where this works, and where to pause
- Perspective: the switch is part of the composition
- Ready to plan your wall
- FAQ
- Sources
Why switches decide the layout
Most wall layouts fail at the same point. The panels are beautifully arranged across a blank wall, and then a double power point appears at hip height, off-centre, and the rhythm breaks.
The instinct is to hide it. We would argue for the opposite. Building Performance guidance on power outlets, switches and controls makes the point that the position and design of these fittings is crucial to convenient use, and that consistency in where they sit helps people find them intuitively, even with full hands or in low light. That guidance is written for accessible buildings, but the thinking applies to any home. A switch you can find without looking is a switch that has been respected by the design.
So the question is not how to disguise the fitting. It is how to let the panels hold the room while the switch keeps its place in it.
Switch or socket: know which you are working around
The two behave differently on a feature wall, so it helps to be precise. WorkSafe’s definitions describe a wall switch as a manually operated air-break device connected to fixed wiring and rated up to 20A. A socket-outlet is the point where fixed wiring terminates and gives a detachable connection for plug pins, also up to 20A.
In practical terms:
- A switch is touched constantly, usually by hand, often in the dark. It needs a generous, unobstructed margin.
- A power point has a plug sitting in it, with a cord leaving at an angle. It needs clearance for the plug body and for the cord to fall naturally.
- A cluster, such as a switch beside a double power point, is best treated as a single block with one frame around it rather than three separate cut-outs.
Frame it, don’t recess it
The most common mistake with thicker wall treatments is letting the switch sink into a well. Building Performance guidance on controls stresses that they should be easy to operate, and advises against designs that demand two hands at once. If a panel is thick enough that the plate sits in a deep pocket, a thumb or finger can no longer reach it comfortably, and it becomes harder to see whether the switch is on or off.
Two habits prevent this.
First, leave a margin. We suggest a clear gap of at least a thumb’s width on every side of the plate, larger where the panel is thicker or the plate is a double. The gap also means the panel edge never presses against the faceplate.
Second, check the depth before you commit. Lay a panel flat beside the plate and look along the wall from the side. If the panel face stands noticeably proud of the plate, widen the margin rather than deepening the pocket.
Don’t move the fitting yourself
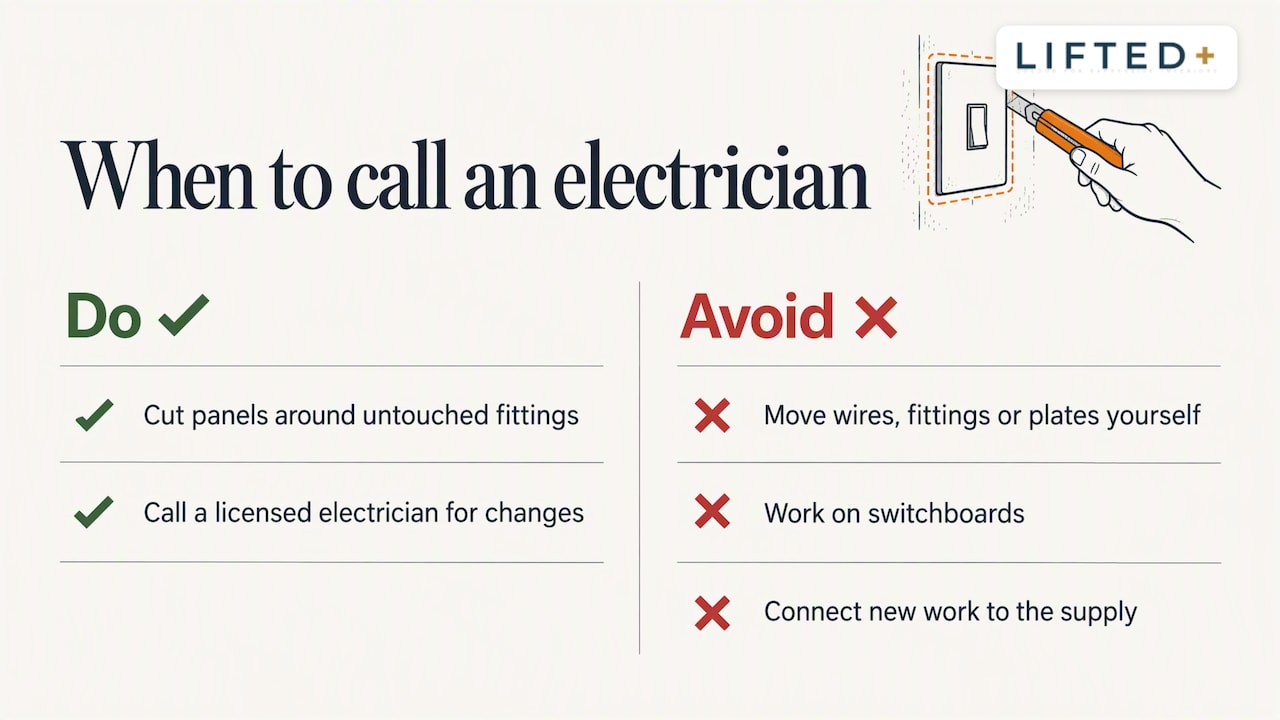
This is where a decorating project can quietly become something else. It is tempting to pull a socket forward so it sits flush with a new surface. In New Zealand, that is electrical work with rules attached.
WorkSafe’s guidance on doing your own electrical work explains that owner-occupiers of their own home can replace existing switches and sockets, and move them when wired with tough plastic-sheathed cable. They cannot work on switchboards or connect new work to the supply, and anything new or altered must be tested and certified. If you rent, you are not the owner-occupier, and any alteration is a conversation with your landlord and a licensed electrician.
The simple rule: if your plan needs a wire, a fitting or a plate to move, stop and call a licensed electrician. If your plan only needs a panel cut around a fitting that stays untouched, you are in decorating territory. This is one of the reasons we designed DwellForms™ as a removable system. It works around what is already on the wall.
Contrast: let the plate stay visible
Colour confidence matters most here. Guidance for accessible buildings recommends that switches and outlets contrast visually with what surrounds them, so they don’t disappear. Add a panel in a similar tone to a white or beige plate and you have quietly reduced that contrast.
The fix is a design opportunity. Some ways to work with it:
- Pair a deep teal, ink or terracotta panel with a pale plate, so the switch reads as a crisp, intentional shape against the colour.
- Where the panel is pale, choose a darker or metallic plate that anchors the wall, and ask your electrician to fit it if you own the home.
- Keep the panel and plate from sitting in the same mid-tone, which is where hardware tends to vanish.
The same logic applies to edges. If you are choosing between a painted surround and a contrasting border, the order of finishes matters, and this discussion of whether to paint the wall or the trim first is a useful way to think about how a clean line around a fitting is built up.
A step-by-step approach for adhesive panels
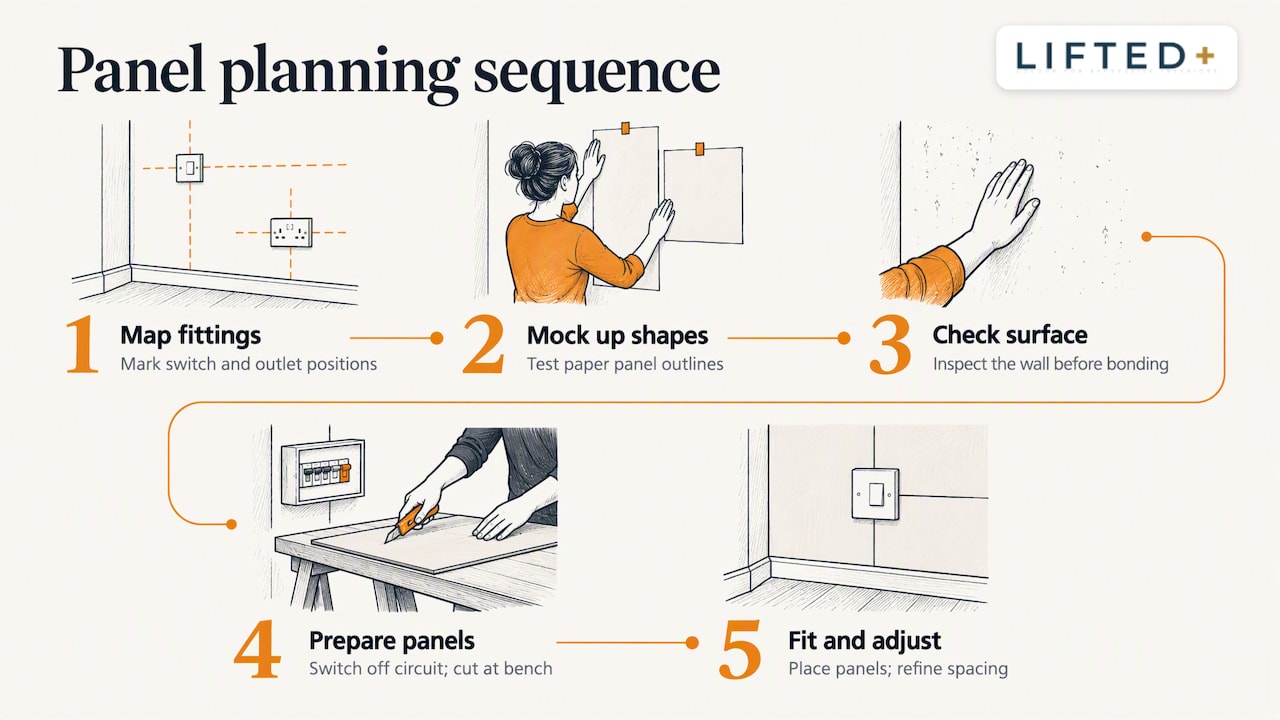
This is how we would plan a wall with a switch or power point when using adhesive-mounted panels.
1. Map the wall first
Sketch the wall to scale and mark every switch, power point, light fitting and thermostat. Note the height of each from the floor. For reference, Building Code G9 material for accessible buildings places switches at 900 to 1200 mm and sockets at 500 to 1200 mm above the floor, with sockets at least 500 mm from corners. Those are requirements for particular building types, not rules for your lounge, but they explain why fittings tend to cluster at familiar heights.
2. Choose a layout that works with the fittings
There are three honest approaches.
- Centre the pattern on the wall and cut around whatever falls in the way.
- Shift the pattern a few centimetres so a fitting lands between two panels, in a natural gap.
- Build the layout around the fitting, so it becomes the focal point of a small composition.
The second is often the cleanest. A switch that lands between forms needs no cutting at all.
3. Mock up with paper
Cut paper templates to the size of your panels and tape them up. Stand back, flick the switch a few times, and push a plug in and out. If anything feels cramped, adjust now. Paper is free and forgiving.
4. Prepare the surface
Check that the paint is sound and clean. Adhesive systems depend on the surface beneath them, and flaking or chalky paint will let go regardless of the adhesive. Test an inconspicuous spot first.
5. Keep a safe working distance
Before you cut, press or trim anything near a fitting, switch the circuit off at the switchboard if you are working close to the plate, and never push tools, blades or fingers behind a faceplate. Cutting is done on the panel at a bench, not on the wall.
6. Stick, check, adjust
Place the panels in sequence, away from the fitting first and then closing in. Because the panels are removable, you can lift and reposition if the gap looks off.
Why we use adhesive pads, not fixings
A conventional panel is screwed, nailed or glued to battens. That means drilling into a wall that may hide cabling, which is exactly what you want to avoid around switches. Our approach is different: DwellForms™ panels are mounted with adhesive pads, with no drilling, no paint and no permanent alteration.
We tested several pull-tab and adhesive options, and deliberately discounted one popular brand because the nano-adhesive pads we selected performed significantly better in our own testing at minimising damage to walls. We are careful with the wording: no adhesive is completely damage-proof, and results depend on the wall surface, the paint and how long the panels stay up. For renters who want the practical detail, our six steps for protecting your bond with no-drill panels walk through it.
Colour and texture around a fitting
The nicest feature walls we see treat the switch as a punctuation mark. A few ideas:
- A single bold form beside the switch. One saturated shape, with the plate set apart by a clear margin, gives the eye a destination.
- A tonal field with one contrasting accent. Softer tones across the wall, with a stronger colour closest to the fitting, create a framed effect.
- Rhythm over symmetry. An off-centre switch is easier to live with in an asymmetrical layout than a rigidly symmetrical one. If you are planning a bedroom wall, our five ways to build a bedroom statement wall has more layout thinking.
Texture matters too. PET felt is soft and matt, so it absorbs light around the plate, which gives the harder, glossier switch a gentle emphasis. If you are new to this, why texture works in home decor is a good primer.
Where this works, and where to pause
We don’t claim every wall is suitable. Be cautious in these situations:
- Walls near a stove, kettle or other heat source, or where steam is constant.
- Textured or flaking surfaces where adhesive pads cannot make good contact.
- Fittings that already feel loose, damaged or warm to the touch. Have a licensed electrician look at those before you decorate anything near them.
- Any layout that would require moving, extending or altering a fitting.
And please don’t treat decor as a substitute for electrical advice. DwellForms™ is a decorative system. It is not soundproofing or a commercial acoustic treatment, and it should never cover or restrict access to a switch, power point or switchboard.
Perspective: the switch is part of the composition
We design DwellForms™ for people who want colour without commitment and texture without renovation, and the switch question comes up in nearly every layout conversation. Our view is simple. A blank rental wall already has a story, with its fittings, its scuffs and its awkward heights, and a good feature wall works with that story instead of pretending it isn’t there.
When we plan a wall, we start with the fittings and design outward from them. That way the panels pull the room out of the safe, polite middle without making daily life harder. The switch stays visible, reachable and recognisable, and the colour does the talking around it.
We also think restraint is underrated. Leave a good margin, choose a clear contrast, and let the wall be used. A home that feels personal is one where the beauty and the function sit side by side.
— Michelle
Ready to plan your wall
If you would like to see how colour and form behave on your own wall, start with our DwellForms™ Colour Samples. Sample kit purchases are credited towards a full kit order, so you can test tones beside your switch plates before committing. When you are ready, browse the DwellForms™ Core Kits and the Extension Kits to grow a layout around the fittings you already have.
For more on layouts that go on in a weekend, see our removable wall panel ideas for NZ renters.
FAQ
Can I put wall panels over a light switch?
We don’t recommend it. A switch needs to stay visible and easy to operate, so panels should be cut to frame the plate with a clear margin. Covering it hides the fitting and makes it hard to use in low light.
Can I move a power point to suit new panels?
Not yourself, in most cases. Moving, extending or altering fittings is electrical work, and WorkSafe says new or altered work must be tested and certified, with owner-occupier work limited to replacing or moving existing fittings wired in tough plastic-sheathed cable. If you rent, speak to your landlord and use a licensed electrician.
What is the difference between a socket and a switch?
A switch is a manually operated device that opens or closes a circuit on fixed wiring. A socket-outlet is where the fixed wiring ends and a plug connects, and both are rated up to 20A under WorkSafe’s definitions. On a feature wall, both need clear margins, but the socket also needs room for the plug and cord.
Is it better to nail or glue panelling?
That depends on the panel and whether the wall is yours to alter. Nails and construction adhesive are permanent and risky near hidden cabling. For a renter-friendly feature wall, we use tested adhesive pads instead, with the caveat that no adhesive is completely damage-proof.
Sources
- Power outlets, switches and controls, Building Performance
- Acceptable Solutions and Verification Methods for G9 Electricity, Amendment 7
- Doing your own electrical work, WorkSafe
- Switches for circuit, installation, protective and connection devices, WorkSafe
Recommended
- No Drill: 3 Ways To Fit Panels On Textured Walls For Renters
- No Drill Wall Panel Corners For Renters: 1–2mm Gap, 20mm V Groove
- Getting Panels On Curved Walls Right Without A Single Drill Hole
- Extend Wall Panels Without Drilling: Renter Safe DwellForms™ Kits
This article is for general information and inspiration only. Product performance and results may vary depending on individual circumstances, surfaces and installation.
