
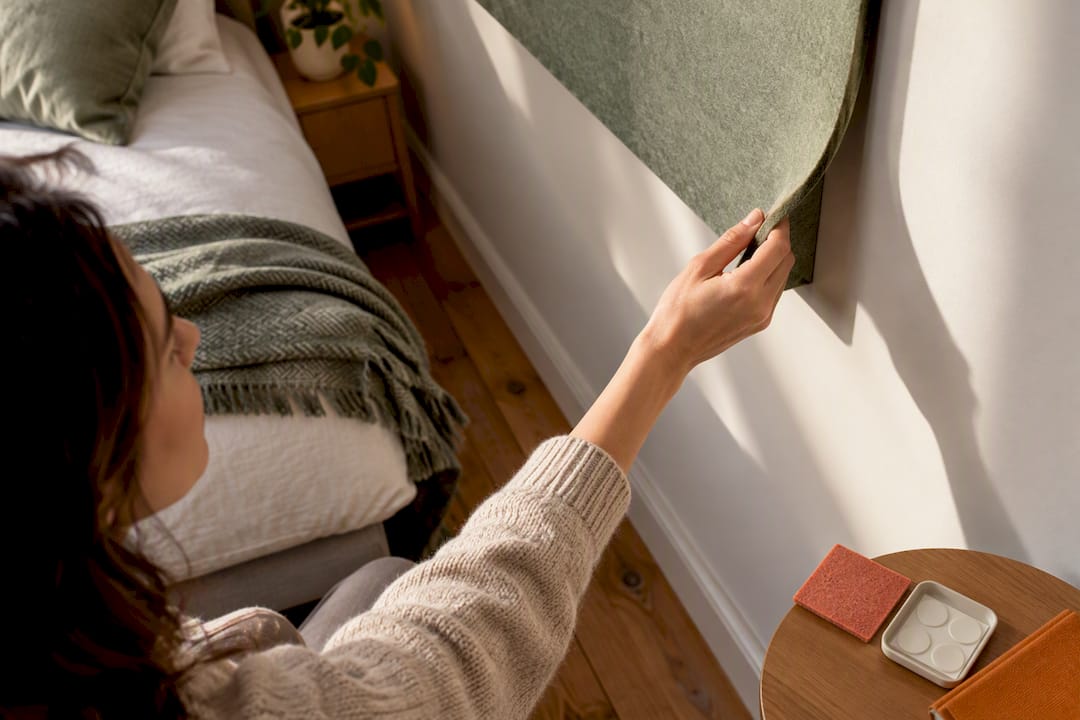
Start with one focal wall. Removable panels, a peel-and-stick accent, a leaning mirror or a no-nail gallery with adhesive strips each deliver a striking result in a single afternoon, and choosing just one gives you room to test your instincts before committing further. Photograph the wall before you begin and stick to products designed to lift away cleanly, and your bond stays protected while your apartment starts to feel like yours.
TL;DR:
- Using a single bold panel or leaning mirror on one wall helps you understand your style without risking damage or needing permanent changes.
- Small flats should keep wall decor minimal, with three to five frames of about 30 by 40 centimeters, arranged with consistent gaps.
- Always test adhesives or panels in a hidden corner first, and photograph walls on move-in day to document their condition for later reference.
- Reconfigurable products like modular panels or magnetic paint allow easy, renter-friendly updates that can move with you to new apartments.
- Light, soft materials like tapestries, rugs, or fabric headboards reduce noise and echo in small or shared spaces without permanent installation.
Table of Contents
- Renter-friendly wall ideas worth trying first
- Choosing the right wall for your room and its size
- Planning a gallery wall that suits a small apartment
- Protecting your bond while you decorate
- How a modular panel system fits into this playbook
- Temporary soundproofing solutions for rental walls
- Magnetic paint and strips for wall decor you can change on a whim
- Start small, test colour, and let the wall grow with you
- Where to go next for a no-drill, colour-led wall
- Sources
- FAQ
Renter-friendly wall ideas worth trying first
Every idea below works without a drill, and each has its own personality, cost and level of commitment. Think of them as a toolkit rather than a checklist: pick the one or two that suit the wall you are staring at right now.
Peel-and-stick wallpaper earns its reputation when used sparingly. A single vertical strip behind a headboard or a small accent square reads as intentional, where papering an entire room can feel like a rental trying too hard. Test a small corner first, since some finishes react differently depending on wall texture, and always follow the manufacturer’s removal instructions rather than pulling from a random edge.
Modular wall panels offer texture and shape rather than pattern. These kits install with adhesive pads and require no drilling, painting, or permanent alteration. The sculptural pieces can be rearranged into new layouts whenever you like. Colour sample kits allow you to test a shade against your actual wall before ordering a full set, which matters more than any swatch card ever could.
A leaning mirror is the quiet hero of small apartments. Propped against a wall rather than hung, it adds height, bounces light around a dim corner and needs nothing more than floor space. In a studio, an oversized mirror leaning behind a console table can make the whole room feel taller.
A no-nail gallery wall, built entirely with adhesive strips, gives you the classic layered look without a single hole. Plan it on the floor first, trace paper templates onto the wall with painter’s tape, and check the weight rating printed on your adhesive strips before you commit a frame to a spot. 3M’s New Zealand installation guidance recommends letting paint cure fully before applying strips, because a fresh coat can lift away with the adhesive if you rush it.
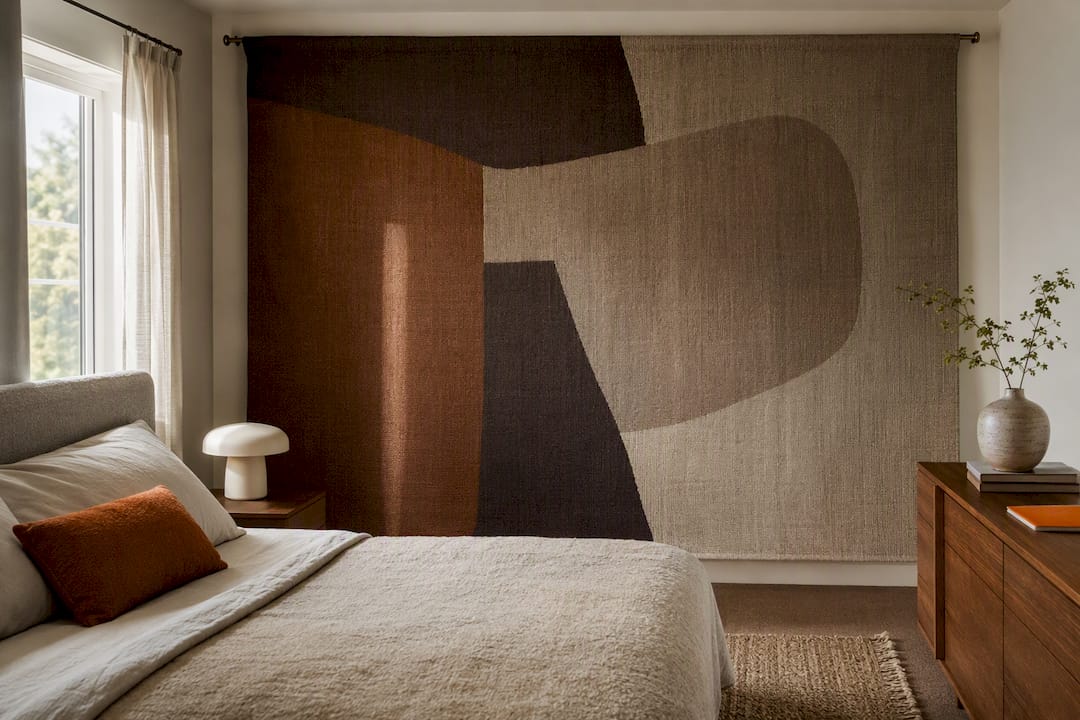
Tapestries and fabric panels are the most forgiving option in this list. Hung from a tension rod, curtain clips or a row of adhesive hooks, a single large textile covers more wall than several small frames for a fraction of the cost, and it rolls up neatly when you move.
Picture ledges and adhesive shelves let you build a layered display, propping art, books and small objects without a single hole in the plaster. They also solve the awkward problem of art that is too heavy or oddly shaped for a standard hanging strip.
An oversized print, hung as a single anchor piece, is the laziest and most effective trick in the book. One large piece reads as considered and expensive, and because there is only one point of contact, precision matters far less than it does with a cluster of small frames.
Washi tape, used to trace a geometric shape or a border, gives you a graphic accent with genuinely zero permanence. It peels away cleanly and costs almost nothing to experiment with.
Removable tile decals work well in kitchens and bathrooms, though patience matters here: apply slowly, align carefully before pressing down, and remove even more slowly to avoid tearing.
Battery-powered LED strips and plug-in sconces bring ambience without an electrician, tucked behind a mirror or along a shelf edge. And where a wall genuinely cannot be touched, a tall plant or a freestanding screen can stand in for wall decor entirely, adding colour and shape from the floor up.
- Clean the wall surface and let any fresh paint cure before applying adhesives.
- Press strips firmly for the full recommended time, then wait before hanging anything.
- Test one strip or panel in a discreet spot before committing to the whole wall.
Pro Tip: Order a colour sample before buying a full panel kit. It costs little and saves you from a wall that doesn’t match the light in your room.
Choosing the right wall for your room and its size
The wall you tackle first should be the one you actually see. In a living room, that is usually the wall behind the sofa or the first thing visible from the entry. In a bedroom, it is almost always the headboard wall.
Small flats reward restraint. A gallery wall in a flat under 40 square metres works best with three to five frames, sized around 30 by 40 centimetres, rather than a sprawling collection that competes with the room’s proportions. Studios benefit from thinking vertically: stack two or three pieces above each other, lean a tall mirror to draw the eye upward, or run a floor-to-ceiling accent panel to add height without eating floor space.
Narrow hallways need a different rule entirely. Keep anything mounted under about 4 centimetres deep, and arrange pieces in a single horizontal line rather than a cluster, since a corridor punishes anything that juts out or breaks the eye’s path forward.
- Identify the first wall you or a guest actually sees when entering the room.
- Measure the available width and choose a frame count that suits a flat under 40 square metres.
- For studios, favour vertical elements over horizontal spreads.
- In hallways, keep depth shallow and arrangements linear.
Planning a gallery wall that suits a small apartment
A gallery wall lives or dies on its spacing, not its content. Pick one anchor piece, usually the largest or most striking, then build two or three supporting pieces around it, keeping gaps consistent at 5 to 8 centimetres throughout.
Three layout families cover most apartments. A grid suits a calmer room, with frames matched in size and evenly spaced. A salon-style cluster suits a more eclectic space, provided you set one unifying rule, matching frame colour, for instance, so the mix reads as curated rather than accidental. A linear row suits narrow walls and hallways, where a single line of frames avoids the visual clutter that a cluster would create.
The floor-and-tape method removes most of the guesswork. Trace each frame onto paper, tape the templates to the wall in your planned arrangement, then stand back from across the room before committing any adhesive.
- Keep gaps between frames consistent, typically 5 to 8 centimetres.
- Leave 15 to 25 centimetres of breathing room above furniture.
- Match frame colour or finish across the arrangement for a cohesive look.
- Step back and view the taped layout from a distance before hanging anything.
Protecting your bond while you decorate
Every adhesive product has a weight limit, and ignoring it is the fastest way to lose both your artwork and your deposit. 3M’s installation guidance specifies limits for its picture hanging strips and recommends pairing strips at the top and bottom of a frame for stability, along with letting fresh paint cure fully before applying anything.
Under Tenancy Services guidance, tenants can make low-risk, reversible “minor changes” without needing prior landlord approval, and landlords must respond in writing within 21 days to any change request that does fall outside that category. Knowing which changes count as minor before you start saves an awkward conversation later.
Photograph every wall on moving-in day, keep receipts for anything you install, and test adhesives in a discreet corner first. Practical tenant guides also recommend requesting a pre-move-out inspection, which gives you time to fix anything before the final check.
- Photograph walls on move-in day and keep receipts for anything adhesive.
- Test strips or panels in a discreet spot before covering visible areas.
- Use the manufacturer’s removal tab and pull slowly, applying gentle heat if recommended.
- Request a pre-move-out inspection to address any marks before the final check.
How a modular panel system fits into this playbook
DwellForms™ panels slot into several ideas above at once. They work as the single accent-wall strategy, as a textured alternative to a gallery cluster, and as a way to add shape without touching paint or plaster. The install sequence is straightforward: order a colour sample first, clean the wall, test an adhesive pad in a corner, then install the core layout before adding extension pieces.
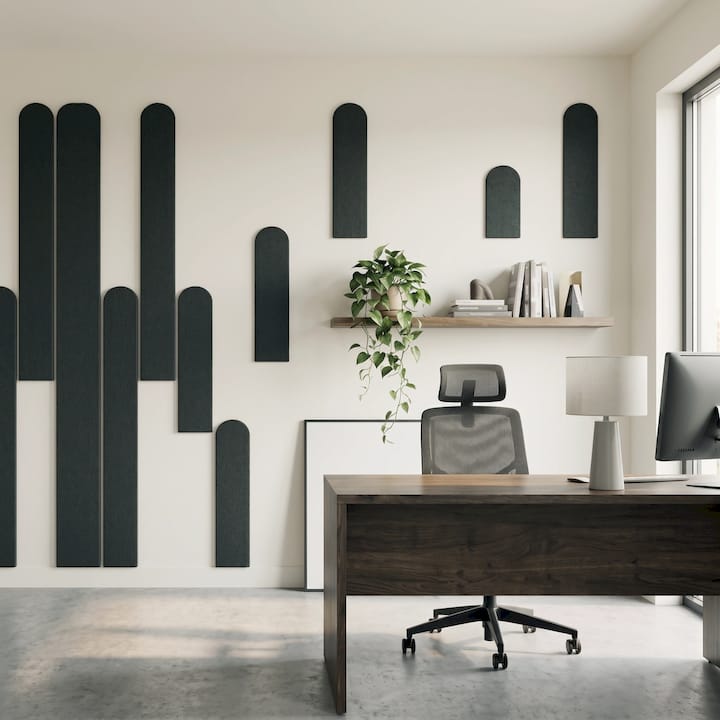
Styling works best with restraint: choose one or two dominant colours and let the panels act as a single anchor rather than scattering several small pieces. If you want printed pattern, peel-and-stick suits you better. If budget is the priority, a tapestry wins. If you want reconfigurable colour and sculptural texture that moves with you to the next apartment, panels are the better fit.
Pro Tip: Install the core kit first and live with it for a week before adding extension pieces, since colour reads differently once it is actually on your wall.
Temporary soundproofing solutions for rental walls
Thin walls are a common frustration in apartments, and while no removable product blocks sound the way a structural renovation might, a few low-commitment additions can soften a room’s noise. Soft, dense materials absorb and diffuse sound better than hard, flat ones, which is why a heavy tapestry or a thick tension-rod curtain across a shared wall can noticeably calm a room’s echo.
Bookshelves packed with books, positioned against a party wall, add mass and break up sound reflections without any installation at all. A large rug on a hard floor reduces footstep noise travelling to the apartment below, and a fabric-upholstered headboard does double duty as both decor and a sound buffer behind a bed.
Door draught stoppers and thick curtains over windows help with noise leaking in from outside, which often matters more in a busy building than wall-to-wall sound between neighbours. None of these fixes amount to genuine acoustic treatment, and it is worth being realistic about that. They soften a room’s harshness rather than silencing it, which for most rental frustrations is enough to make the space feel calmer to live in.
Magnetic paint and strips for wall decor you can change on a whim
Magnetic paint, rolled on like a primer under a regular topcoat, turns a section of wall into a display surface you can rearrange constantly. It works well behind a desk or in a child’s room, holding lightweight art, postcards or notes with small magnets, though it is worth checking with your landlord first, since paint of any kind usually falls outside the “minor change” category under tenancy rules.
Magnetic strips are the more flexible, fully removable cousin of the paint option. Applied along a skirting board or the edge of a shelf, they let you clip in postcards, photos or small prints without adhesive touching the wall itself at all. A magnetic strip mounted along a picture ledge gives you a rotating display that changes as often as you like, without ever needing a fresh strip of tape.
Both options suit renters who like to change their walls seasonally rather than commit to one arrangement. A magnetic board leaned against a wall, rather than painted onto it, sidesteps the landlord question entirely while still giving you that same rearrange-on-a-whim flexibility.
Start small, test colour, and let the wall grow with you
I always tell people to commit to one wall before touching the rest of the apartment. A single bold panel or a leaning mirror tells you more about your own taste than any mood board ever will. Order a colour sample, live with it for a week, and photograph the change. Half the fun is watching a blank wall become something that actually feels like home.
— Michelle
Where to go next for a no-drill, colour-led wall
Some wall panels are made from recycled materials, install with adhesive pads rather than screws or nails, and can be rearranged or taken with you when you move. If the ideas above have you leaning towards texture and colour rather than paint or paper, that reconfigurable quality is a real advantage for renter-friendly options.

Start by ordering a colour sample to see how a shade sits against your actual wall, measure your focal wall, then browse the layout guides for inspiration. When you are ready to commit, the DwellForms™ Core Kits are the place to begin.
Sources
- 3M picture hanging strips installation guidance (NZ copy)
- Tenancy Services — tenants making changes to the property (NZ)
- Making your rental feel like home: tenant personalisation tips (property-plus)
FAQ
What is the 3-5-7 rule in decorating?
Definitions vary, but a common version suggests grouping decor in threes, fives or sevens, since odd numbers tend to read as more visually balanced than even ones. It is a styling guideline rather than a fixed law, so treat it as a starting point for arranging shelf objects or gallery frames rather than a strict requirement.
What to put on walls in an apartment?
Removable panels, peel-and-stick accents, leaning mirrors and adhesive-strip gallery walls all work well without drilling or damaging paint. Choose based on your budget and how often you want to change the look: panels and mirrors suit a longer-term feature, while tapestries and washi tape suit quick, low-cost experiments.
What is the new trend for walls?
Colour-led, sculptural wall treatments that avoid paint and permanent installation are gaining ground over flat prints and traditional wallpaper, largely because renters want personality without commitment. Textured, no-drill options like modular felt panels reflect that shift toward walls that feel considered rather than rented.
What makes a home look cheap?
Cluttered walls with mismatched frames, uneven spacing and no unifying colour or finish are the most common culprits. A single anchor piece, consistent gaps of 5 to 8 centimetres in a gallery arrangement, and one or two dominant colours across a room tend to read as far more considered than a scattered mix of small items.
Do I need my landlord’s permission to hang wall decor in a rental?
Low-risk, reversible changes such as adhesive strips or removable panels generally count as minor changes that do not require prior approval, though it depends on your specific tenancy agreement. If you are unsure, Tenancy Services guidance explains what qualifies and how landlords must respond to change requests.