
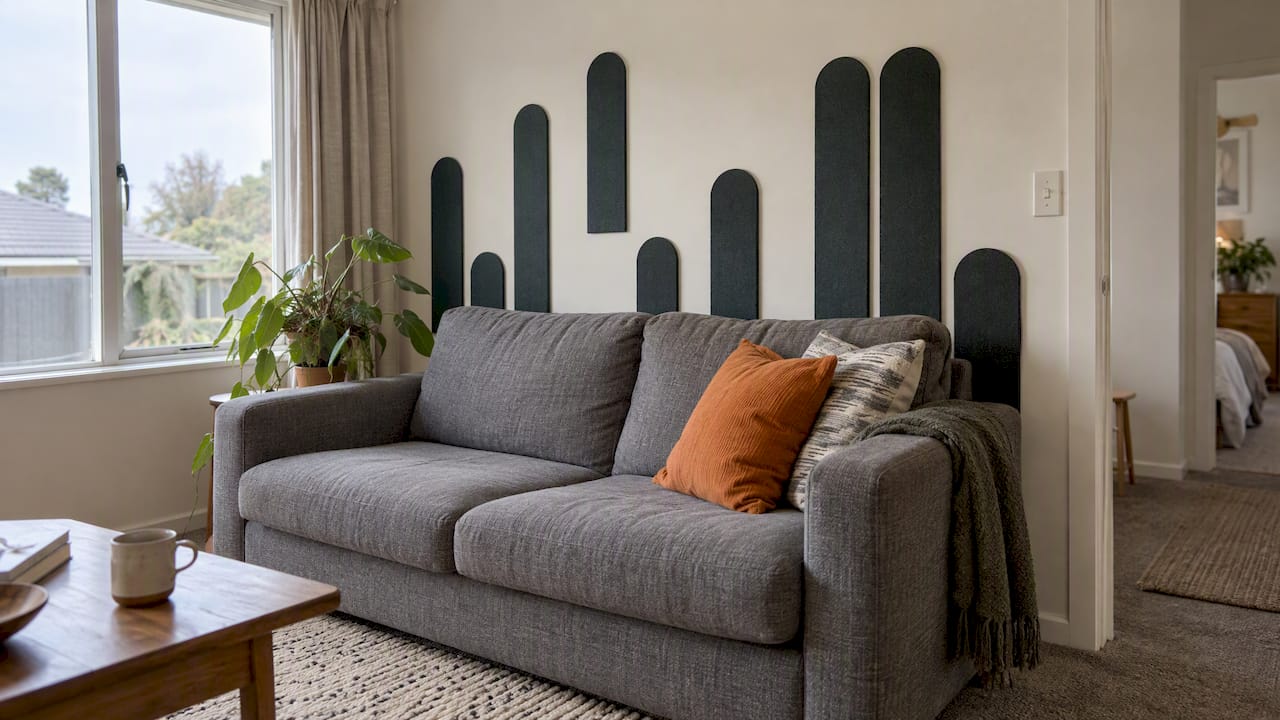
The easiest way to protect and personalise the wall behind furniture is a removable, no-drill modular PET felt panel system such as DwellForms™. It covers scuffs and dents that sofas and beds leave behind, adds genuine colour and texture, and lifts away cleanly when you shift furniture or move house, with no paint, no plaster and no drilling involved.
TL;DR:
- Panels should be tested on your wall for at least 24 hours to prevent paint damage caused by adhesive residue or reactions.
- It is best to remove panels slowly at a shallow angle, working edge by edge, to avoid ripping paint or damaging the wall surface.
- Tenants need to request permission in writing before installing removable panels, and must restore the wall to its original condition upon removal.
- Choosing a panel layout slightly narrower than furniture pieces like sofas and beds enhances durability and prevents constant bumping.
- Starting with a color sample kit ensures confidence in felt color and texture against your wall lighting before purchasing full panels.
Table of Contents
- What are removable PET felt wall panels?
- How do you choose the right panel layout for your furniture?
- What’s the safest way to prep and install panels without damage?
- Can you remove panels without damaging a rental wall, and what does tenancy law say?
- How do you style panels behind furniture so they look intentional?
- A practical note on getting this right the first time
- Ready to protect and personalise the wall behind your furniture?
- Where this guidance comes from
- Sources
- FAQ
What are removable PET felt wall panels?
A modular PET felt panel is a shaped, precision-cut piece of felt made from recycled plastic, designed to sit flush against a wall and build into a pattern. Instead of screws or construction adhesive, each panel uses tested adhesive pads that hold firmly during daily use but release without tearing paint or plaster when you want them gone. That distinction matters behind furniture, where sofas and bedheads rub, knock and mark the wall over months of ordinary living.
This is a different category to hard bumper-style guards, which exist purely to stop impact damage and offer nothing in the way of colour or texture without renovation. A renter-friendly feature wall does both jobs at once: it sits exactly where the scuffing happens and turns that stretch of wall into something you actually chose.
What makes the category work behind furniture:
- Hides existing scuffs, scrapes and faint marks instantly, without repainting.
- Adds colour, shape and texture without committing to a permanent treatment.
- Lifts off and reconfigures when you rearrange the room or move.
For more on how this compares with paint, wallpaper and traditional wall art, see our guide to movable wall art for renters.
How do you choose the right panel layout for your furniture?
Start with a tape measure, not a colour chart. Measure the width and height of the wall section directly behind the sofa, bed or cabinet, then check that against the kit’s listed dimensions before buying. A core kit covers a defined area, and if your wall runs wider or taller, an extension pack lets you grow the layout without buying a second starter set.
Scale and placement decisions affect how well the panels handle daily wear:
- Behind a sofa, keep the panel run slightly narrower than the sofa back so edges aren’t exposed to constant bumping.
- Behind a bed, centre the layout on the headboard rather than the wall itself, so it reads as a considered feature, not an afterthought.
- Behind cabinets or shelving, a low horizontal band often works better than full height, since the furniture will hide the lower edge anyway.
For narrow hallway strips or small marks, a partial run is often enough. For a bedroom or living room wall you actually want to look at, a full feature wall earns its place. Either way, plan for reconfiguration: panels that click into a repeatable pattern are easier to shrink, grow or move than one-off custom shapes.
Pro Tip: Buy a colour sample kit before the full set. Seeing the felt texture and colour against your actual wall light removes most of the guesswork.
If you’re decorating specifically behind a sofa, our behind-sofa wall ideas guide has layout examples worth looking at before you order.
What’s the safest way to prep and install panels without damage?
Surface condition decides how well any adhesive pad performs, so start there, not with the panels themselves.
- Check the wall is clean, dry and the paint is sound. Avoid damp patches, peeling edges or paint less than a few weeks old.
- Wipe away dust, grease or residue, since even a light film can weaken the bond.
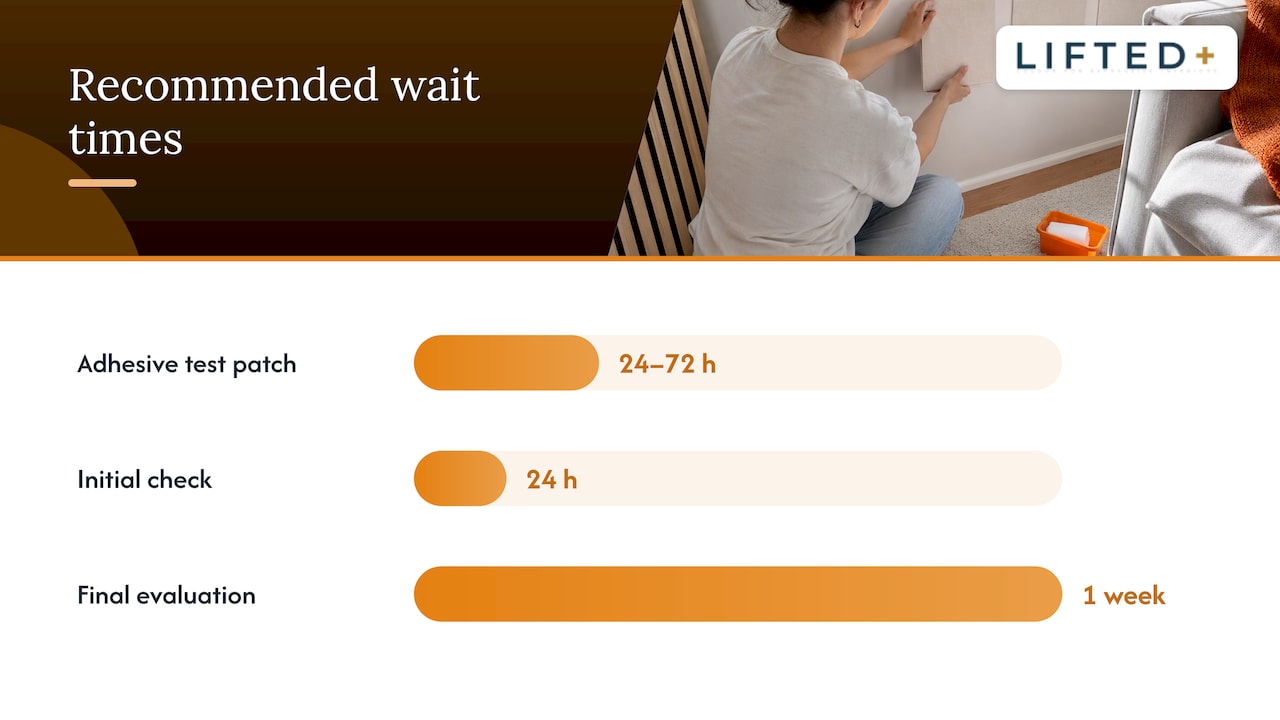
- Apply a small adhesive test patch in an inconspicuous spot and leave it for 24 to 72 hours, watching for edge lift or any reaction with the paint.
- Dry-fit your panel layout on the floor or against the wall first, marking reference points before committing to adhesive.
- Press each panel firmly using the adhesive pads supplied with the kit, following the pressure and cure time in the instructions.
Technical guidance recommends evaluating test samples at both 24 hours and one week for edge lift or paint removal before proceeding to a full install, according to wall graphics technical guidance, a principle that applies just as well to a felt panel kit as to adhesive signage. The same source notes that scoring large runs into manageable strips before removal reduces surface tension and lowers the risk of sudden, wide paint lift, a detail worth remembering if you ever need to take a large layout down in one sitting.
If you’re weighing up different protective materials before buying, our damage-free wall panels guide walks through the options.
Can you remove panels without damaging a rental wall, and what does tenancy law say?
Removal technique matters as much as installation. Peel slowly, at a shallow angle, working one edge at a time rather than tearing straight off the wall. For large areas, cut the panel run into strips first and remove each strip separately, testing a small section before pulling off the rest.
Manufacturer guidance for removable adhesives is blunt about the limits here: removal instructions from wall-graphic manufacturers note that clean removal is not guaranteed on every painted surface, and that improper preparation can cause paint or the wallboard face to lift during removal. Time matters too: the longer panels stay up, the greater the chance of adhesive transfer, so checking in on them periodically is worth the thirty seconds it takes.
For tenants, the legal picture is reassuring but has edges worth knowing. Tenancy Services guidance allows tenants to request minor, reversible changes, and landlords cannot unreasonably refuse, though permission should be requested in writing and the property returned to substantially the same condition afterwards. The Residential Tenancies Act adds that tenants can remove fixtures they’ve installed themselves, but any damage caused during removal may need to be repaired or paid for.
A written request, dated photos of the wall before and after installation, and a copy of the adhesive instructions give you a clear record if a landlord ever questions the change.
Practical steps that help:
- Email or message your landlord describing the change and attach a photo of the wall as it stands.
- Keep the original packaging and adhesive instructions in case removal questions come up later.
- Do a small adhesive test before committing to the full layout, and note the date.
If you’d like a deeper walkthrough, our guide on removing adhesive wall panels without wrecking the wall covers the process step by step.
How do you style panels behind furniture so they look intentional?
A few repeatable layouts do most of the work. A low horizontal band sitting just above the sofa back reads as considered rather than patched in. A centred block behind a bed, roughly the width of the headboard, mimics a built-in feature without the renovation. A full-height run beside a cabinet or shelving unit acts as an anchor for the whole wall.
Colour strategy matters as much as layout:
- Use one strong contrast colour against a neutral wall for instant impact.
- Layer two or three tones of the same hue for a quieter, textured look.
- Repeat a single shape in a grid for a graphic, modular pattern that still reads as deliberate.
These are fast to install and just as fast to pull down at the end of a lease, which makes them a genuinely practical staging tool for small or rented rooms. For more layout inspiration, see our renter feature wall ideas.
A practical note on getting this right the first time
The biggest mistake I see is people skipping the adhesive test because they’re excited to finish the room in one afternoon. It takes two extra days and saves you from discovering a paint reaction on the one wall you actually wanted to keep intact. Measure twice, test small, and let colour confidence come from the sample kit, not a guess from a screen.
Our layout guides and installation visuals are worth a look before you commit to a full kit, especially if you’re combining panels across more than one wall.
— Michelle
Ready to protect and personalise the wall behind your furniture?
Start with a DwellForms™ Colour Sample to check the felt against your actual wall and light. From there, pick a DwellForms™ Core Kit sized to the wall behind your sofa, bed or cabinet, and add a DwellForms™ Extension Kit if the space runs wider than expected.

Reconfigure the layout whenever the room changes, or take it with you to the next place entirely. Browse DwellForms™ Core Kits to find a size that fits your wall.
Where this guidance comes from
This guide draws on Tenancy Services rules for minor changes, the Residential Tenancies Act, and wall-graphic installation and removal technical bulletins. For wall damage beyond a panel’s reach, see this practical repair guide.
Sources
- Tenants making changes to the property — Tenancy Services
- Residential Tenancies Act 1986 — tenant’s fixtures
- Wall graphics overview — Arlon technical bulletin
- Drytac wall-graphic installation and removal instructions
FAQ
Will removable wall panels damage my rental wall?
Panels are designed for no-drill, adhesive-pad installation, but no adhesive product can guarantee damage-free removal on every surface. Testing a small sample first and following manufacturer removal guidance lowers the risk considerably.
Do I need my landlord’s permission to install wall panels?
Under Tenancy Services guidance, reversible changes like removable panels generally count as minor changes, and landlords cannot unreasonably refuse a written request. Keeping photos and a copy of the installation instructions helps if the topic comes up at the end of the tenancy.
How long can I leave panels up before removal gets risky?
The longer an adhesive pad stays on a painted wall, the greater the chance of residue or paint transfer when you remove it. Checking the panels periodically and planning removal sooner rather than later keeps the process straightforward.
What’s the best way to protect the wall behind a sofa specifically?
A low horizontal panel band sized to sit behind the sofa back hides existing scuffs while adding colour, and a DwellForms™ Core Kit sized to that section is a straightforward starting point. Keep the panel edges slightly narrower than the sofa so they aren’t exposed to constant contact.
How much does a DwellForms™ kit cost?
Pricing for DwellForms™ Core Kits, Extension Kits and Colour Samples is available on request through the DwellForms™ product pages, where you can check current options for your wall size.