

The best place for acoustic panels at home is where sound first bounces back at you: the side walls beside your seat, the wall behind you, and, in many rooms, the ceiling above you. Start there, spread panels across more than one wall, hang them around seated ear height, and stand back to judge the result before adding more. If your walls are rented, or simply too good to drill, the same logic works with removable felt panels that double as a feature wall.
Key Takeaways
- Start at the first reflection points: the spots on the side walls where you would see a speaker, or a person talking, in a mirror from your usual seat.
- Spread panels across opposing walls rather than clustering them on one, and keep the faces clear of furniture.
- Centre most panels near seated ear height, then add height if you stand, cook or present in the room.
- Plan placement as a composition: a considered grid of colour looks intentional, a scattering looks like an afterthought.
- Removable, no-drill panels let you test a layout, live with it, and rearrange it without touching a drill.
Table of Contents
- Begin with the room, not the empty wall
- Find your first reflection points
- The wall zones to treat, in order
- Height, spacing and orientation
- How much wall do you actually need?
- Placement changes with the room
- Placement is also composition
- Test, live with it, then adjust
- Why removable panels suit the way we live
- DwellForms™ for a layout you can change
- Our view on placement
- FAQ
- Sources
Begin with the room, not the empty wall
Most people do this the wrong way round. They spot a blank stretch of wall, buy something to fill it, and hope the room improves. Placement works better when you begin with the path sound travels: from the source (a speaker, a television, a voice at the kitchen bench) to your ears, and then onto every hard surface it meets along the way.
Hard, flat surfaces such as plasterboard, glass, timber floors and polished concrete send sound straight back into the room. Soft, textured surfaces take some of that energy up instead of returning it. That is the whole principle behind placing panels. Where you put them matters more than how many you buy, because a few panels at the right points do more for a room than a crowd of them in the wrong place.
One clear boundary before we go further. Panels change how a room sounds inside it. They are not soundproofing, and they will not stop a neighbour’s television coming through a shared wall. If that is your problem, the guide to quieting a room as a homeowner or renter separates the two jobs well, and it also covers panel spacing and coverage for taming echo.
Find your first reflection points
The first reflection point is the place on a wall where sound from a source bounces once and then reaches your ears. It arrives a fraction of a second after the direct sound, which is exactly why it muddies speech and music. These points are the highest-value spots in any room, so they are where you place your first panels.
You do not need instruments to find them. You need a mirror and a friend.
- Sit where you actually sit: the middle of the sofa, the desk chair, the end of the dining table.
- Have your friend hold a mirror flat against the side wall at roughly speaker height, or mouth height if the sound source is a person.
- Ask them to slide it slowly from the front of the room towards the back.
- The moment you can see the speaker (or the television, or the person’s face) in the mirror, mark the wall with a pencil or a small piece of removable tape.
- Repeat on the other side wall, and again for any other seat that matters.
The marks tell you where to centre your panels. Each side wall will usually give you a band of positions rather than a single dot, so think of the mark as the middle of a zone.
The same trick works for a home office. Sit at your desk, imagine your voice on a call, and mirror-test the walls beside and in front of you. The surface directly opposite a talking person is often the one that returns the most echo.
The wall zones to treat, in order
Once you have your marks, work through the room in a sensible order. Stopping after the first two or three steps is a perfectly good result for many homes.
1. The side walls at the reflection points
These come first. Centre a panel or a cluster of panels on each mark. If you have only a handful of panels, put them here before anywhere else.
2. The wall behind the listening or talking position
The rear wall catches sound that has already travelled the length of the room and sends it straight back. In a lounge this is often the wall behind the sofa, and it is a natural home for a statement piece: sofas have their backs to it, so it is the wall you rarely look at, and the wall guests walk past when they enter.
3. The wall facing you
The wall opposite a listener or a talker, such as the one behind the television or the one your desk faces, is the next candidate. If it holds a screen, place panels around it rather than trying to cover it.
4. Opposing parallel walls
Two bare, parallel walls facing each other can bounce sound back and forth between them, which gives that rapid, slightly metallic flutter when you clap. The fix is simple: never leave both walls completely bare. A panel on each is enough to break the pattern, and it also gives the room visual balance.
5. The ceiling
The ceiling is the forgotten surface. In many rooms, especially those with lower ceilings, it sends a strong early reflection down onto your seat. A ceiling placement is the hardest for a renter, since it usually means drilling or heavy fixings, so treat it as optional and prioritise the walls first. If you do want to address it, a lightweight piece centred over the seating area, not the whole ceiling, is the sensible scale.
Height, spacing and orientation
The rules here are refreshingly practical.
Height. Sound from a seated listener’s perspective travels at roughly head height, so centre your panels around seated ear level. If you mostly stand in the room (a kitchen, a bar area, a creative studio where you move about), lift the centre point so it sits around standing head height. In a mixed-use room, a vertical arrangement that spans both heights does the job neatly.
Spacing. Even spacing reads as design and works as placement. Keep gaps consistent, whether you choose a tight grid or a looser rhythm. Distribute panels across several walls instead of loading them onto one, because a single heavily covered wall leaves the others free to bounce sound around.
Orientation. Vertical orientation lifts the eye and suits tall, narrow walls and hallways. Horizontal runs widen a room, suit long walls behind sofas and beds, and work well at standing height. Either is fine acoustically; choose the one that suits your wall’s proportions, then keep it consistent.
Clearance. Keep the face of every panel free of furniture. A bookcase pushed against a panel hides it, and a sofa back pressed against it muffles what it can do.
How much wall do you actually need?
Less than you think. Rooms that are used lightly, a reading nook or a spare bedroom, need only a modest share of wall. Rooms where you listen carefully, work on calls or entertain often benefit from more. Think in terms of layers: place your first reflection panels, live with the room for a week, and only then decide whether to add more.
This is where modular kits earn their place. Because you can add to a layout later, you are never forced to guess the final quantity on day one. You build a composition, test it in your actual daily routine, and extend it with more pieces if the room asks for it.
Placement changes with the room
Living rooms and open plan spaces
Open plan rooms mix a lot of activities, so aim for balance rather than a single focus. Treat the long wall behind the sofa, put something on the side wall near the seating, and soften the wall opposite the kitchen or dining zone. Our guide to taming echo and noise in open plan homes walks through the zoning in detail, and five no-drill fixes for living room echo covers the quick wins.
Home offices
Sit at your desk, find the points to your left, right and behind, and think about where your voice travels. A feature wall directly behind you, in view of the camera, doubles as a backdrop. That is a good example of placement and styling working together.
Kitchens
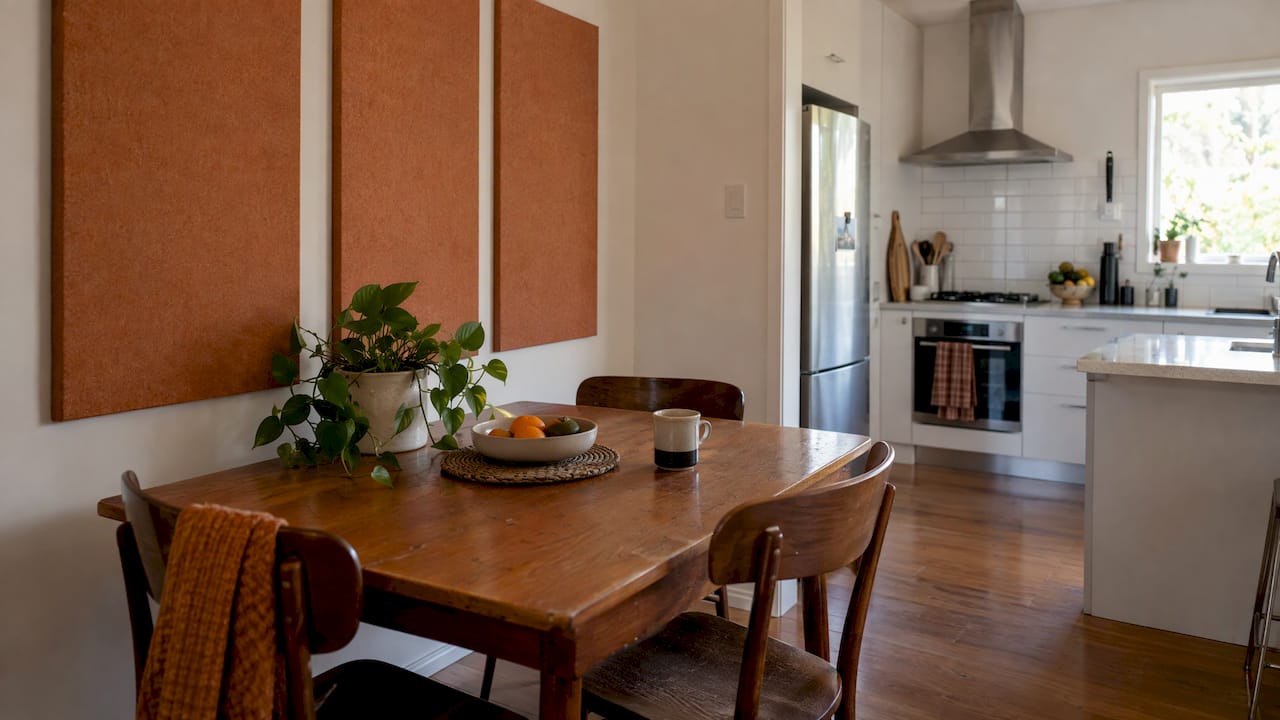
Kitchens are full of hard surfaces: stone benchtops, splashbacks, tiles. Panels in a kitchen should sit away from the heat and splash zone, usually on a wall near the dining table. See cutting kitchen echo in a weekend with removable felt panels for how renters approach it.
Hallways
Long, narrow hallways are echo tunnels. A repeated rhythm of panels along one wall, with something different on the opposite side, keeps the corridor from feeling like a bare tube. Our no-drill hallway echo solutions for New Zealand renters shows layouts for narrow spaces.
Bedrooms and apartments
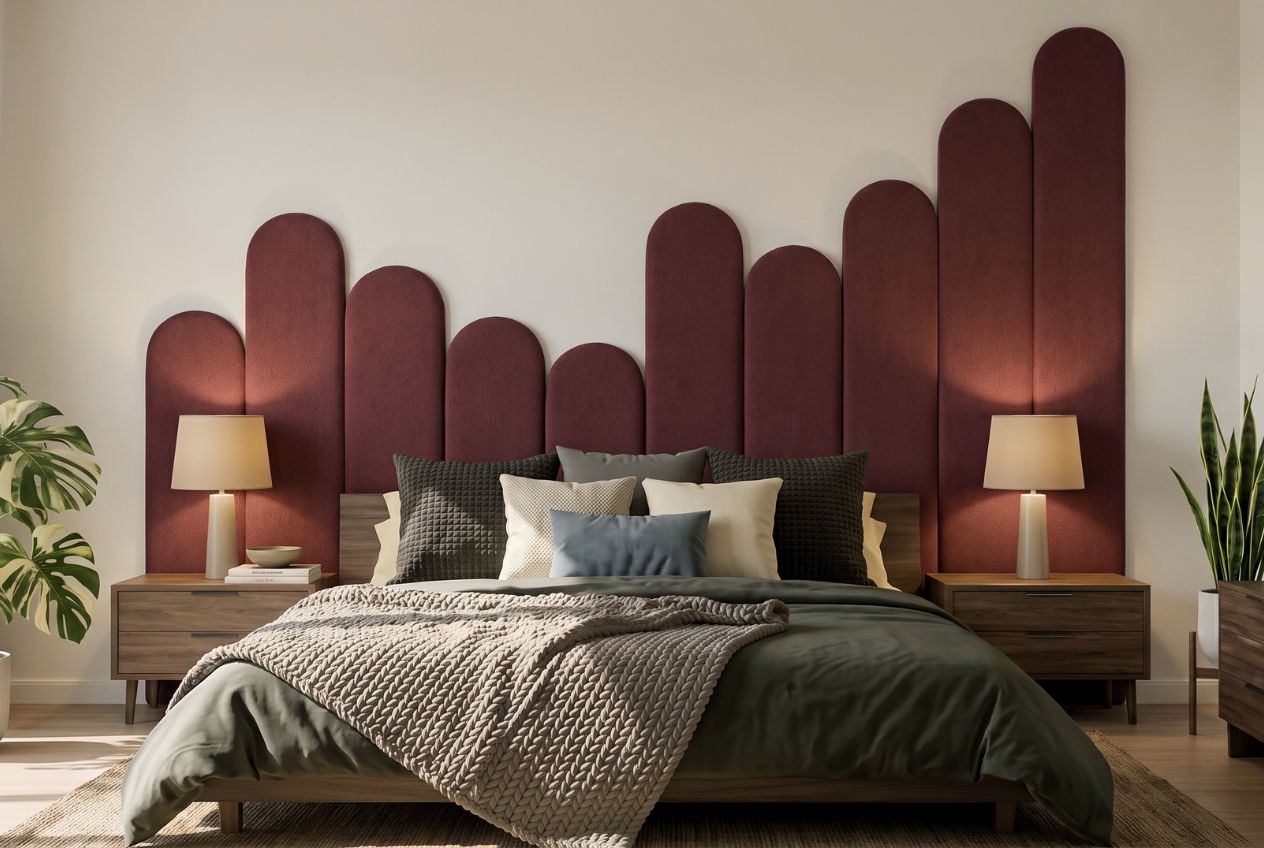
A panel arrangement behind or beside the bed softens the room and gives the headboard wall a focal point. In apartments, with their hard floors and glass, our apartment acoustics guide for renters and the piece on hard floor echo explain where to start.
Placement is also composition
Here is the part most acoustic guides miss. A room is not a recording booth. You live in it, you photograph it, you have people over. The same marks that tell you where sound lands also tell you where the eye lands, and the two usually coincide: the wall behind the sofa, the wall beside the desk, the stretch of corridor you walk down every morning.
So choose a palette first. Take colour from something already in the room, a rug, a piece of art, the timber of a table, and let your panels echo it or push against it. Our guide to mixing colours in interiors is a good place to build confidence, and how colour lifts a room shows the mood each choice creates.
Then think in groups. A cluster of three to five panels reads as a deliberate feature. A single panel stranded on a big wall reads as a mistake. If you are pairing panels with framed art, give the art the focal point and let the panels frame it, or the other way round, but never let them compete.
Test, live with it, then adjust
After you place your first set, do three simple checks.
Clap test. Stand in the middle of the room and clap once, sharply. Listen for a ringing tail. Do it again after placement and compare.
Voice test. Read a paragraph aloud or take a short call from your usual seat. Notice whether your voice sounds crisper or more natural.
Eye test. Stand in the doorway. Does the arrangement look intentional from where guests will first see it?
If the clap still rings, add panels to the wall you have left bare, particularly one opposite a treated wall. If the room starts to feel too muffled or dull, you have gone far enough. Remember that a soft, textured wall is a benefit you can feel, but results depend on your room, your furniture and your layout.
Why removable panels suit the way we live
Placement is a process of trial. You will want to move a panel six centimetres, swap two colours, or add a row once you see how the room feels. Drilling makes that expensive and permanent. Adhesive-mounted panels make it a ten-minute adjustment, which is the right pace for experimenting.
It also matters if you rent, if you plan to move, or if you simply do not want to patch holes later. A layout that comes down and goes with you is a layout you can try with confidence.
DwellForms™ for a layout you can change
DwellForms™ is the New Zealand-designed wall system we make at Lifted+: precision-cut PET felt panels, produced from 100% recycled plastic, arranged as modular kits you can install, remove, rearrange and take to a new home. They mount with tested adhesive pads instead of drills, paint or wallpaper. In our own testing, our selected nano-adhesive pads performed significantly better at minimising damage to walls than a popular pull-tab brand we deliberately discounted, though no adhesive is completely damage-proof and results depend on your wall surface and paint.
If you are placing your first panels, begin with a Core Kit for the main wall, and add an Extension Kit once you have lived with the layout. Not sure of your palette? Order colour samples and hold them against your wall in different light, and our Choose My Kit tool can narrow the options. Sample kit purchases are credited towards a full kit order.
DwellForms™ is designed as a colour-led decorating system. We do not position it as soundproofing or as commercial acoustic treatment.
Our view on placement
We believe a wall should earn its place in your home twice: once by how it looks and once by how the room feels around it.
Most placement advice is written for studios. Homes are different. You live in yours, you rearrange it, and sometimes you have to leave it with the walls looking as you found them. That is why we designed DwellForms™ as a removable system: so you can follow good placement logic, begin with the walls that matter most, and still be free to change your mind.
Our advice is to begin with one confident wall. Choose colours you would be a little nervous to paint, because panels are far easier to take down than paint is to cover. Arrange them with rhythm, live with them for a fortnight, and then extend. A neutral, polite room is a choice, not a default, and a wall of colour and texture pulls a space out of the safe middle.
Michelle
FAQ
Where should I put acoustic panels first?
Start on the side walls at your first reflection points, found by the mirror method above. Then treat the wall behind your seat, and make sure two opposing walls are not both left bare. Add the ceiling last, if at all.
What height should panels be hung at?
Centre them around seated ear height if you mostly sit, and higher, around standing head height, if you mostly stand. In a room used both ways, a vertical arrangement that spans the two heights works well.
Should I cover one whole wall or spread panels around?
Spread them. Distribute panels across several walls, especially opposite pairs, rather than loading everything onto one. A single feature wall can still be the visual centrepiece, with smaller groupings elsewhere to balance it.
Can I place panels without drilling?
Yes. Adhesive-mounted panels can be positioned, tested and moved without drilling, which suits renters and anyone who wants to experiment with layout. DwellForms™ kits use tested adhesive pads. Results depend on your wall surface and paint, so check your lease and test an inconspicuous spot.
Will panels soundproof my room?
No. Panels shape how sound behaves inside a room. They do not stop noise passing through walls, floors or ceilings to neighbours.
Sources
Recommended
- Acoustic Wall Decor: Top 10 Picks For Your Home
- Are Architectural Wall Panels Worth It For Living Rooms?
- Open Plan Acoustics: How To Tame Echo And Noise At Home
- Wall Panel Layout Ideas For A Renter-Friendly Feature Wall
This article is for general information and inspiration only. Product performance and results may vary depending on individual circumstances, surfaces and installation.
