
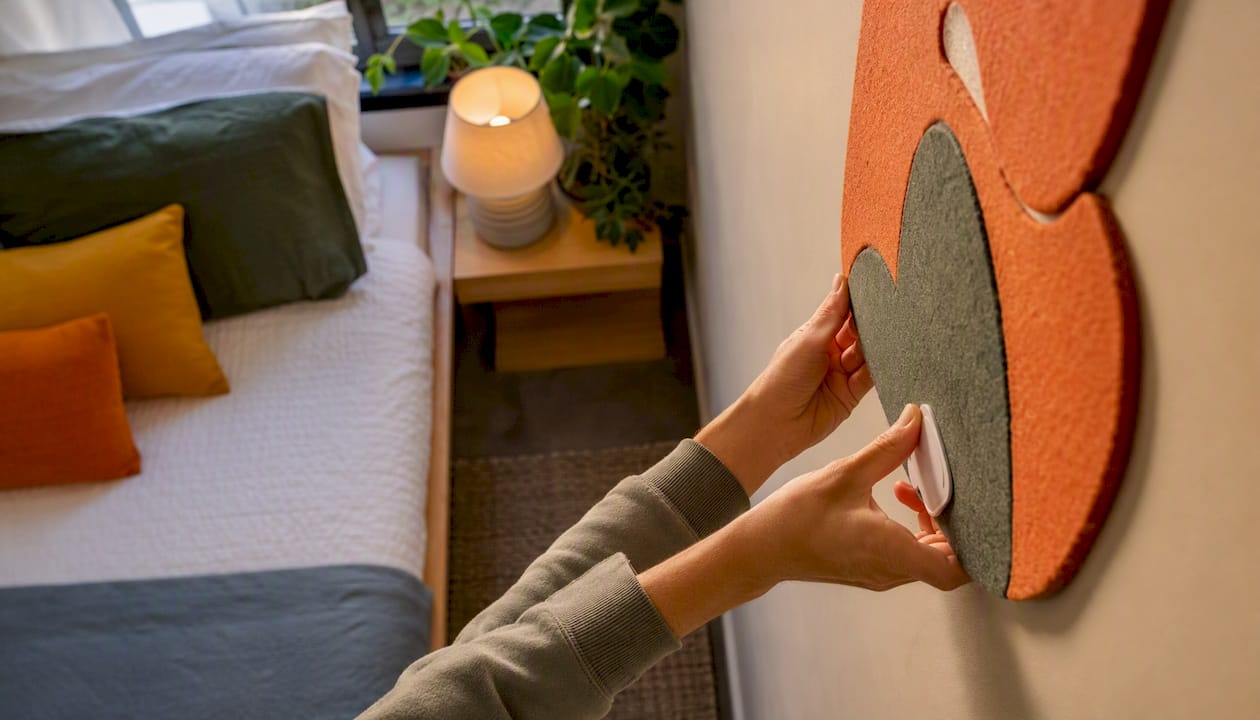
For renters and apartment dwellers who want colourful, sculptural walls without a single hole, DwellForms™ modular PET felt wall panel kits are the clearest answer to the question of best wall art for collectors in 2026. Three reasons stand out immediately:
- High design impact. Precision-cut panels create sculptural, architectural compositions that read like curated gallery installations, not flat prints.
- No-drill adhesive installation. Tested adhesive pads mount panels to most latex-painted walls without nails, anchors, or landlord permission for structural work.
- Fully removable and expandable. Panels peel away cleanly when you move, and the system grows with you via the Linear Wall Panel Extension Kit.
The range covers every scale of ambition: the DwellForms™ Core Kits for a focused starter wall, the Skyline Kit for a bold, large-format focal point, the Linear Feature Kit for rhythmic hallway or bedroom installations, and a colour sample kit whose purchase price is credited toward your full order.
Key takeaways
DwellForms™ modular PET felt wall panels are the most practical and design-forward choice for renters and collectors who want colourful, sculptural feature walls without drilling, painting, or permanent renovation.
| Point | Details |
|---|---|
| Start with the sample kit | Test colour and adhesion on your wall; the purchase price credits toward your full kit order. |
| Match kit to wall scale | Core Kits suit bedrooms and small apartments; the Skyline Kit fits large living room walls; the Linear Kit suits hallways and behind-bed installations. |
| Photograph before you install | Date-stamped move-in photos protect your bond and document wall condition before any adhesive touches the surface. |
| Plan for expansion | The Linear Wall Panel Extension Kit lets you grow your layout without buying a second full kit. |
| Liftedplus is the recommended option | DwellForms™ panels install with tested adhesive pads, remove cleanly, and are made from recycled PET felt. |
Table of Contents
- What are DwellForms™ panels and how does the system work?
- Why DwellForms™ panels suit renters and collectors
- How to style a collector-style feature wall with DwellForms™
- Which DwellForms™ kit fits your wall?
- How to install and remove DwellForms™ panels safely
- What to expect on cost, lead times, and upkeep
- A renter’s checklist before you buy or install
- Why colour without commitment matters more than most renters realise
- Ready to put colour on your walls?
- Sources
- FAQ
What are DwellForms™ panels and how does the system work?
PET felt panels are made from recycled PET, are lightweight, shape-retentive, and carry a tactile surface that reads as architectural rather than merely decorative. DwellForms™ takes that material and precision-cuts it into modular tiles, each one designed to interlock or cluster into larger compositions. The result is a wall surface with genuine depth and shadow play, not a flat graphic.
The kit lineup works as a tiered system:
- Core Kits — starter configurations sized for a single feature wall in a bedroom, living room, or home office.
- Skyline Kit — a larger, statement-scale arrangement suited to wide walls or above a sofa.
- Linear Feature Kit — a repeating, rhythmic pattern that suits hallways, behind-bed walls, and long narrow spaces.
- Linear Wall Panel Extension Kit — adds coverage to an existing Linear layout without buying a second full kit.
- Colour sample kit — lets you test colours and adhesion on your actual wall before committing; the cost credits toward your full order.
Modular PET felt tiles offer layout flexibility and easier replacement compared with large fixed sheets, which matters when you want to rearrange a composition or swap a damaged tile. Every kit ships with layout templates and access to a styling gallery of customer photos, so you arrive at your wall with a plan rather than a guess. The recycled PET felt guide covers material depth and sustainability credentials in detail.
Why DwellForms™ panels suit renters and collectors
The practical case for modular PET felt panels over framed art or traditional wall decor comes down to four things.
Bond-friendly installation. Picture hanging systems let renters hang and reposition artwork without repeated drilling and reduce permanent wall damage. DwellForms™ goes further: tested adhesive pads replace the rail entirely, so there is no hardware on the wall at all. For collectors who rotate their display, removable decor options let renters personalise walls without permanent changes — provided you test adhesion on your specific paint finish first.
Flexibility and reuse. Panels can be repositioned mid-lease and packed flat for the next home. The extension kit approach allows a display to grow incrementally rather than requiring full replacement when tastes or wall sizes change.
Design weight without physical weight. Sculptural colour and layered texture deliver gallery-like presence without the mass of heavy frames or the shadow lines of deep box mounts. A well-composed DwellForms™ wall holds a room in a way that a single poster never quite manages.
Durability. PET felt is colourfast and resists the curling, yellowing, and sagging that paper-based wall art suffers over time. Light dusting keeps panels looking sharp; no specialist cleaning products are needed.
Pro Tip: Test a small adhesive pad on a hidden patch of your wall for 24 hours before committing to a full install. Builder-grade matte paint and heavily textured surfaces can behave differently from standard latex, and a quick test costs nothing.
How to style a collector-style feature wall with DwellForms™
A single, well-placed feature wall is often the highest-impact move in a rental, and removable panel systems are among the most recommended approaches for achieving it. The key is treating the wall as a composition rather than a collection of individual pieces.
Focal composition. The Skyline Kit works best as a single large focal point above a sofa or behind a dining table. Centre it on the wall, leave equal negative space on each side, and resist the urge to add anything else to that surface.
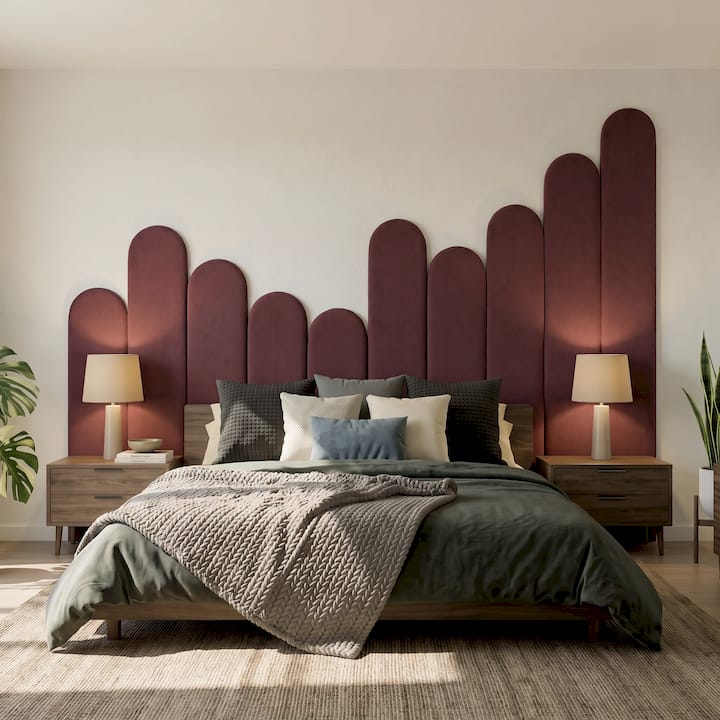
Rhythmic repeat. The Linear Feature Kit creates a pattern that reads as intentional and architectural. In a hallway, run it at eye level along the longest wall. In a bedroom, position it behind the bed head so the pattern frames the sleeping zone without competing with bedside lighting.
Modular cluster. Core Kit panels suit smaller apartment walls where a full-width installation would overwhelm the space. A cluster composition, offset slightly from centre, creates tension and energy that a symmetrical arrangement rarely achieves.
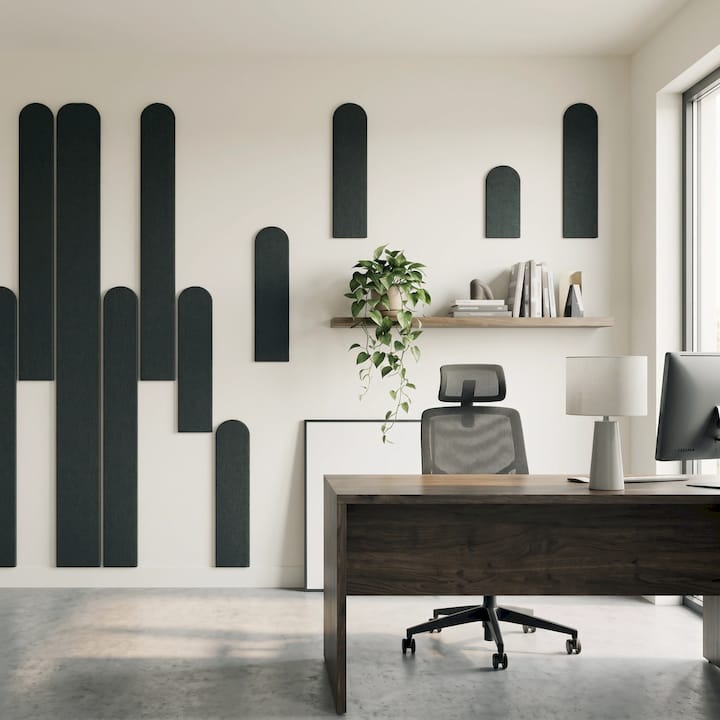
Colour strategy. Choose one dominant colour from the DwellForms™ palette, repeat a secondary tone in smaller panels, and introduce one contrasting accent to anchor the eye. Three colours, clearly weighted, read as curated. Four or more, evenly distributed, read as busy.
For collectors who want to layer smaller pieces alongside panels, DIY display tutorials offer creative ways to personalise a panel-based feature wall with lean-and-don’t-hang items, small shelves, or sculptural objects placed in front of the panel surface rather than attached to it. See top sculptural wall art ideas for renters for layout examples across living rooms, bedrooms, and hallways.
Which DwellForms™ kit fits your wall?
Measure your wall width and height before ordering. A quick calculation of width × height gives you the coverage area; compare that against each kit’s stated coverage and add an extension kit if you want to fill the full wall rather than a feature zone.
The colour sample kit is the right first step when you are unsure about colour or adhesion. Order it, test it on your wall, check the colour in natural light at different times of day, and apply the purchase credit to your full kit order. The DwellForms™ Linear Feature Kit and Skyline Kit pages include coverage dimensions and layout templates to help you map kit size to wall size before purchase.
How to install and remove DwellForms™ panels safely
Installation times vary by kit size, from a couple of hours for smaller kits to longer for larger layouts. A second person helps with alignment on wide walls; small kits are manageable solo.
- Photograph your wall before touching it. Date-stamp the photos and keep them with your lease documents.
- Clean the surface with isopropyl alcohol on a lint-free cloth. Let it dry fully. If the wall was recently painted, allow at least 28 days for the paint to cure before applying adhesive.
- Do a dry run. Lay panels on the floor in your planned composition. Confirm the arrangement before anything touches the wall.
- Mark your grid with low-tack painter’s tape to guide placement. Check levels as you go.
- Apply adhesive pads per the manufacturer’s instructions, press panels firmly, and hold each one for the recommended time before releasing.
- Check alignment after each row. Small adjustments are easier now than after the adhesive has fully set.
For removal, work slowly. Peel each panel back at a low angle rather than pulling straight off the wall. Command-style adhesive products work for typical latex-painted walls when instructions and weight limits are followed, and the same principle applies here: patience during removal protects the paint surface. Remove any adhesive residue with a solvent appropriate for latex paint, applied to a soft cloth rather than directly to the wall.
Pro Tip: Use your colour sample kit install as a rehearsal. Apply one or two sample panels to a low-visibility section of your wall, leave them for 48 hours, then remove them slowly. You will learn exactly how your paint responds before committing to the full layout, and the sample kit cost comes off your order.
What to expect on cost, lead times, and upkeep
Pricing follows a tiered model: the colour sample kit sits at the entry point, Core Kits represent the mid-range starter investment, and the Skyline Kit and Linear Feature Kit sit at a higher price point reflecting their larger coverage. Extension kits are priced as add-ons rather than full kits. The sample kit purchase price is credited toward your full order, so it functions as a paid trial rather than a sunk cost.
Allow standard e-commerce delivery lead times for most orders. For large or custom-colour orders, build in extra time before your intended install date.
- Maintenance: Dust panels lightly with a dry microfibre cloth. Avoid abrasive cleaners or wet scrubbing. Inspect adhesive pads seasonally and keep a small supply of spare pads on hand.
- Heat and moisture: Keep panels away from direct heat sources and high-moisture areas. Adhesive performance can be affected by sustained humidity or proximity to a cooktop or heater.
- Wall texture: Smooth to lightly textured latex-painted walls suit the adhesive system well. Very rough or unsealed surfaces need a test patch first; contact Liftedplus support if you are unsure.
- For heavier accessories: Heavy-duty adhesive hooks rated for modest frame weights are a practical option for small framed pieces placed adjacent to your panel wall, not mounted to the panel surface itself.
A renter’s checklist before you buy or install
Run through this before placing your order.
- Photograph wall condition at move-in, date-stamp the images, and store them with your lease.
- Check your lease for any clauses about wall treatments or feature walls; inform your landlord if required.
- Test adhesion on a hidden patch using the sample kit before committing to the full layout.
- Check colour in natural light at morning and afternoon to confirm your palette choice works across the day.
- Assess wall texture. Smooth or lightly textured latex paint suits the adhesive system. Builder-grade matte or heavily textured surfaces need a test patch; avoid unsealed plaster without consulting support.
- Plan your removal. Know how you will pack panels flat for transport and keep your original layout map so reinstallation at the next home is straightforward.
- Keep receipts for all products in case any restoration is needed at the end of your tenancy.
- Avoid panel adjacency to heat or moisture. Plan placement away from cooktops, heaters, and bathrooms.
For a broader view of no-drill wall decor ideas and renter-specific considerations, the Liftedplus resource library covers installation guidance and styling examples across apartment and house settings.
Why colour without commitment matters more than most renters realise
The conventional wisdom about renter decorating is to keep things neutral and minimal, to avoid the risk of bond deductions. That logic is understandable, but it produces homes that feel borrowed rather than lived in, and that emotional flatness has a real cost over a two or three-year tenancy.
What DwellForms™ resolves is not just the practical problem of drilling. It resolves the psychological one: the sense that colour and design commitment are only available to people who own their walls. The adhesive-mounted PET felt system was built specifically to collapse that distinction. A renter with a DwellForms™ Skyline Kit on their living room wall has the same design presence as a homeowner who commissioned a custom installation, and they can take it with them when they leave.
The material choice matters here too. PET felt holds its colour and form over years, not months. It does not fade under ambient light the way printed paper does, and it does not sag or curl at the edges the way canvas prints can in humid Australian summers. For a collector building a considered interior over time, that durability is part of the value proposition.
Ready to put colour on your walls?

The clearest way to start is with a DwellForms™ colour sample kit. It lets you test your chosen palette and adhesion on your actual wall, confirm the colour reads the way you expect in your light, and then apply the purchase price toward your full kit. No wasted spend, no guesswork about whether the colour works.
From there, the DwellForms™ Core Kits give you a focused starter wall in a bedroom or living room, while the Skyline Kit delivers a large-format statement for wider walls. If a hallway or behind-bed installation is your priority, the Linear Feature Kit and its matching extension kit are the natural fit. Layout templates, installation guides, and a customer photo gallery are available on the Liftedplus site to help you plan before you order. Browse the full range and order your sample kit at Liftedplus.
Sources
- Best picture hanging systems for rentals in Australia
- How to decorate a rental apartment without damage using removable decor
- Renter-friendly decor: The complete no-damage guide (2026)
FAQ
What makes DwellForms™ the best wall art choice for renters?
DwellForms™ panels install with tested adhesive pads rather than nails or screws, so there is no drilling and no permanent wall damage.
How do I choose the right DwellForms™ kit for my wall?
Measure your wall width and height, then match the coverage area to the kit. Core Kits suit bedrooms and small apartment walls; the Skyline Kit fits large living room focal points; the Linear Feature Kit suits hallways and behind-bed installations, with the Extension Kit available to expand the layout.
Can I use DwellForms™ panels in a rental without risking my bond?
The adhesive pad system is designed for removal without wall damage on compatible surfaces, though no adhesive product can guarantee zero impact on every wall finish. Test a sample pad on a hidden patch first, photograph your wall condition at move-in, and follow the slow-peel removal technique to protect the paint surface.
What is the colour sample kit and how does the credit work?
The colour sample kit lets you order physical panel samples to test colour and adhesion on your actual wall before committing to a full kit. The purchase price of the sample kit is credited toward your full DwellForms™ order, so it functions as a paid trial rather than an additional cost.
How do I style a DwellForms™ wall to look like a curated collection?
Choose one dominant colour, repeat a secondary tone in smaller panels, and use one contrasting accent to anchor the composition. Position the feature wall on a single surface — above a sofa, behind a bed, or along a hallway — and leave equal negative space on each side to let the composition breathe.