

Colour blocking wall panels are modular, coloured panels arranged in deliberate geometric blocks to create bold, architectural feature walls without paint, wallpaper or permanent renovation. For renters and apartment dwellers, the best immediate next step is to order a sample kit, lay the panels on the floor to map your design, then measure your wall for a starter kit.
- Order a sample box to test colours and scale in your actual space before committing to a full kit.
- Map your design on the floor first, arranging panels in your chosen colour-block layout to confirm proportion and rhythm.
- Measure your wall area (height × width, minus any doors or windows) to calculate how many panels you need.
DwellForms™ by Lifted+ is the recommended renter-friendly option: modular PET felt kits that mount with adhesive pads, leave no drill holes, and move with you when you leave.
Key takeaways
Modular, adhesive-mounted colour blocking wall panels are the most practical way for renters and homeowners to create bold, removable feature walls without paint, drilling or permanent renovation.
| Point | Details |
|---|---|
| Proportion rule | Use a two-thirds / one-third split or the 60/30/10 formula for balanced colour-block layouts. |
| Sample first | Order a sample box, live with the colours for 48 hours, then measure and order your full kit. |
| No-drill installation | Adhesive pad kits suit rental walls; always patch-test the adhesive and check your tenancy agreement first. |
| Material credentials | DwellForms™ panels are made from 100% recycled PET felt — colourfast, low-VOC and removable. |
| Liftedplus recommendation | DwellForms™ Skyline and Core Kits offer modular, no-drill colour blocking with sample credit toward full kit orders. |
Table of Contents
- What colour blocking wall panels can do for every room
- Which panel types suit colour blocking in Australia?
- How do you plan a colour-blocked wall layout?
- What are your installation options for renter-friendly walls?
- How do you measure, order samples and estimate cost?
- Which rooms benefit most from colour-blocking panels?
- What should you know about materials, care and safety?
- Why colour without commitment is the most honest design advice for renters
- DwellForms™ by Lifted+ makes colour-blocked walls achievable for renters
- Sources
- FAQ
What colour blocking wall panels can do for every room
Editorial galleries show how homeowners adapt arches, framed blocks and stripes to suit their rooms — and modular panels make every one of those ideas removable and renter-safe.
Living room. A large rectangle of deep colour behind the sofa, running two-thirds of the wall height, anchors the seating zone and gives the room a considered, gallery-like quality. Pair a warm terracotta or forest green block with a lighter upper third for contrast without visual weight.
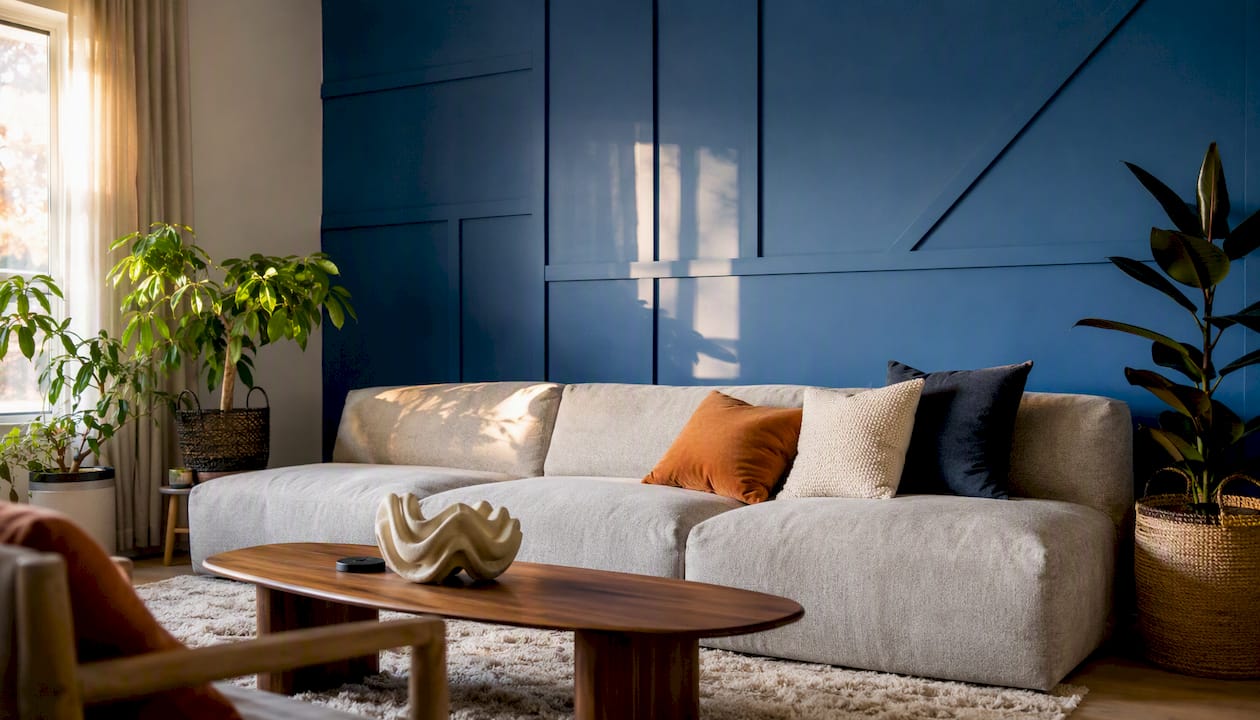
Bedroom. A headboard-height block, roughly 120–150 cm from the floor, frames the bed as a deliberate focal point. Two-tone wall panels in a muted sage below and soft white above feel calm and considered rather than loud.
Home office. A vertical block behind the desk, floor to ceiling and desk-width, signals the work zone without a partition wall. Vertical slats in a single accent colour add rhythm and pull the eye upward, making low ceilings feel taller.
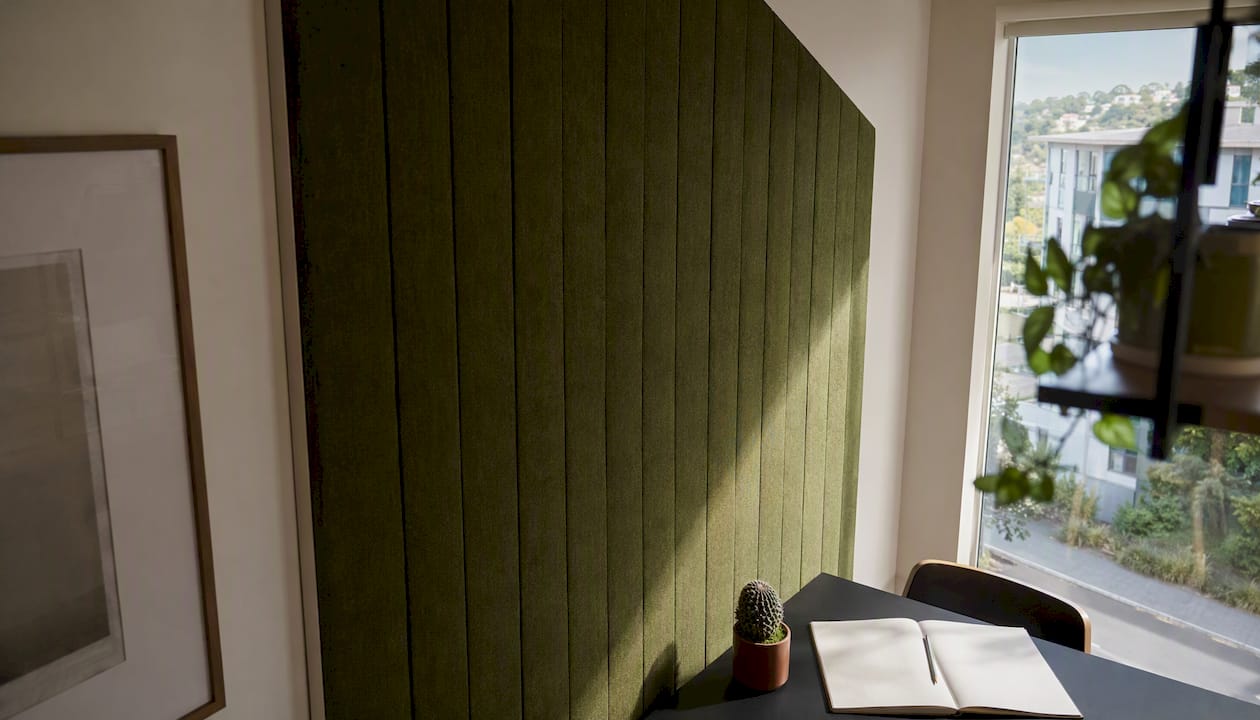
Hallway. Rhythmic slats or a two-thirds lower block in a deep, saturated hue make a narrow hallway feel intentional rather than forgotten. The colour does the architectural work that moulding or wallpaper would otherwise require.
Kids’ room. Playful geometric blocks in two or three colours create a mural-like effect without paint. Arrange panels in a grid or staggered pattern, and choose washable-finish options for longevity.
Pro Tip: Before settling on a layout, photograph your wall and sketch the block proportions over the image in a free tool like Canva or even your phone’s markup app. Seeing the scale on screen before you touch the wall saves a surprising amount of second-guessing.
Ceiling-to-wall rectangles that extend a wall colour onto the adjacent ceiling plane are one of the most striking effects in current colour-blocking interiors — and with removable panels, you can test the idea without any lasting commitment.
Which panel types suit colour blocking in Australia?
Not every panel type suits a renter-friendly, removable installation. The choice of material shapes both the visual effect and the practicality of the treatment.
Modular PET felt panels are precision-cut from recycled felt and come in a range of pre-dyed colours. Their soft texture adds warmth and a sculptural quality that paint alone cannot replicate. Because they mount with adhesive pads rather than screws or battens, they are the most renter-suitable option available in Australia.
Wood slat and fluted panels create strong linear rhythm and a natural warmth. Most require adhesive or mechanical fixing to a batten frame, which makes them less suited to rental walls. They work well for homeowners who want a more permanent treatment.
Flexible foam and 3D panels offer tactile, geometric relief and are lightweight. Adhesive mounting is common, though the bond strength and removal behaviour vary significantly between products. Check the manufacturer’s removal guidance before committing.
Lightweight rigid panels (MDF, compressed fibre) are typically painted or primed on-site. They require mechanical fixing and are not removable without wall repair, so they suit owner-occupiers undertaking a planned renovation rather than renters.
For colourful wall decoration without renovation, modular PET felt panels offer the clearest combination of design impact and renter safety.
How do you plan a colour-blocked wall layout?
The single most important planning rule: divide your wall by thirds or use the 60/30/10 proportion — a large portion of the wall in your primary colour, a smaller portion in a secondary, with an optional accent if you want a third tone. Aligning the colour boundary to an architectural feature (a window sill, a dado rail, the top of a headboard) makes the division feel deliberate rather than arbitrary.
- Measure and photograph. Record the wall’s height and width. Photograph it in natural light and at the time of day you use the room most.
- Choose your colour ratio. Pick a primary block (60%), a secondary block (30%) and an optional accent (10%). Two tones are often more powerful than three.
- Order samples. Live with the sample panels on the wall for at least 48 hours across different lighting conditions before ordering a full kit.
- Map on the floor. Lay your panels out in the intended arrangement on the floor to confirm scale and rhythm before any adhesive touches the wall. Modular panels arranged off-wall let you iterate quickly and avoid designer’s remorse.
- Mark your guidelines. Use a chalk line or laser level to mark the dividing line on the wall. Reference the headboard, desk, or window sill as your anchor point.
- Test the adhesive. Apply one panel to a discreet area first and follow the manufacturer’s removal test before mounting the full layout.
Pro Tip: The paint-first tape technique — painting the existing wall colour along the tape edge before applying the new colour — prevents bleed and creates a crisp join. The same principle applies when you want a clean visual boundary between two panel colours meeting at a corner or edge.
Dulux’s stepwise how-to confirms that measuring, marking and taping in sequence is standard practice for any colour-blocking treatment, whether paint or panels.
What are your installation options for renter-friendly walls?
For renters, the answer is clear: no-drill adhesive kits are the right starting point. They mount without screws, leave the wall surface intact (subject to the adhesive product’s own specifications and your wall type), and come down when you move.
Adhesive pad systems work by bonding a precision-cut panel directly to a clean, dry wall surface. DwellForms™ kits use tested adhesive pads sized for each panel, so there is no guesswork about bond strength or coverage. The modular format means you can add, remove or rearrange individual panels without disturbing the rest of the layout.
For homeowners who want a more permanent result, options include:
- Construction adhesive on a batten frame — strong and flat, but requires wall repair on removal.
- Mechanical fixing through a timber batten — the most rigid option for heavy panels; not suitable for renters.
- Double-sided mounting tape — works for lighter panels on smooth surfaces; removal behaviour varies by brand and wall paint.
Renter-friendly installation steps for adhesive pad kits:
- Clean the wall surface with a dry cloth to remove dust and grease.
- Allow the surface to reach room temperature (avoid installation in cold or humid conditions).
- Activate the adhesive pad per the kit instructions and press firmly for the recommended dwell time.
- For removal, follow the manufacturer’s guidance — most systems recommend a slow, low-angle pull.
One important note: always check your tenancy agreement and confirm with your landlord before mounting anything to walls. Wall type matters too — textured, painted brick or surfaces with loose paint may not bond reliably with any adhesive system. For more no-drill wall decor ideas suited to rental walls, the Liftedplus resource library covers a range of surface scenarios.
How do you measure, order samples and estimate cost?
Order a sample box first. Measure twice before ordering a kit. That sequence protects your budget and your walls.
Measurement checklist:
- Measure wall height and width in centimetres.
- Subtract any doors, windows or built-in furniture from the total area.
- Decide what percentage of the wall you want to cover (a two-thirds block covers roughly 65% of the wall area).
- Check the panel coverage per kit on the product page and round up by one panel row to account for cuts or adjustments.
Prices are indicative. Confirm current pricing at checkout before ordering.
Typical timeline from planning to installed wall:
- Planning and design mapping: 1–3 days
- Sample order and delivery: 3–7 business days
- Colour decision and full kit order: 1–2 days
- Kit delivery: 3–7 business days
- Installation: 1–3 hours for a standard feature wall
The sample credit policy means your sample box cost applies toward the full kit, so testing colours costs you nothing extra in the long run. For a full breakdown of kit options and sizing, the DwellForms™ homeowner’s guide covers measurement and ordering in detail.
Which rooms benefit most from colour-blocking panels?
Colour blocking can zone a space, lift a ceiling, anchor a furniture arrangement, or create a focal point that holds the room. The effect depends on where you place the colour and how much of the wall it occupies.
- Living room. A large rectangle behind the sofa in a deep, saturated tone grounds the seating zone and gives the room a gallery-like quality. Pair it with a considered colour palette for open-plan spaces to avoid the block feeling isolated.
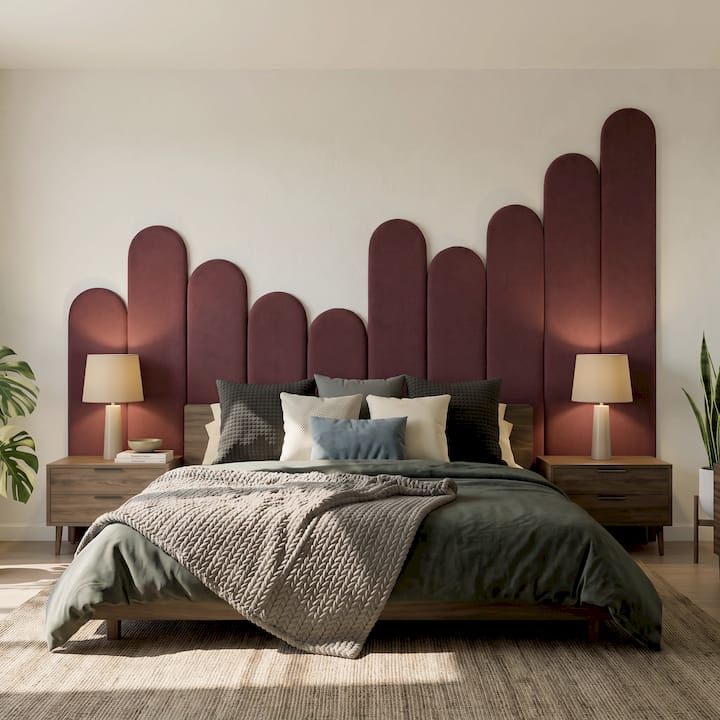
- Bedroom. A headboard-height block signals rest and retreat. Cooler hues (slate blue, dusty sage) tend to lower perceived energy in the room; warmer tones (terracotta, blush) add intimacy. Pairing your wall colour with colour-blocked bedding extends the design language from wall to bed without additional cost.
- Home office. A vertical block behind the desk anchors the work zone and reduces visual distraction. Colours with moderate saturation (deep teal, forest green) support focus without the harshness of a stark white wall.
- Hallway. A large lower block in a strong hue makes a narrow corridor feel considered and architectural. Vertical slats add rhythm and draw the eye toward the end of the hall, making the space feel longer.
- Kids’ room. Bold geometric blocks in two or three tones create a playful mural effect. Choose panels with a cleanable surface finish and avoid very dark tones directly behind furniture that may be moved frequently.
Colour psychology is worth a brief note: hue and proportion genuinely affect mood and perceived scale. Darker tones on the lower third of a wall ground a room and make ceilings feel higher. A single saturated block in an otherwise neutral room creates tension and energy without overwhelming the space.
What should you know about materials, care and safety?
Choose panels made from tested materials and follow the supplier’s care guidance. For colour-blocked walls that stay looking sharp, a little routine maintenance goes a long way.
- Dusting. Wipe PET felt panels with a dry microfibre cloth every few weeks to prevent dust build-up in the panel texture.
- Spot cleaning. For marks, use a lightly damp cloth and blot rather than rub. Avoid solvent-based cleaners on felt surfaces.
- Sustainability. DwellForms™ panels are made from 100% recycled PET felt, meaning each kit diverts plastic from landfill. The material is durable, colourfast and does not off-gas volatile organic compounds the way some solvent-based paints or adhesives can.
- Fire rating. Check the product’s fire-rating documentation before installing panels in a rental property or multi-unit building. Liftedplus publishes material specifications on its product pages.
- Adhesive patch test. Always test the adhesive on a small, discreet section of your wall before full installation. Different paint types and surface textures respond differently to adhesive systems.
One important caution: do not overstate acoustic or fire performance based on material type alone. PET felt has inherent sound-absorbing properties, but residential panel kits are not certified commercial acoustic treatments. Check the vendor’s published specifications for any performance claims relevant to your situation.
Why colour without commitment is the most honest design advice for renters
There is a particular kind of frustration that comes from living in a space that feels borrowed rather than yours. Blank white rental walls are not neutral — they are a constant, low-level signal that you are not allowed to make this place home.
Colour blocking, done with modular, removable panels, is the most direct answer to that frustration. Not because it mimics what paint can do, but because it does something paint cannot: it gives you a feature wall you can take with you. The design decision is reversible, but the effect while it is up is fully committed. That combination — colour without commitment — is not a compromise. It is a more considered way to live.
What I find most underestimated about this approach is the psychological shift that happens when a wall holds colour and texture with intention. Interior design genuinely affects mental wellbeing, and a renter-friendly feature wall that you designed, mapped and installed yourself carries a different emotional weight than a print hung on a hook. It is the difference between decorating a space and making it yours.
The practical case is equally strong. No-drill wall decor removes the single biggest barrier renters face: the fear of bond deductions. When the installation method is adhesive pads rather than screws, the conversation with your landlord changes entirely.
DwellForms™ by Lifted+ makes colour-blocked walls achievable for renters
DwellForms™ modular PET felt wall kits are designed specifically for no-drill, removable feature walls — the kind of colour-blocked statement that transforms a rental bedroom or living room without touching the wall permanently.

Each kit arrives precision-cut and ready to arrange, with tested adhesive pads and a layout guide included. The sample credit policy means your sample box cost applies directly toward a full kit order, so testing colours in your actual space costs nothing extra. Colourways range from deep, saturated tones to softer, layered palettes, and extension packs let you grow the layout over time.
The DwellForms™ Skyline Kit is the recommended starting point for a feature wall. For readers comparing kit styles and sizes, the DwellForms™ Core Kits page covers the full range. Order a sample box today and see the colour in your space before you commit to a full kit.
Sources
These sources informed the planning guidance, proportion rules and installation techniques in this article.
- 6 Tips for Color-Blocking Walls with Paint – This Old House
- FunHaus molding ideas: Stripes, panels, and color blocking – Bark and Chase
- Accent wall tutorial for colour blocking + 3D wall panels – TMooreHome / Fortune House Shop
- 6 New Ways to Work Colour Blocking at Home – Dulux
- Color blocking walls: 22 clever ideas to add shape and style – Real Homes
FAQ
What are the rules for colour blocking on walls?
The core rule is proportion: dedicate two-thirds of the wall to one colour and one-third to another, or use the 60/30/10 formula across three tones. Align the colour boundary to an architectural feature — a window sill, headboard height, or dado line — so the division reads as deliberate.
Is colour blocking still in style in 2026?
Yes. Colour blocking has moved from a trend to a recognised interior design technique, used in everything from rental apartments to architect-designed homes. The shift toward bold, personal interiors and away from safe neutrals has kept it relevant and growing.
How do you colour block a wall with panels?
Order a sample kit, map the layout on the floor, then mount panels with adhesive pads following the two-thirds / one-third proportion rule. DwellForms™ kits include a layout guide and tested adhesive pads for a no-drill install that suits rental walls.
Is colour blocking suitable for renters?
Modular, adhesive-mounted panels make colour blocking fully renter-compatible. No-drill wall decor systems like DwellForms™ mount without screws and remove without permanent wall damage, though you should always patch-test the adhesive and confirm with your landlord before installation.