

Yes, you can put panels over tiled walls, but the right panel depends entirely on the room. In a shower or other wet area, you need a lining that is designed to be waterproof and is jointed and sealed properly. On a dry or lightly used tiled wall, such as a hallway, entry, kitchen end wall or a dated fireplace surround, a lightweight decorative panel can hide the tile pattern and add colour without a hammer or a chisel. This guide separates those two jobs, so you choose the right product and avoid the expensive mistakes.
Key Takeaways
- Wet areas such as showers need panels or linings made for wet-area use, with sealed joints. Decorative felt is not a shower lining.
- NZ Building Code clause E3 expects surfaces exposed to splashing to be impervious and easy to clean, and the tile or panel behind it must not let water into hidden spaces.
- For dry tiled walls, a removable, no-drill approach gives you colour without commitment, but always test a small area first.
- Preparation decides the result: clean, dry, sound tiles with no loose pieces or cracked grout.
- Cover is not repair. Panels hide a tired tile wall, they do not fix moisture problems underneath.
Table of Contents
- The real problem with tiled walls
- Two very different jobs: wet-area linings and decorative cover
- What NZ rules say about covering tiles
- Is your tiled wall ready for panels?
- How to prepare a tiled wall for panels
- Why we use adhesive pads, not screws or glue
- Where PET felt panels suit tiled walls
- Our point of view
- Problems that can happen, and how to avoid them
- Renting with tiles: protecting your bond
- Meet your wall: a kit that fits
- Other ways to handle a tiled wall
- FAQ
- Sources
The real problem with tiled walls
Tile is a stubborn surface. It was chosen by someone else, in another decade, and it is rarely the colour you would choose. Pink bathroom tiles, beige kitchen squares, a stripe of mosaic that hasn’t been fashionable since the nineties. Painting is awkward, removal is dusty and costly, and if you rent, it is simply not your decision.
So the question is a sensible one. Can you cover tile instead of tearing it out? The honest answer is that it depends on two things: how wet the wall gets, and how sound the tile beneath is.
Two very different jobs: wet-area linings and decorative cover
Most search results for this topic are about bathroom linings. They are written for people renovating a shower, and they are useful if that is you. Decorative wall panels in a living space are a different category, and mixing the two up is where trouble starts.
Wet areas: showers, tub surrounds and splash zones
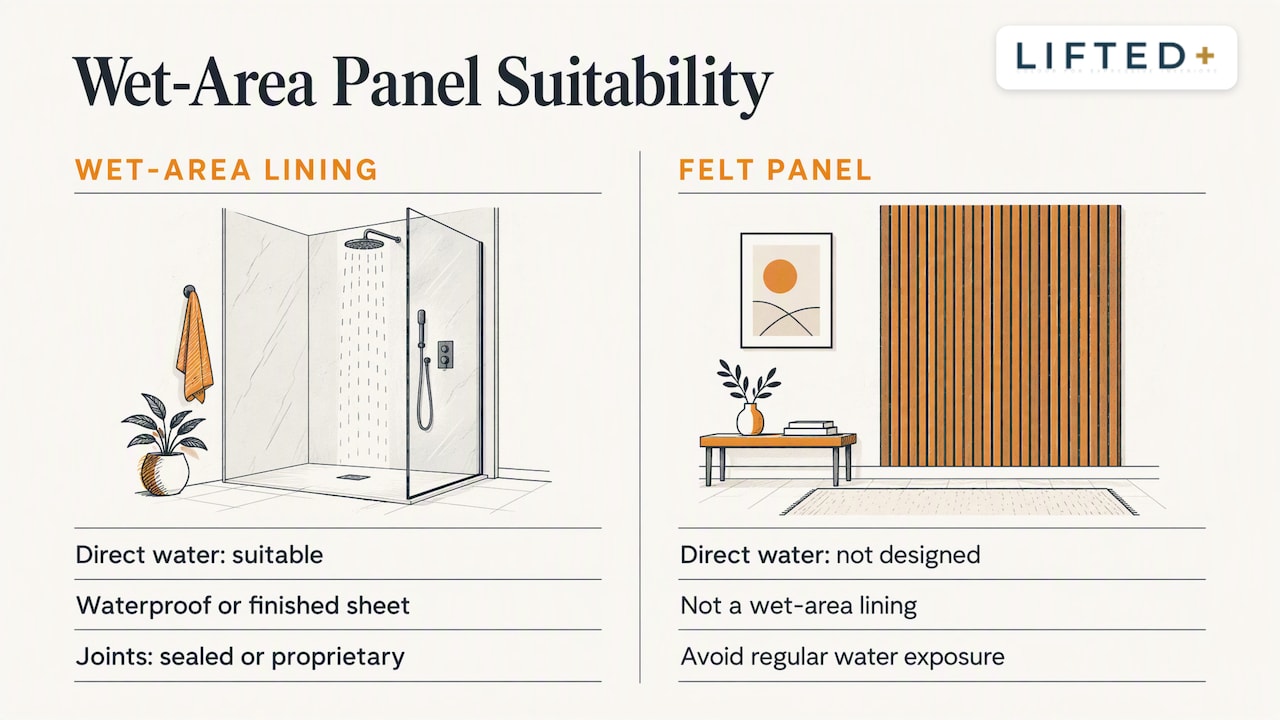
BRANZ, the NZ building research body, lists suitable wet-area finishes as integrally waterproof sheet materials such as PVC with sealed joints, or water-resistant sheet linings finished with high-pressure laminate or factory-applied polyurethane or resin. The same guidance notes that MDF is traditionally not recommended for wet areas because moisture damages it easily, although some H3.1-treated products are marketed as suitable.
Joints matter as much as the sheet. BRANZ’s quick reference guide says decorative panels with proprietary jointing are suitable for showers, and that sheet joints need proprietary jointers or expressed sealant joints. Pre-finished panels also need their edges sealed before installation, and their bottom edges separated from the floor or shower by a gap, as set out in BRANZ’s wet-area finishes guidance.
In plain terms: if water hits the wall directly and regularly, use a purpose-made wet-area lining, follow the manufacturer’s jointing system to the letter, and consider a qualified installer. A decorative felt panel is not designed for that job, and we would never suggest it.
Dry or lightly splashed walls: where decorative panels belong
The hallway with a strip of tiles by the front door. The kitchen end wall that never sees a pot of boiling water. The lounge fireplace surround. The laundry nook with a feature of mismatched tiles. These are the places where covering tile with a decorative, removable panel is a design decision, not a building one.
This is where our kits are intended to sit: renter-friendly feature walls, no-drill wall decor, texture without renovation. We are specific about it because we would rather you place panels where they will look good and last, than stretch them to somewhere they should not go.
What NZ rules say about covering tiles
Two points are worth knowing before you start.
First, consent. A Ministry of Business, Innovation and Employment determination notes that clause 12 of Schedule 1 of the Building Act exempts internal linings or finishes in an existing dwelling from needing a building consent, but that all building work must still comply with the Building Code. A decorative panel in a hallway is a finish. A new waterproof lining in a shower is building work that needs to meet the Code.
Second, performance. Under clause E3, surfaces prone to splashing must be impervious and easily cleaned, and must stop water splash entering concealed spaces, as the same determination explains. In that case the Ministry found that cracked grout let water into concealed spaces, which made the tiled showers non-compliant. Level, the BRANZ guidance site, repeats that wet-area wall linings exposed to splash must be impervious and easy to clean.
The lesson from that determination is useful even if you never go near a shower. Tile and grout are not always the waterproof layer they appear to be, and a panel over a failing wall can hide a problem rather than solve it.
Is your tiled wall ready for panels?
Before you choose anything, spend ten minutes with the wall. Press your palm flat against it and look closely at the surface.
You want tiles that are firmly bonded, with no hollow sounds when you tap them, no cracks that run through the tile, and no tiles that shift. You want grout that is intact rather than crumbling. You want a wall that is dry and free of damp, mould or staining that points to water getting behind it.
If you see any of the following, fix or investigate before covering anything:
- Loose or drummy tiles that sound hollow.
- Cracked or missing grout, especially near a shower, basin or bath.
- Black mould, musty smell or soft plasterboard near the tiles.
- A surface that is constantly damp or steamed up.
In a rental, report moisture signs to your landlord rather than covering them. It protects your health, and it protects your bond.
How to prepare a tiled wall for panels
Preparation is the least glamorous part and the part that most decides how it all holds. For a dry tiled wall, work through these steps.
- Clean thoroughly. Remove grease, soap film, cooking residue and dust. Kitchen tiles in particular carry an invisible layer of oil that stops anything sticking.
- Degrease and dry. Wipe with a suitable household degreaser, rinse with clean water and let the wall dry fully.
- Check for texture. Deeply embossed, heavily relief-patterned or very uneven tiles give adhesive less contact. Smooth glazed tile generally offers a more even surface to work with.
- Note the grout lines. Wide, deep grout channels can matter, because the pad needs to land on something flat. Plan the panel layout so fixing points fall on tile faces where possible.
- Test first. Stick a single pad or a small sample piece in a hidden spot, leave it for several days, and see how it behaves before committing to the full wall.
- Mark your layout. Lay the panels on the floor, photograph the arrangement, then work up the wall with a level.
Testing is not optional in our view. Glazed tile, matt tile, textured stone-look tile and old, slightly soapy tile all behave differently, so we do not claim that our adhesive suits every wall or every tile. Our colour sample kit lets you see the colour in your own light and try the adhesive approach on a small scale, and sample purchases are credited towards a full kit order.
Why we use adhesive pads, not screws or glue
Drilling into tile is a bad idea at the best of times, and a quick way to crack a tile, break the waterproofing behind it or lose your bond. Construction adhesive is worse, because it commits you to a permanent result.
DwellForms™ panels use nano-adhesive pads that we selected after testing several options. We deliberately discounted one popular pull-tab brand, because the nano-adhesive pads performed significantly better in our own testing at minimising damage to walls. That is a statement about our testing, not a promise. No adhesive is completely damage-proof, and results depend on the surface, the preparation and how the panel is removed. Our guide on removing adhesive wall panels walks through the gentle way to take them down.
Where PET felt panels suit tiled walls
PET felt is light, soft to the eye and warm to the touch, which is part of the appeal against a hard, glossy tile surface. Our panels are made from 100% recycled PET felt and cut precisely into modular shapes, so a wall of small square tiles can become a sculptural field of colour.
Think about where the contrast works best:
- Hallways and entries. A tiled strip by the door becomes a deliberate feature. Our guide to hallway echo solutions for NZ renters covers more of this.
- Kitchen end walls and dining nooks. Away from the cooktop and sink, a panel arrangement can soften a sea of cream tile.
- Home-office walls. A tiled wall in a converted room can feel cold on video calls. Colour and texture change the mood of the whole room.
- Fireplace surrounds that are not in use. Only where the panel is a safe distance from any heat source, and never on a surface that gets hot.
We do not suggest felt panels inside showers, directly behind a cooktop, or anywhere that gets regular, direct water. We also do not claim soundproofing or acoustic treatment for our kits; our focus is colour, shape and texture.
Our point of view
We often hear the same sentence from customers: “I would love colour on this wall, but it is tiled and it is not mine to change.” It is a very reasonable sentence, and it is exactly what we designed DwellForms™ for.
Tile has a way of making a home feel temporary, even when you plan to stay for years. A wall of someone else’s taste can quietly drain the personality from a room. Our belief, which sits behind everything we make under the idea of Colour That Lifts, is that you should be able to answer back without a renovation.
That is why our kits are modular, adhesive-fixed and removable, and why we are careful about where we say they belong. We would rather you test a small piece, choose a dry wall and love the result than overreach. A feature wall should lift a room, not cause an argument with your landlord or your builder.
If you are unsure whether your tiled wall is a good candidate, start with a colour sample and a test pad. It costs little, it tells you a lot, and it keeps the decision where it belongs: with you.
Michelle
Problems that can happen, and how to avoid them
Most problems with panels over tile come from a handful of causes, and nearly all of them can be planned around.
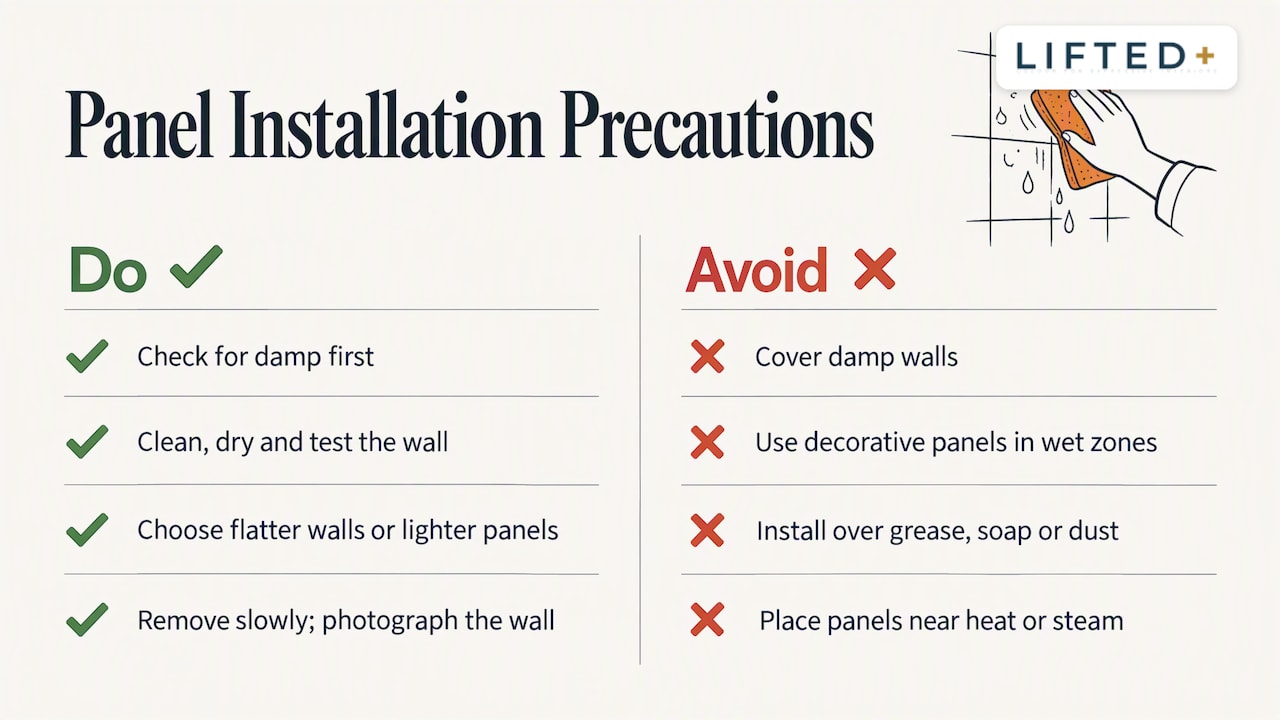
Trapped moisture. Covering a damp wall hides the symptom and feeds the problem. Check for damp first, and stay out of wet zones with decorative panels.
Poor adhesion. Grease, soap film and dust are the usual culprits. Clean properly, let the wall dry and test before you commit.
Uneven surfaces. Relief tiles and deep grout lines reduce contact. Pick a flatter section of wall, or choose a smaller, lighter arrangement.
Heat and steam. Adhesives can soften with heat. Keep panels away from cooktops, heaters and steamy bathrooms.
Edges that look unfinished. Where panels meet a bench, window or corner, a considered gap looks intentional. Our guides on finishing panel edges and panel corners show how.
Removal damage. Tile glaze is tougher than paint, but grout and any previous repair work are not. Remove slowly, following the guide, and photograph the wall before and after.
Renting with tiles: protecting your bond
If the tiled wall belongs to your landlord, the sensible order is simple. Check your tenancy agreement, ask permission in writing where you can, photograph the wall before you start and keep the panels removable. Our step-by-step guide to protecting your bond with no-drill panels covers the conversation and the paperwork, and our ideas for landlord-friendly wall decor offer a softer way into it.
We do not promise damage-free removal, because no honest supplier can promise that across every wall. What we can say is that a no-drill approach avoids the guaranteed damage of drilling, and that careful preparation and removal reduce the risk.
Meet your wall: a kit that fits
If you have a dry tiled wall and a love of colour, our Core Kits are the starting point: a complete modular arrangement made from recycled PET felt, with a layout designed to be installed without drilling or paint. If your wall is larger, Extension Kits let you keep building the pattern outwards.
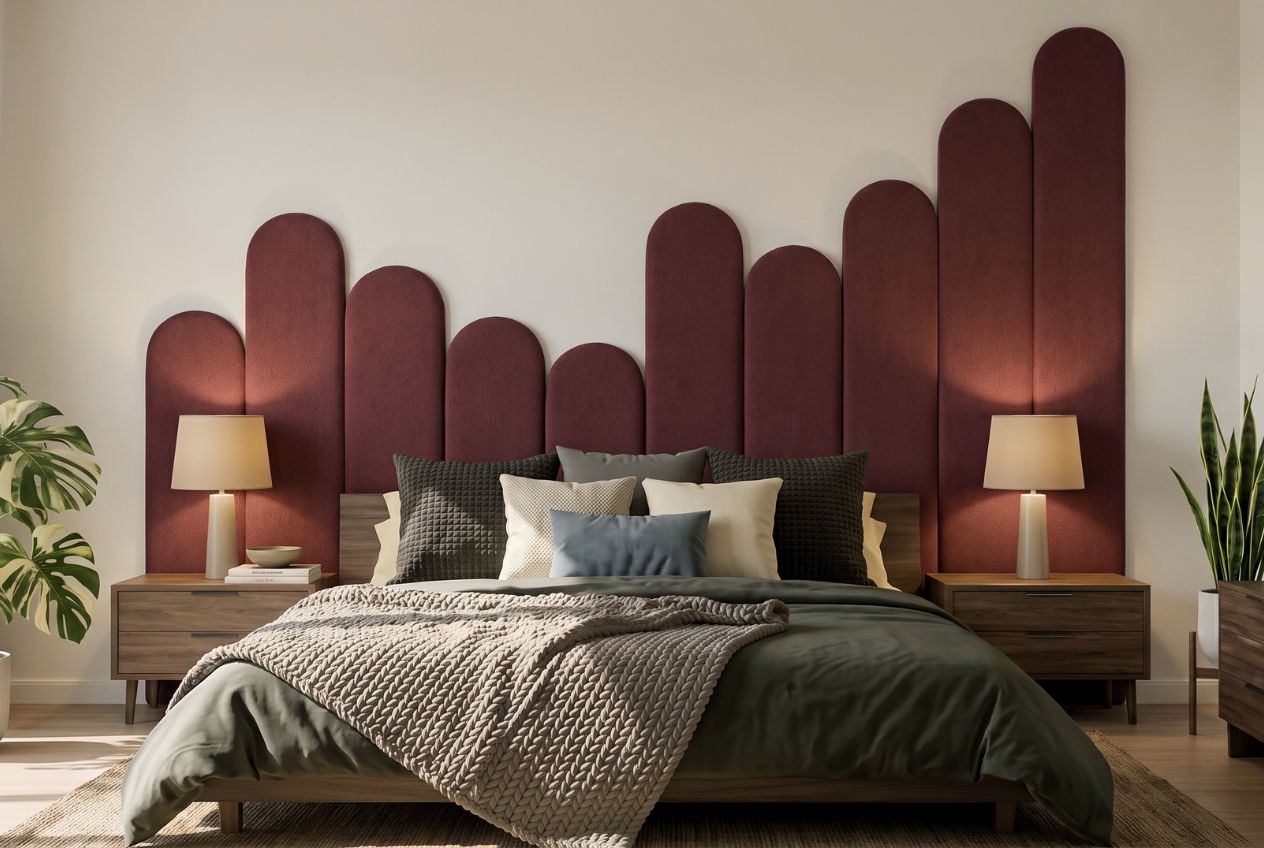
Not sure which colour will sit well against your tile? Begin with a sample. The tile’s undertone, whether warm cream, cool grey or a faded green, changes how a colour reads, and seeing it in your own morning light beats guessing from a screen.
Other ways to handle a tiled wall
Panels are not the only answer, and the right choice depends on your wall and your situation.
If the tiles are in good condition and you own the home, tile paint made for the job can refresh them, though it needs proper preparation and is permanent. If the wall is a shower and the tile is failing, a purpose-made wet-area lining installed to the manufacturer’s system is the sound route, and a qualified installer is worth the cost. If you only want a lift in a rental, a combination of a bold mirror, art and a smaller panel arrangement on an adjacent plain wall can do much of the work. Our wall art collection is a good place to look for that second layer.
For more on how different panel types compare in a home, see our homeowner’s guide to decorative wall panels, and for ideas that move with you, our collection of removable wall panel ideas for NZ renters.
FAQ
Can you put wall panels over existing tiles?
In many cases, yes, provided the tiles are sound, clean and dry, and the panel suits the room. Wet areas need a purpose-made lining with sealed joints, while dry tiled walls can take decorative, removable panels. Always check the wall for loose tiles or damp first.
Do you need building consent to cover tiles with panels in NZ?
Internal linings or finishes in an existing dwelling are exempt from consent under clause 12 of Schedule 1 of the Building Act, according to a Ministry determination. However, all building work must still comply with the Building Code, so wet areas need particular care. If in doubt, ask your council or a qualified builder.
Can I use decorative felt panels in a shower?
We do not recommend it. Showers need linings that are impervious, easy to clean and jointed with proprietary systems or sealed joints. Decorative felt panels are intended for dry or lightly used walls such as hallways and living spaces.
Will adhesive pads damage my tiles?
We cannot promise any adhesive is completely damage-proof. In our own testing, our selected nano-adhesive pads performed significantly better at minimising wall damage than a popular pull-tab option we discounted. Test a small area first, and remove the panels slowly using our guide.
How should I clean tiles before fitting panels?
Remove grease, soap film and dust with a suitable household degreaser, rinse with clean water and let the wall dry completely. Kitchen and bathroom-adjacent tiles often carry an oily residue that stops pads from gripping.
Sources
- Wall and ceiling finishes in wet areas, BRANZ
- Quick reference guide for wet area wall finishes, BRANZ
- Determination 2024/054: Building Code compliance of two tiled showers, MBIE
- Wet area wall and ceiling linings and finishes, Level
Recommended
- Reusable Wall Panels: Colour Without Commitment In NZ
- Removable Wall Panel Ideas For NZ Renters In 2026
- Reuse Wall Panels Without Drilling: NZ Renters Can Take Them Along
- Why Use Accent Walls: A Guide For NZ Homeowners
This article is for general information and inspiration only. Product performance and results may vary depending on individual circumstances, surfaces and installation.
