
Last Updated: October 26, 2026
Quick Summary
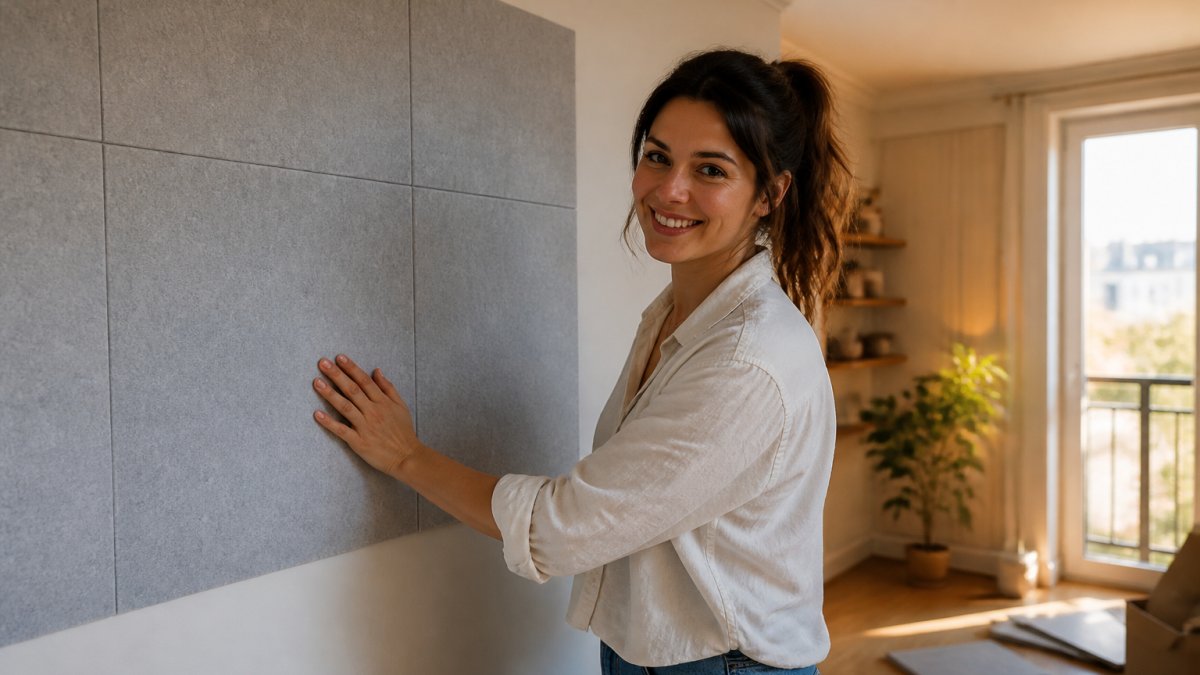
Fit temporary wall panels for apartments by choosing a no-drill, removable system and checking your lease before you buy. Clean and dry the wall, let new paint cure at least four weeks, plan the layout on the floor, then press each panel and hold for the full time specified. Temporary wall panels lift off cleanly and pack flat for your next place.
- Peel-and-stick wallpaper is the cheapest full-wall option but can lift paint and rarely reuses.
- Hook-and-loop or felt tabs carry the lowest damage risk on sealed, flat paint.
- Anchor anything taller than about 1.8 m and never block egress, vents or smoke detectors.
- Press and hold each panel for the full time specified, usually 30 seconds per tab.
- Photograph the wall before installation and after removal to protect your bond.
Table of Contents
- Why Temporary Wall Panels Suit Apartment Living
- Types of Temporary Wall Systems Compared
- Removable Wall Panels: What to Check Before You Buy
- No-Drill Wall Panels: How They Stay Up and Stay Straight
- Temporary Room Divider Panels for Open-Plan Apartments
- Wood Panelling for Apartment Walls: Wood-Look Without the Weight
- Installation Steps, Costs and Lease Rules to Sort First
- Explore DwellForms Wall Kits for Your Next Rental
- Frequently Asked Questions
Why Temporary Wall Panels Suit Apartment Living
Temporary wall panels are modular, non-permanent wall coverings that attach without paint or structural drilling, so renters can change a room’s look and remove it later.
Renting rarely rewards permanence. You stare at the same magnolia box for a year, then pay for the privilege of repainting it.
The tension worth naming: most “renter-friendly” products are neither. They peel paint, sag after a month, or cost more than the bond they’re meant to protect.
That’s the filter we’ll apply to every option below.
Types of Temporary Wall Systems Compared
Four families dominate the market, and they solve different problems. Decorative panels prioritise looks, freestanding partitions prioritise space division, wallpaper prioritises coverage, and modular systems prioritise reconfiguration.
| System | Attachment | Reusable | Best For | Main Trade-off |
|---|---|---|---|---|
| Decorative panels | Adhesive or hook-and-loop | Yes | Feature walls | Surface must be clean and flat |
| Peel-and-stick wallpaper | Adhesive backing | Rarely | Full-wall colour | Can lift paint on removal |
| Freestanding partitions | Floor-standing frame | Yes | Dividing a room | Takes floor space |
| Modular interlocking panels | Tool-free clips or adhesive tabs | Yes | Reconfiguring layouts | Higher upfront cost |
Decorative Panels, Wallpaper and Freestanding Partitions Side by Side
Peel-and-stick wallpaper is the cheapest way to cover a large wall, and the most likely to take paint with it.
Freestanding partitions divide space without touching the wall at all. They’re the safest option for a strict lease, but they eat floor area in a small apartment.
Decorative modular panels sit between the two. They’re pricier than a wallpaper roll, but they lift off, pack flat, and go back up somewhere else.
Removable Wall Panels: What to Check Before You Buy
Removable wall panels are only as good as their attachment method.
Ask the seller directly how the panels come off. If the answer is vague, walk away.
Watch out: adhesive products applied to freshly painted walls, or walls painted less than a few weeks ago, are the most common cause of paint lift.
For a deeper look at what adhesive does to painted surfaces, read will adhesive wall panels damage paint before you buy anything.
Damage Risk by Attachment Method and Wall Surface
Damage risk tracks the attachment, not the panel. Here’s how the methods stack up:
- Hook-and-loop or felt tabs: lowest risk on sealed, flat paint; releases with a steady pull.
- Pressure-sensitive adhesive backing: moderate risk; can lift paint on glossy or poorly bonded surfaces.
- Traditional wall anchors and screws: highest risk; leaves holes that need filling.
Textured walls, brick, and heavily angled corners are the hard cases. Adhesive struggles on texture because it can’t make full contact. In those rooms, a freestanding divider or a floor-to-ceiling tension system is the honest recommendation.
No-Drill Wall Panels: How They Stay Up and Stay Straight
No-drill wall panels stay up through a combination of low-tack adhesive tabs and a rigid panel core that spreads load across the surface.
This is where cheap kits fail. A flimsy panel bows under its own weight, and once it bows, no adhesive saves it.
Our DwellForms™ panels use 100% recycled PET felt, which is dense enough to hold shape and light enough to hang without anchors.
If you’re coming from peel-and-stick wallpaper, expect a different installation rhythm.
Temporary Room Divider Panels for Open-Plan Apartments
Temporary room divider panels create a boundary in an open-plan apartment without building one. They work best when you need to separate a work corner, a sleeping zone, or a dressing area from the main living space.
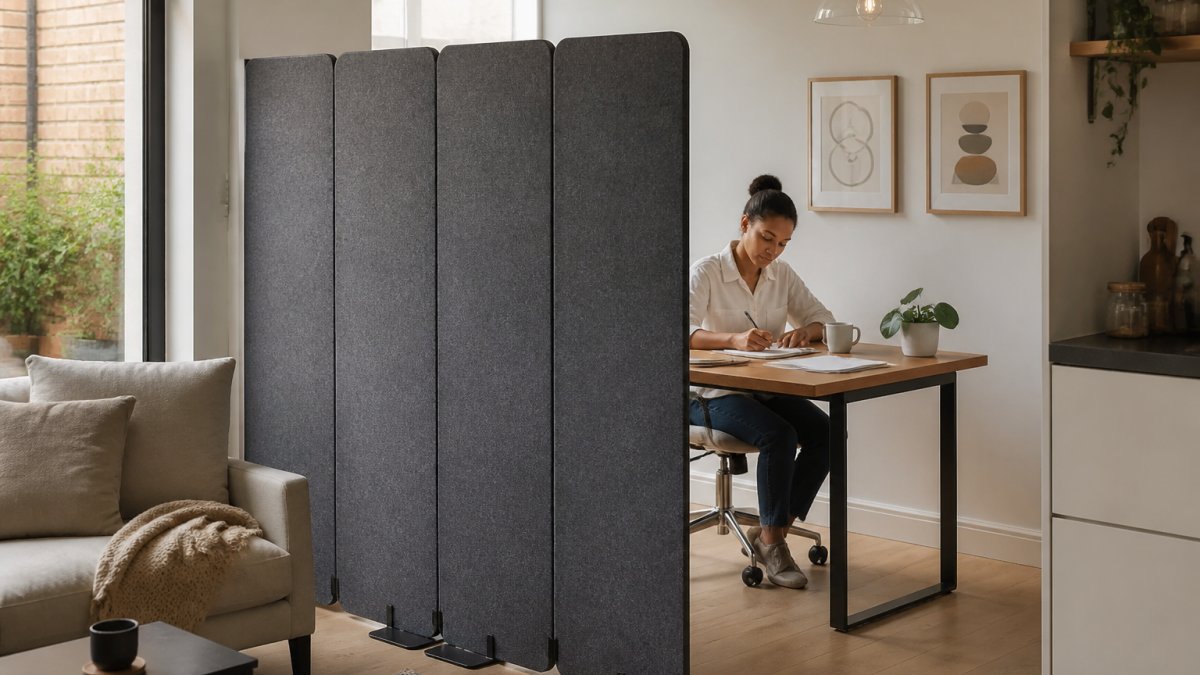
The mistake most people make is buying a divider that’s too short. A panel that stops at chest height divides sightlines but not sound or light. If privacy is the goal, go floor-to-ceiling or close to it.
Sound, Light and Privacy Performance
Panels are not soundproofing. They block sightlines and add a soft surface that takes the edge off echo, but they won’t silence a neighbour’s television.
Light matters more than people expect. A solid divider darkens the room behind it, which is fine for a sleeping nook and bad for a workspace.
For renter-friendly fixes that target noise properly, our guide to apartment acoustics and no-drill fixes covers sealing gaps first, which does more for noise than any panel.
Wood Panelling for Apartment Walls: Wood-Look Without the Weight
Wood panelling for apartment walls usually means one of two things: real timber slats, which are heavy and need fixing, or wood-look finishes on a lightweight core. The second is the only realistic option for a rental.
Real wood slats look superb and cost accordingly. They also need anchors, which means holes, which means a conversation with your landlord.
Wood-look panels give you the grain and warmth without the weight or the drill.
Board and batten is the other popular request. It’s a genuine renovation, not a removable treatment, so save it for a home you own.
Installation Steps, Costs and Lease Rules to Sort First
Installation takes an afternoon for a single wall. Sort the lease question before you sort the layout, because consent rules can change your whole plan, and sort the safety question before you buy, because a panel that tips or blocks egress is a problem no adhesive can fix.
Lease and consent: what to check first
- Read your tenancy agreement. Look for the clause on alterations, fixtures, and additions. Most agreements require written consent for anything fixed to a wall, and some treat adhesive-mounted panels as a fixture even when they leave no mark.
- Ask for written consent if your agreement requires it. Get it in writing, not verbally, a text message or email is enough, but keep it.
- Check your bond position. Your landlord can only deduct for damage beyond fair wear and tear. Photograph the wall before installation and after removal so you have a record.
- Check body corporate or building rules if you are in an apartment complex. Some buildings restrict alterations to common-property-facing walls, balconies, and corridors, and a few restrict anything that changes the exterior appearance.
Tenancy law sets the framework and your individual agreement sets the detail. The Tenancy Services guidance on alterations and fixtures explains what landlords can and can’t require, and it’s worth reading before you buy. Our six-step bond protection checklist for renters combines the consent process with tested installation and removal methods.
Safety, stability and building-code limits
A temporary partition is not a building consent matter in most apartments, but it can become one if it creates a room, blocks a means of escape, or interferes with smoke alarms, sprinklers, or ventilation. The practical rules:
- Do not block egress. A divider that narrows a hallway or covers a door is a fire risk, and it may breach your tenancy agreement and the building’s fire evacuation scheme.
- Anchor anything taller than about 1.8 m. Freestanding panels that are tall and narrow can tip; use the manufacturer’s wall strap or a weighted base, and keep them away from open windows and balconies.
- Respect ceiling height. Floor-to-ceiling tension systems need a solid ceiling fixing point; suspended ceilings and bulkheads often will not take the load.
If you are unsure whether a partition counts as a structural alteration, ask before you buy. A five-minute email is cheaper than reversing a consent breach.
Installation steps
- Clean and dry the wall. Dust and moisture are the enemy of any adhesive. Wipe with a damp cloth and let it dry fully.
- Let new paint cure. Freshly painted walls are the most common cause of paint lift; wait at least four weeks.
- Plan the layout on the floor first. Move panels around before committing.
- Start from a level line. Use a spirit level; crooked first panels cascade.
- Press and hold each panel for the full time the instructions specify, usually 30 seconds per tab.
- Check after 24 hours and re-press anything that’s lifted.
- Remove slowly and steadily at the end of the tenancy, warming the adhesive with a hairdryer on a cool setting if it resists.
Costs: what to budget
Pricing depends on wall size, panel quantity, finish, and delivery, so check current pricing on our site rather than working from a guess. As a planning guide, budget in NZD and allow for:
- Panels: the largest line item; cost scales with wall area and finish.
- Adhesive tabs or mounting hardware: usually included in a kit, but replacement tabs are a small ongoing cost.
- Tools: a spirit level, tape measure, and pencil, most households already own these.
- Delivery: varies by location and order size.
For a realistic budget breakdown, see our guide to removable wall panel costs.
Photograph the wall before and after. If a landlord disputes a bond deduction, dated photos are the difference between a clean exit and a costly argument.
Explore DwellForms Wall Kits for Your Next Rental
DwellForms™ wall kits are modular, no-drill panels made from 100% recycled PET felt, built to add colour, texture, and architectural shape to a rental without paint or renovation. Shop DwellForms™ wall kits to find a kit that fits your rental.
Best for: renters who want a designed wall without touching the paint.
Skip if: you need full soundproofing or a permanent built-in look.
Frequently Asked Questions
Will temporary wall panels damage my apartment walls when I remove them?
It depends on the attachment method. Adhesive-backed products carry the most risk: on painted plasterboard, low-VOC paint or freshly painted walls, the adhesive can lift paint or leave residue. Tension-mounted and freestanding systems avoid the wall surface entirely, so there is nothing to peel off. Before buying, check your tenancy agreement and ask the landlord what fixings are permitted, then test any adhesive product on a hidden patch first. Photograph the wall before installation so you have a record at move-out.
Are no-drill wall panels stable enough to stay up long term?
No-drill wall panels stay put when the mounting method matches the wall. Tension poles need a firm ceiling and floor to grip; adhesive systems need a clean, smooth, sealed surface; modular felt kits use lightweight panels that spread load across a wide contact area. Textured walls, brick and uneven plaster can defeat adhesive and suction fixings, so check the surface first. Follow the manufacturer’s weight limits per panel and avoid hanging heavy items from the panels themselves.
Can temporary room divider panels split a studio or open-plan apartment?
Yes, and they are the least invasive way to do it. Freestanding dividers need no fixing at all, so there is no lease issue, and they can be moved when you rearrange the room. For sound and privacy, choose a solid or dense panel rather than an open frame, and run the divider floor to ceiling where possible to close the gap that lets noise through. Check the panel height against your ceiling before ordering, and leave clear walkway space on both sides.
How much do temporary wall panels for apartments cost?
Pricing depends on the panel type, the area you want to cover and delivery, so get a quote rather than budgeting from a single figure. As a rule, budget by price per square metre and measure the wall first: height times width gives you the coverage figure to compare quotes against. Add the cost of any mounting hardware if it is not included. Lifted Plus lists current DwellForms kit pricing on its website, and kits are reusable, so the cost spreads across every move.
Your apartment doesn’t have to stay blank until you buy a house. The challenge is finding a wall treatment that looks intentional, stays put, and leaves nothing behind when you go. Lifted Plus builds DwellForms™ kits for exactly that: no-drill modular panels, 100% recycled PET felt, and a system made to move and reconfigure with you. Get started with Lifted Plus and turn that blank wall into something that feels like yours.

