
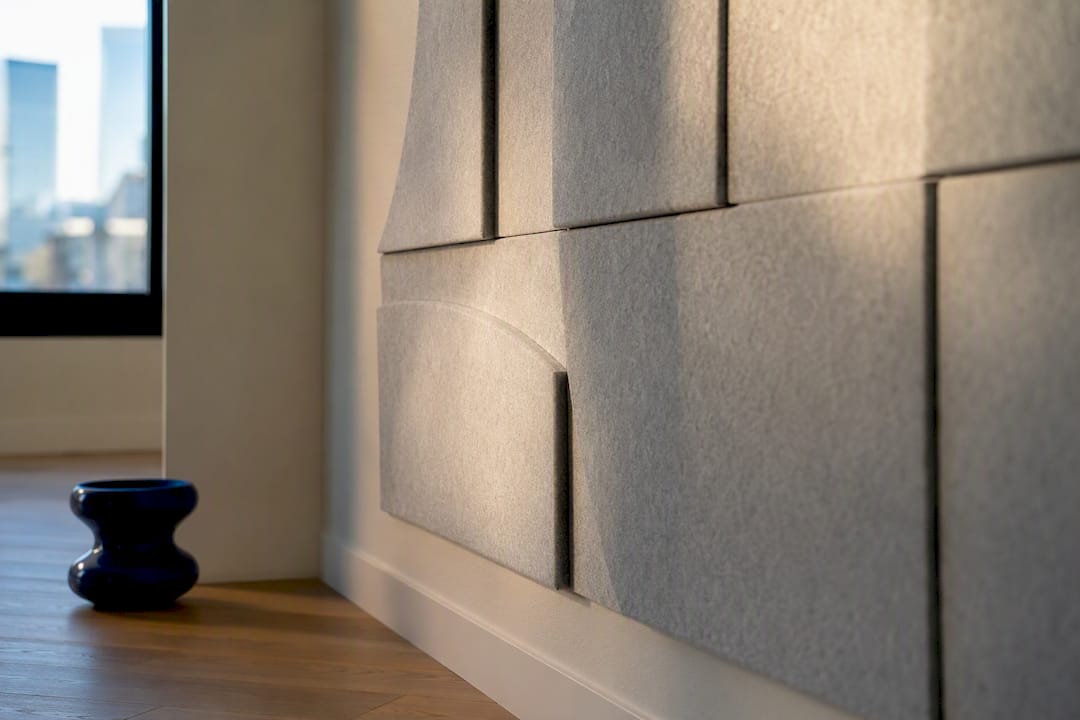
Felt wall panels give you colour, sculptural texture and a genuine feature wall without touching paint, plaster or a drill. The main felt wall panels benefits are visual impact at scale, reversible no-drill installation, and portability, which makes them suited to renters, apartment dwellers and homeowners who want their walls to feel finished without a permanent commitment. This guide covers where they work, how to fit them properly, and how to take them with you when you move.
TL;DR:
- Felt panels are best installed on smooth, cured drywall or plasterboard for reliable adhesion, while textured or older painted walls increase removal risk.
- Testing a small panel on your wall for 24 to 48 hours before full installation can prevent damage, especially on textured or older surfaces.
- Adhesive pads rated for the panel’s weight and surface type are essential, and a clear removal process should be available from the manufacturer.
- Panels can be disassembled, stored flat, and reused in multiple homes, making them a cost-effective and portable alternative to repainting.
- Felt panels add a slight insulation benefit and work well with modern, minimalist, and Scandinavian decor styles, but are mainly decorative rather than soundproofing.
Table of Contents
- What are the real benefits of felt wall panels?
- Why PET felt and removable mounts matter for renters
- Will felt panels work on your wall type?
- How do you install a felt feature wall step by step?
- How do you remove and reuse felt panels when you move?
- Do felt panels add any thermal or energy benefit?
- Do felt panels suit every decor style?
- Author perspective: why colour-led, renter-friendly panels matter now
- DwellForms™: a colour-led option built for renters
- Sources
- FAQ
What are the real benefits of felt wall panels?
Small framed prints and single canvases rarely change a room’s feel. A modular felt panel layout covers a metre or more of wall in colour, shape and dimension, which reads as architectural rather than decorative. That shift from “wall art” to “wall design” is the biggest reason renters reach for panels over another print.
The practical case is just as strong. Panels install with tested adhesive pads instead of nails, screws or paint, so there’s no filling, sanding or waiting for a top coat to dry. Modular kits can go up in an afternoon and, because they’re not fixed permanently, they qualify as a genuinely renter-friendly feature wall rather than a semi-permanent gamble on your bond.
There’s also a value argument that’s easy to overlook. A single panel kit typically costs less than a full repaint job or a large custom art commission, and unlike paint, it comes with you.
- Large-scale colour and texture impact without a paintbrush in sight
- No drilling, no filling, no wall damage during install
- Reusable across multiple rentals or house moves, so the spend isn’t a one-off
- A sense of ownership over a space you don’t technically own
That last point matters more than the marketing usually admits. Colour confidence in a rental is rare, because most leases discourage anything permanent. Panels solve that tension directly.
Why PET felt and removable mounts matter for renters
The material doing the work here is PET felt, made from recycled plastic, and it’s chosen for decorative reasons rather than acoustic ones. It holds colour well, cuts cleanly into precise shapes, and is light enough that a properly rated adhesive pad can hold it without strain. Architects comparing PET felt against acoustic-grade panels note it’s the colour fastness and precision cutting that make it useful for feature walls, not sound absorption.
Mounting is where renters should pay closest attention. Expect one of three approaches: manufacturer-supplied adhesive pads (the most common and easiest to remove cleanly), peel-and-stick backing, or tension or top-mount systems for surfaces where adhesive isn’t ideal. Before buying, check the adhesive’s hold rating, which wall surfaces it’s designed for, and whether removal instructions are published at all.
- Adhesive type and stated hold rating (matched to panel weight, not just size)
- Recommended surfaces, and any surfaces explicitly excluded
- A documented removal process, not just an install guide
Pro Tip: If a product page doesn’t mention how to take the panel down, that’s a bigger warning sign than any install video. A brand confident in its adhesive will show you the removal step, not just the highlight reel.
One caveat worth sitting with: no adhesive is damage-free in every case. Wall texture, paint age and how long the panel’s been up all affect whether it lifts cleanly.
Will felt panels work on your wall type?
Not every wall behaves the same way under adhesive, and testing before you commit saves both your panels and your bond. Smooth, cured drywall or plasterboard is the most forgiving surface. Textured plaster, popcorn ceilings extending onto walls, unsealed brick and tiled surfaces are far less predictable, and older or flaking paint is one of the biggest failure points, since the adhesive can end up stronger than the paint’s bond to the wall itself.
- Clean a small test area with a lint-free cloth and let it dry fully.
- Apply a single test patch for 24 to 48 hours, then peel slowly from one corner.
- Check the surface underneath. No paint transfer or texture damage means you’re likely clear to proceed.
If you’ve repainted recently, wait at least two to four weeks before testing, since fresh paint keeps curing and can bond too tightly to release cleanly. Freshly painted, humid, or sun-baked walls all raise the risk of a messy result. For textured or older painted walls, a tension-top mount or fabric-style solution is often the safer choice over adhesive alone.
Watch for these red flags: visible flaking or chalking paint, consistent damp or humidity (bathrooms, poorly ventilated rooms), and walls that get long stretches of direct afternoon sun, which can soften adhesive over time.
How do you install a felt feature wall step by step?
Getting a considered result comes down to sequence, not skill. Rushing the layout stage is where most home installs go wrong.
Plan first. Choose your wall, measure its width and height, and decide on scale, a single accent panel, a cluster, or a full feature wall. Order a colour sample or a small sample kit before committing to a full order, since felt reads differently under artificial light than it does on a screen.
Then install:
- Clean the wall surface and let it dry completely.
- Mark a plumb line as your vertical reference point.
- Lay panels out on the floor first to confirm the pattern and spacing.
- Follow the manufacturer’s adhesive pad instructions exactly, including any recommended pressure or wait time.
- Position and press the first row along your plumb line.
- Work outward row by row, checking alignment every second or third panel.
Keep a spirit level, a soft cloth, a tape measure and a pencil on hand. That’s genuinely all the toolkit an adhesive-pad install requires.
Pro Tip: Install in the coolest part of the day if your wall gets direct sun. Warm adhesive is softer and more forgiving to reposition, but it also loses grip faster, so avoid pressing panels onto a wall that’s still warm from midday light.
If alignment drifts, stop and reset the row rather than fixing forward. Corners are the most common weak point, so press pad edges firmly and hold for the manufacturer’s stated time, not just a quick push.
How do you remove and reuse felt panels when you move?
Removal technique matters as much as installation, especially with a bond on the line. Follow the manufacturer’s specific removal steps rather than a general “just peel it off” approach. If the panel’s been up for months, gently warming the adhesive (a hairdryer on low, held at a distance) can help it release without pulling at the wall surface.
- Peel slowly from one corner, working across rather than straight out
- Address any minor residue with a manufacturer-recommended adhesive remover, not a harsh solvent
- Wipe gently, don’t scrub, if there’s a small amount of paint lift
For storage, keep panels flat, stack them with a soft cloth or felt offcut between layers to protect edges, and photograph your layout before you take it down. That photo makes reinstalling in a new home far faster than reconstructing the pattern from memory.
Pro Tip: Do a final test patch removal on an inconspicuous section before pulling down the whole wall, especially if the panels have been up longer than six months. It tells you what to expect before you’re staring at a bare wall on moving day.
When in doubt about your lease terms, a quick check with your landlord before installation is cheaper than a dispute over the bond later.
Do felt panels add any thermal or energy benefit?
Felt wall panels aren’t sold as an insulation product, and DwellForms™ isn’t positioned as one either, but a layer of felt on a wall does add incidental thermal mass compared with bare paint or plaster. Felt is a naturally insulating fibre, and a full feature wall of panels sits as a soft buffer between the room’s air and the cold surface of an external wall.
This is a modest, secondary benefit rather than a headline reason to buy. Don’t expect a measurable drop in heating bills. What you can reasonably expect is a wall that feels slightly less cold to the touch in winter, and a room that feels a touch cosier simply because a hard, reflective surface has been softened by texture.
If energy efficiency and thermal comfort are a genuine priority in your home, window treatments tend to do more heavy lifting than wall decor. Products like interior shutters, for instance, are designed specifically around reducing heat loss and noise transfer through glazing, which is a different job to what a decorative panel is built for. Felt panels are a colour and texture solution first. Any thermal softening they add is a pleasant side effect, not the reason to install them.
Do felt panels suit every decor style?
Felt panels are more flexible than most renters expect, largely because the modularity does the styling work for you. A minimalist apartment might use a single muted tone in a geometric arrangement as a quiet accent. A maximalist living room can layer contrasting colours and shapes into a genuine statement wall. Because kits are modular, you’re not locked into one fixed pattern, you can rearrange panels as your taste or room use changes.
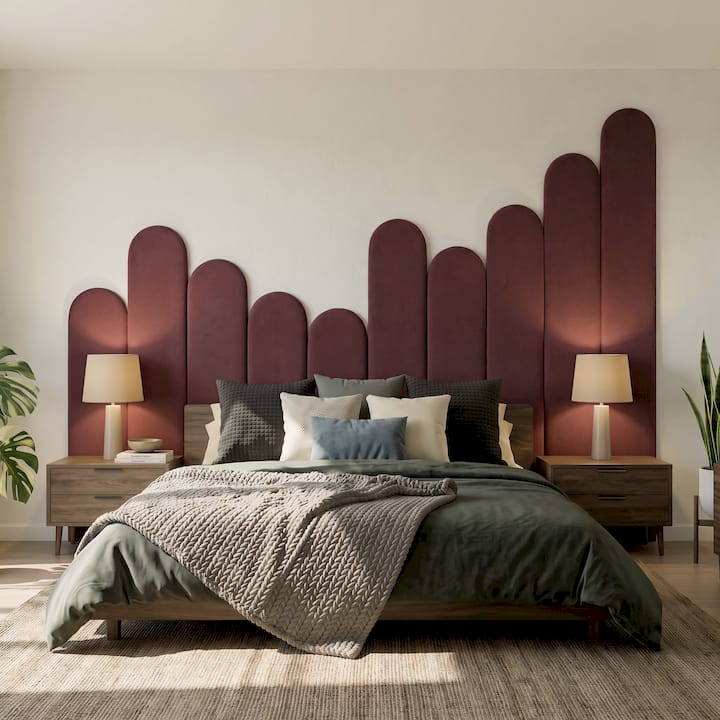
Colour range matters more here than most buyers initially think. A panel system offered only in three neutral shades limits you to matching existing decor. A system with a broader palette, plus the option to mix and layer colours across a single wall, lets you actively shape the room’s mood rather than just filling a gap.
Texture also plays into existing styles more than people expect. Sculptural, dimensional panel arrangements pair naturally with mid-century, Scandinavian and contemporary interiors that already lean on clean lines and considered shapes. In a rental with existing beige carpet or a landlord-chosen paint colour, a bold panel wall becomes the one element in the room that’s genuinely yours, which is often the entire point of choosing panels over a print.
Author perspective: why colour-led, renter-friendly panels matter now
Most rental advice focuses on what you can’t do to a wall. That’s backwards. The real question is what you can add without asking permission for anything permanent. Colour and texture do more for how a house feels than most people credit, and a temporary home doesn’t have to look or feel temporary.
If you’re unsure about colour, order a small sample or sample kit before committing to a full wall. It’s the cheapest way to avoid regret.
— Michelle
DwellForms™: a colour-led option built for renters
If everything above sounds like exactly the problem you’re trying to solve, DwellForms™ by Lifted+ is a New Zealand-designed modular panel system made from 100% recycled PET felt, built specifically around no-drill, no-paint installation.

Every kit ships with tested adhesive pads, clear layout guides and the option to order a sample kit first, so you can check colour and texture against your actual wall before committing to a full order. Panels are designed to be rearranged within a room or taken down entirely and reinstalled in a new home, which matters if you move more often than you repaint. The colour range is built around statement impact rather than safe neutrals, so you’re not settling for beige because it’s the only “safe” removable option.
If you’re ready to move past small framed prints and try a feature wall that’s genuinely yours, start with the Skyline modular kit or browse the removable wall panel idea gallery for layout inspiration before you order.
Sources
This guide draws on renter-focused testing and material comparisons, including rental-friendly wall paneling trials, panel-versus-wallpaper analysis, and Liftedplus’s own guide to damage-free wall panels.
- Why Modular Wall Panels Are Perfect for Renters
FAQ
Are felt wall panels actually damage-free?
No adhesive is guaranteed damage-free on every wall. Outcomes depend on wall texture, paint age and how long panels stay up, so a test patch before full installation is essential.
What wall surfaces work best for felt panels?
Smooth, cured drywall or plasterboard performs most reliably. Textured plaster, tiled surfaces and older or flaking paint carry higher risk and may suit a tension-top mount instead.
Do felt wall panels provide soundproofing?
Felt wall panels are a decorative product, not a soundproofing solution, and direct-mount installs don’t deliver the acoustic performance of lab-tested, cavity-mounted setups.
Can I take felt panels with me when I move?
Yes. Panels disassemble flat, store easily, and are designed to be removed and reinstalled in a new home, which is one of their main advantages over paint or wallpaper.
How much do felt wall panel kits typically cost compared with repainting?
Exact pricing varies by kit size and design, but a modular panel kit generally costs less than a full professional repaint and can be reused across multiple homes, unlike paint.