
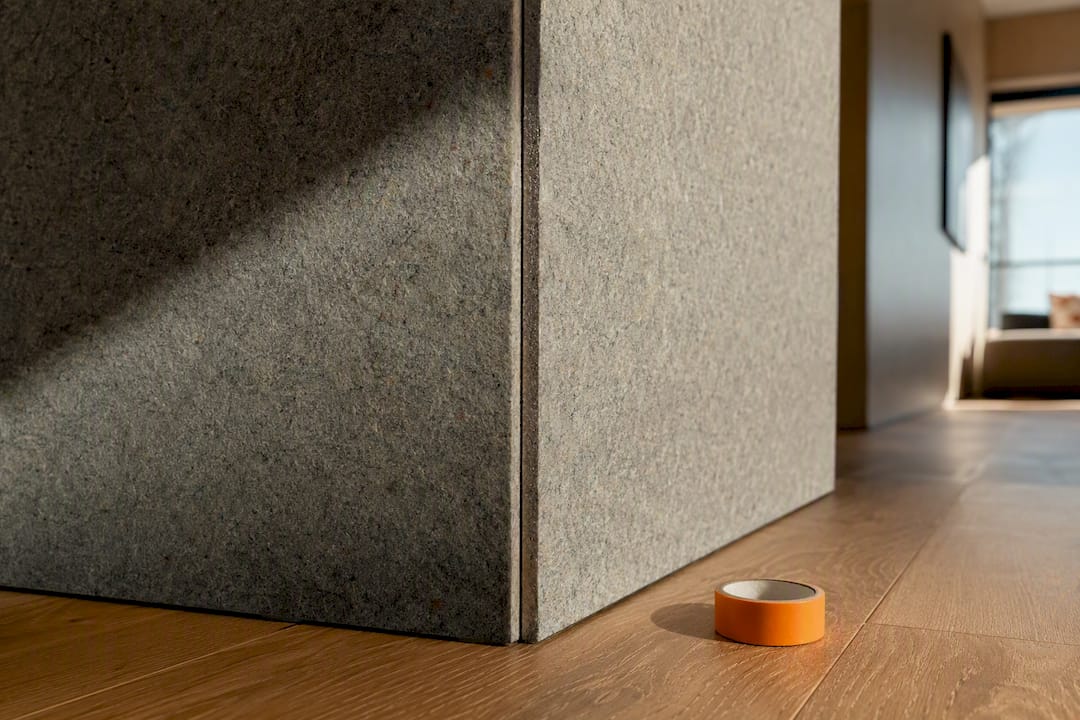
Finishing wall panel corners on a removable feature wall comes down to three methods: a butt joint sealed with flexible caulk, a slim wrap trim, or a V-groove hinge for anything that curves. Whichever you choose, leave a 1–2mm expansion gap at every corner rather than sealing panels edge to edge. DwellForms™ panels are built for exactly this kind of no-drill, reversible finishing, so you never need a single fastener to get a tidy result.
TL;DR:
- Leave a 1–2mm expansion gap at every corner to accommodate wall movement and humidity, avoiding rigid sealing that can cause lifting or gaps.
- Use coping, fillets, or wrap trims instead of mitres on uneven or out-of-square corners to prevent visible gaps and ensure a neater finish.
- When installing around curves, cut a V-groove into the panel’s back to allow flexible bending without cracking, especially on 12mm thick panels.
- Always dry-fit panels and measure carefully before applying adhesive, ensuring plumb lines and offsets are correct to prevent crooked seams.
- Peel panels slowly at a shallow angle during removal, warming adhesive pads with a hairdryer if needed to prevent paint damage or wall tearing.
Table of Contents
- Choosing between butt joints, trim pieces and a hinge for corners
- How do you finish inside corners without drilling?
- Getting a clean finish on outside corners
- Bending panels around curves with a V-groove hinge
- Getting trims, adhesive and alignment right the first time
- What tools actually make a no-damage install possible?
- How do you remove panels without wrecking the wall?
- Can you reuse wall panels after taking them down?
- What mistakes ruin a corner installation, and how do you avoid them?
- Designer perspective: treat the corner as a design detail
- Finish corners the DwellForms™ way, without a single drill hole
- Sources
- FAQ
Choosing between butt joints, trim pieces and a hinge for corners
The right corner method depends on three things: how flat your wall actually is, how square the corner is, and whether you’ll want to take the panels down later. A butt joint works when both walls meeting at the corner are reasonably flat and the angle is close to true. Trim pieces rescue you when the corner is out of square or the wall surface has texture, bumps, or old paint ridges. A V-groove hinge is the only real option when the panel itself needs to wrap around a curve rather than meet another panel at an angle.
Before you cut or fix anything, walk the corner with your hand and a spirit level.
- Check the angle: hold a set square or use your phone’s level app to see how far the corner strays from 90 degrees.
- Feel the surface: run a hand down each wall for bumps, old fillers or uneven paint that will stop a panel sitting flat.
- Decide on removability: if you’re renting, plan for trims and adhesive pads you can lift later, not anything permanent.
- Measure twice: corners are the one place where a few millimetres out throws off the whole visual line.
Whatever you pick, resist the urge to force panels tight into the corner. A hard seal with no room to move is one of the most common reasons feature walls start showing gaps or lifting edges within a few months, because PET felt still expands and contracts slightly with humidity and temperature.
How do you finish inside corners without drilling?
Inside corners are the most forgiving spot on a removable feature wall, provided you work through them in order rather than fixing panels as you go.
- Mark a plumb line. Start from the most visible corner in the room and draw a plumb vertical line with a spirit level. Every following panel keys off this line, which is what keeps the whole run square even if the corner itself isn’t.
- Dry-fit before you fix anything. Hold each panel in place, check the plumb line, and look at how the edge meets the corner before any adhesive comes out.
- Apply adhesive pads in a grid, not a bead. Press pads across the panel back in an even grid pattern, then press from the centre outward to bed the panel flat and push out any trapped air.
- If the mitre doesn’t seat, switch to coping or a fillet. Walls are rarely dead square, and forcing a mitred edge into an inside corner that’s slightly off often leaves a visible gap. Coping the joint, or running a narrow fillet trim down the seam, gives a cleaner result than fighting the angle, and pre-finished interlocking corner pieces or L-profiles are a solid shortcut if you’d rather avoid mitring altogether.
- Finish with flexible caulk where needed. A thin, paintable, flexible sealant closes any hairline gap without locking the panel rigid.
- Cut outlets and switches before final fixing. Measure the plate position, score the panel with a sharp blade, test the cutout against the switch, then only apply adhesive once it fits cleanly.
Pro Tip: Dry-fit every panel along a run before you commit any adhesive. Installers who skip this step are far more likely to end up with a crooked seam, because small errors compound corner by corner.
Getting a clean finish on outside corners
Outside corners show every flaw, which is why the trim choice here matters more than almost anywhere else on the wall.
A 45-degree mitre looks best when both walls are genuinely square, but that’s rarer than most people assume in older rentals or apartments with settled framing. If the angle is even slightly off, a mitred edge opens up a wedge-shaped gap that catches the eye from across the room. In that case, a slim L-trim or purpose-made corner profile is the better call: it wraps over the raw edge, protects it from knocks, and conceals the expansion gap you should be leaving anyway.
- Check both wall faces for square before deciding on a mitre versus a wrap trim.
- Dry-fit the trim first, holding it in place with low-tack tape while you check the line runs true.
- Support the join while adhesive cures, using tape rather than pressure alone, since a corner under tension will creep out of alignment overnight.
- Step back and check the sightline from normal viewing height and from the doorway, since corner errors are far more visible at eye level than close up.
Corner trim protects exposed panel edges and prevents delamination, and taking the extra time to measure and fit it properly is what separates a feature wall that looks considered from one that looks like a quick DIY patch.
Bending panels around curves with a V-groove hinge
Curved walls need a different approach entirely, because no amount of clever trim work makes a flat panel wrap a bow wall. The fix is a V-groove hinge cut into the back of the panel: for a 12mm panel, that means a 20mm total groove width centred on the bend line, leaving roughly 2mm of front thickness intact to hold the face together.
- Use a sharp utility knife and a straight edge, cutting the groove in short, controlled passes rather than one deep cut.
- Test the bend gently after each pass. Once it flexes to the radius you need, stop cutting.
- Dry-fit the curved section against the wall before any adhesive goes down, since a groove cut too shallow will crack rather than bend.
- For tight radii, or if you want the panel fully removable without weakening it at the fold, z-clip systems or flexible trims are often a better choice than scoring.
Pro Tip: Score in stages and re-test the bend between passes. Cutting the full 20mm width in one go on a 12mm panel is the single fastest way to snap the face rather than fold it.
Getting trims, adhesive and alignment right the first time
Every no-drill installation lives or dies on the same three details: the starting line, the adhesive pattern, and the gaps you leave behind.
Start with a plumb vertical line and fit your starter and corner trims before the first full panel goes up. Trims anchor the edges and give the whole run something square to reference, so check level again every few panels rather than trusting the first mark to hold for the entire wall.
- Apply adhesive pads in an even grid across the panel back, not a zigzag bead. A zigzag pattern is designed for permanent adhesion; a grid of pads gives even contact while still allowing repositioning during a removable install.
- Leave a consistent 1–2mm expansion gap at the top, bottom, and every corner rather than pushing panels tight against trims.
- Use flexible sealant to dress any visible gap, never a rigid filler, since PET felt needs room to move with temperature and humidity.
- Press from the centre of each panel outward once positioned, to bed the adhesive evenly and avoid trapped air pockets that show up as soft spots later.
Adhesive suits flat, sound walls particularly well; if your rental has textured or uneven plaster, a clip-based approach copes better with the imperfections and still comes down cleanly at the end of a tenancy.
What tools actually make a no-damage install possible?
You don’t need a tradesperson’s kit for this. A short, deliberate toolkit gets you a neater result than piling on hardware you won’t use again.
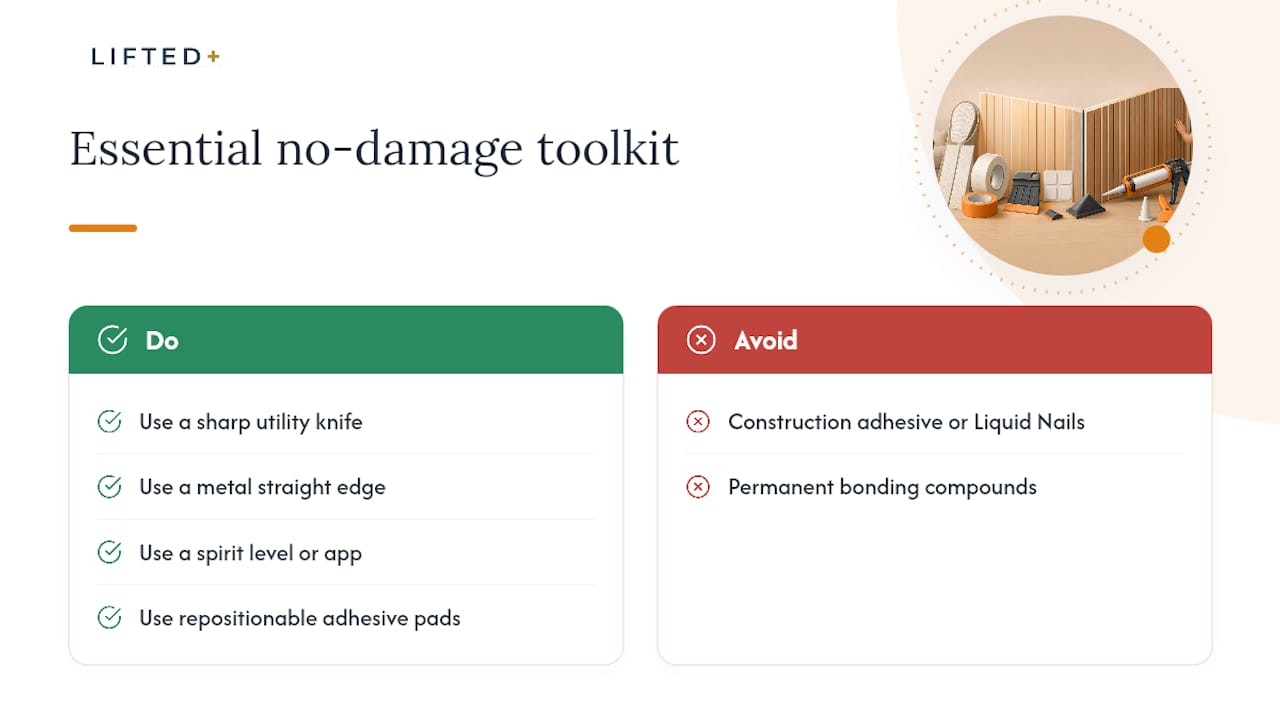
A sharp utility knife and a metal straight edge handle every cut, from switch cutouts to V-groove scoring, and a fresh blade matters more than a fancy handle. A spirit level or a levelling app on your phone keeps the plumb line honest across the whole run. A tape measure and a soft pencil mark cut lines without scratching the panel face. Low-tack painter’s tape holds trims and mitred corners in place while adhesive cures, and it lifts away without pulling paint or wallpaper underneath.
For fixing, tested adhesive pads designed for repositionable wall décor do the actual holding. Skip anything marketed as construction adhesive, liquid nails, or a permanent bonding compound. Those products are built to resist removal, which defeats the entire point of a renter-friendly feature wall. A small foam roller or a flat plastic scraper helps bed each panel evenly once it’s placed, pressing out air pockets from the centre toward the edges.
A soft cloth and a little warm water handle any adhesive residue on the wall itself once panels come down, and a hairdryer on a low, cool setting can soften stubborn pad adhesive enough to peel it away cleanly. Keep a small level and a fresh blade on hand for touch-ups if you rearrange panels later. This isn’t a big investment. Most of it is a one-off purchase that gets reused every time the wall changes, which is very much the point of a system built to be relaid rather than replaced.
How do you remove panels without wrecking the wall?
Removal deserves the same care as installation, because rushing it is what causes the paint damage people worry about with any stick-on wall product.
Start at a top corner and peel slowly at a low, shallow angle rather than pulling straight out from the wall. Pulling a panel straight off puts direct stress on the adhesive pad and the paint film underneath it; peeling sideways at a shallow angle lets the bond release gradually instead of tearing.
If a pad resists, warm it gently with a hairdryer on low heat for a few seconds. Warmth softens the adhesive without softening the panel, and it’s usually enough to let the pad let go cleanly. Never use a metal scraper directly against painted plaster. If residue remains, a plastic card or a soft cloth dampened with warm water lifts it without scratching the surface.
Work one panel at a time rather than yanking a whole run down in one go, which spreads the load unevenly and increases the chance of pulling paint with it. Check the wall after each panel comes away. If you see any lifting paint, stop and let the area dry before continuing rather than pushing on with a damp cloth. For a fuller walkthrough, DwellForms™’s own removal guide covers the sequence in more depth, including how to handle stubborn pads on textured or previously painted walls.
Can you reuse wall panels after taking them down?
Yes, and this is one of the genuine advantages of a modular, adhesive-mounted system over anything glued or nailed permanently. Panels that come off cleanly are just as usable in a new layout, a new room, or a new home.
Store panels flat rather than leaning them on an edge, since PET felt can bow slightly if left standing at an angle for weeks. A wardrobe shelf, under a bed, or flat against a spare wall all work fine. Keep any leftover adhesive pads and trims together in a labelled bag or box so you’re not hunting for matching pieces months later when you move.
Before reusing a panel, check the back for old adhesive residue and clean it off with a soft cloth. Fresh pads generally hold better than trying to reuse old ones, so budget for a new set of pads at the next install rather than stretching worn adhesive across a second or third setup. If a panel picked up a scuff or a slight colour change from sun exposure, it may sit better in a lower-light spot in the new arrangement rather than front and centre.
This is also where colour planning pays off. Because DwellForms™ kits come in distinct colour and shape combinations, a layout that didn’t quite work in one room often reads completely differently once rearranged somewhere with different light or a different colour scheme next to it.
What mistakes ruin a corner installation, and how do you avoid them?
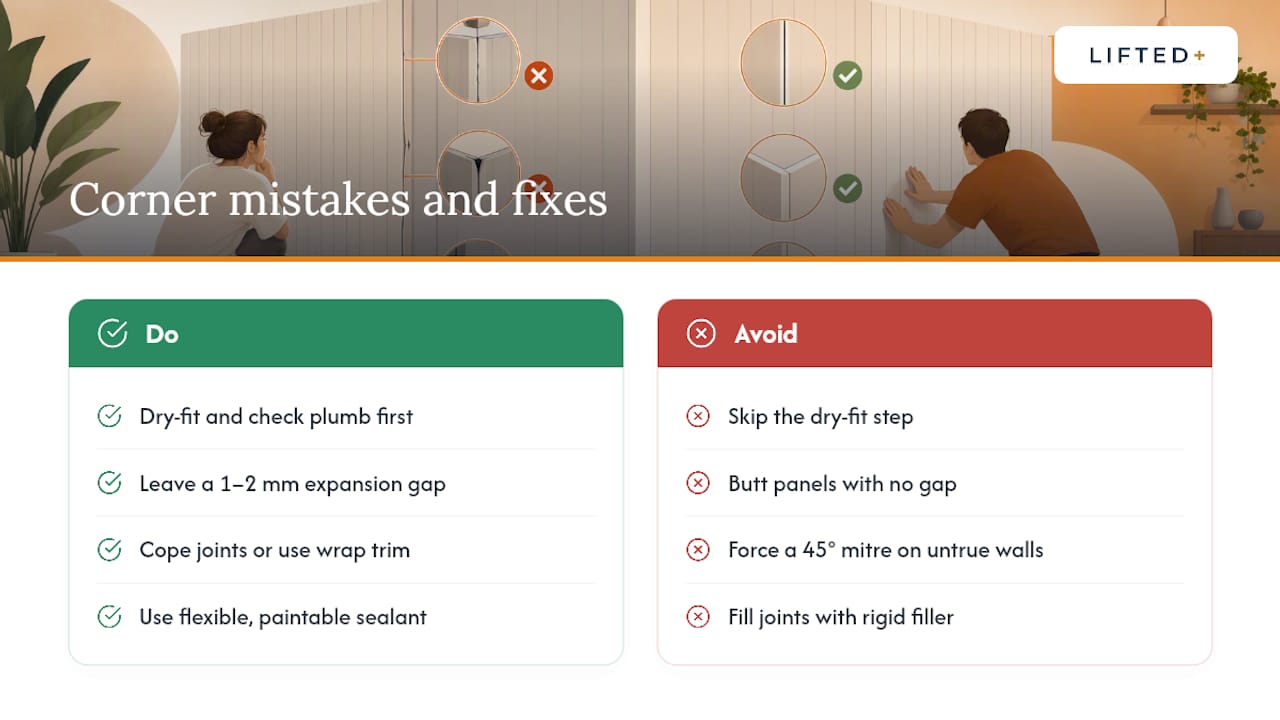
Most corner problems trace back to one of four habits, and every one of them is avoidable with a bit more patience at the start.
Skipping the dry-fit. Installers who go straight to adhesive without test-fitting are far more likely to end up with a crooked seam, because small errors at the first corner compound down the whole wall. Always dry-fit, check plumb, then fix.
Sealing corners with no expansion gap. Butting panels hard into a corner with no room to move is the single most common cause of visible gaps or lifting edges appearing weeks later, as the material responds to normal humidity and temperature changes. Leave that 1–2mm gap every time.
Forcing a mitre on an out-of-square wall. Very few walls are perfectly true, and pushing a 45-degree mitre into a corner that isn’t will only open a wedge-shaped gap. Cope the joint or switch to a wrap trim instead of fighting the angle.
Using rigid filler instead of flexible sealant. Rigid fillers crack the moment the panel shifts even slightly, which it will. A flexible, paintable caulk moves with the material instead of fighting it.
Rushing switch and outlet cutouts. Cutting first and checking fit second almost always leaves a visible gap around the plate. Measure, score in light passes, test-fit, then commit.
Designer perspective: treat the corner as a design detail
The instinct with any DIY wall job is to hide the corner, to make the join disappear. I’d argue the opposite: a small reveal at a corner, or a trim in a contrasting shade, reads as intentional rather than accidental. It tells the eye this was designed, not just stuck up in a hurry.
Test your colour choice before committing to a full run. A sample panel against the actual corner light tells you more in five minutes than any swatch photo will. DwellForms™’s sample kits exist precisely for this, and pairing them with the installation guidance in our homeowner’s guide gives you the confidence to commit to colour without committing to anything permanent on the wall itself.
— Michelle
Finish corners the DwellForms™ way, without a single drill hole
DwellForms™ gives you a route to a finished, architectural-looking corner that a paint job or a hung print simply can’t match, because it’s built from modular PET felt panels designed from the outset for no-drill installs, curves, and corners. Where a mitred timber trim demands tools and confidence you may not have, DwellForms™ panels use tested adhesive pads and starter trims that go up in an afternoon and come back down just as easily when your lease ends or your taste changes.

If you’re still deciding on a layout, start with a sample pack to see the colour and texture against your actual wall before you commit to a full kit. Follow the plumb line and starter trim guidance in this article, and if a tricky corner has you stuck, our support team can talk you through it. Ready to commit to a full run? The DwellForms™ Skyline modular wall kit is the natural starting point for a feature wall that handles both straight runs and corner detail cleanly.
Sources
- PET wall panels — installation guide
- How to install wall panels: the right way
- How to install paneling with perfect corners
- How to use corner trim for a clean panel installation
External guides cover general panel installation; always follow DwellForms™’s own product instructions for removable, no-drill setups.
FAQ
What size expansion gap do wall panels need at corners?
Leave roughly 1–2mm at every corner and along the top and bottom edges, then mask it with a flexible sealant or a slim corner profile rather than sealing panels edge to edge.
Can you bend a wall panel around a curved wall?
Yes, using a V-groove hinge cut into the panel back. On a 12mm panel, that’s a 20mm total groove width centred on the bend line, leaving about 2mm of front thickness intact.
Do you need to drill to fit panels into a corner?
No. Removable PET felt panels like DwellForms™ use tested adhesive pads and starter trims, so corners can be fitted, adjusted, and later removed without any drilling or wall damage.
What if a mitred corner won’t sit flush?
Coping the joint or switching to a pre-finished interlocking corner piece or L-profile usually gives a cleaner result than forcing a mitre into a wall that isn’t perfectly square.
How do you remove wall panels without damaging paint?
Peel slowly from a top corner at a shallow angle rather than pulling straight off, and warm stubborn adhesive pads gently with a hairdryer before easing them away.