
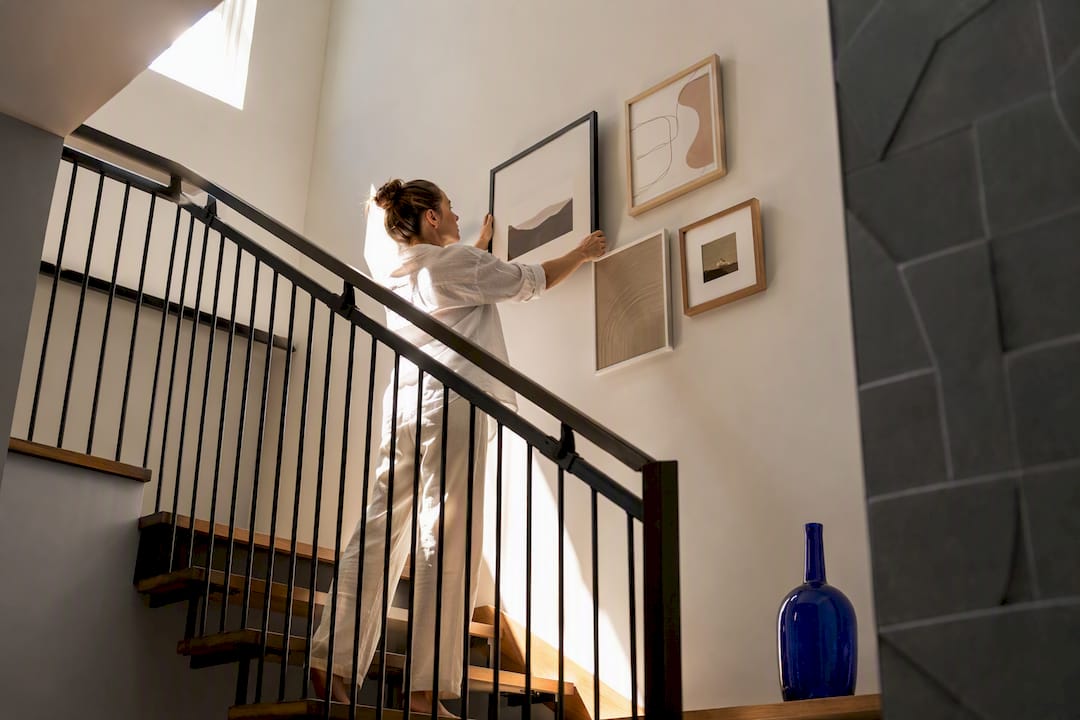
Pick one strategy and commit to it: a climbing gallery wall, a single oversized piece, or a bold wallpaper moment, rather than scattering odd frames up the stairwell. That single choice does more for a staircase than any individual object. Renters can get the same visual weight with removable, no-drill options like adhesive-mounted panel kits, so a landlord’s no-holes policy never has to mean a bare, forgettable stairwell.
TL;DR:
- A staggered gallery following the stair’s angle, with 8 to 12 frames anchored by a large central piece, offers a balanced and intentional look.
- A single oversized statement item, covering at least two-thirds of the wall’s width, creates a bold impact in narrow or dark stairwells.
- Removable, renter-friendly wall treatments like peel-and-stick wallpaper or DwellForms™ panels enable versatile decor without permanent damage.
- For low-light or awkward spaces, bold patterns, saturated colors, or textured objects like mirrors and woven baskets enhance visual interest.
- Prioritize quick, reversible decor strategies, such as adhesive mounts and temporary panels, to allow easy updates aligned with changing tastes or rental restrictions.
Table of Contents
- Stairs wall decor ideas that actually work: start with one strategy
- Gallery walls that climb with the stairs
- Single oversized statement pieces for impact
- Wallpaper, paint and colour-blocking ideas for stairwells
- Architectural treatments: panelling, moulding and wood slats
- Shelves, ledges and curated objects along the climb
- 3D objects, mirrors, clocks and stair riser decorating
- Lighting and safety: how to light and protect stair displays
- Renter-friendly feature wall options and DwellForms™ expertise
- Choosing art and decor styles to complement different stairwell aesthetics
- Seasonal or thematic decoration ideas for stairs wall decor
- Why most stair wall advice misses the point
- How DwellForms™ helps you create a no-drill staircase feature wall
- Sources
- FAQ
Stairs wall decor ideas that actually work: start with one strategy
Most stairwells fail for the same reason: too many small decisions made one frame at a time, with no plan for how the eye travels up the slope. A Homes and Gardens guide on staircase walls makes the same point designers repeat constantly. Maximise the vertical space you have with oversized art, a curated gallery, or a statement lighting moment rather than a scatter of leftover pieces.
The good news is you do not need a trade qualification to get this right. You need a plan before you pick up a hammer, or better yet, before you reach for an adhesive strip at all. The sections below walk through the main approaches, in order of how much commitment each one asks of you, starting with the most popular: the gallery wall.
Gallery walls that climb with the stairs
A staggered gallery that follows the stair’s angle reads as intentional, not accidental, because the frames rise in step with your feet rather than sitting in a rigid grid.
- Pick a stagger, not a straight line. Offset each frame slightly higher than the last, tracking roughly two thirds of the way up the rise, so the arrangement climbs with you.
- Plan for 8 to 12 frames, anchored by one larger piece around 24 by 36 inches to give the wall a visual centre of gravity.
- Build it on the floor first. Cut paper templates to match each frame and tape them to the wall in the intended stagger, a step the D and G Flooring guide to stair walls recommends before anyone commits to a hole. It costs nothing and saves you from a lopsided result.
- Choose renter-friendly hanging hardware. Rated adhesive picture hooks and slim picture ledges hold most framed art without a single drill mark, provided you respect the pack’s stated weight limit per hook.
Single oversized statement pieces for impact
Sometimes one large piece beats a dozen small ones, especially in a narrow or dim stairwell where too many focal points compete for attention. Designers lean toward this approach when the wall itself is awkward: low ceiling height, an odd dogleg, or a run of wall broken up by a window.
- Choose one statement piece when the stairwell is dark, narrow, or already busy with a patterned runner or bannister detail.
- Size the piece to at least two thirds the width of the longest straight run of wall so it doesn’t look stranded.
- Position it on your longest sightline, meaning the spot you see first from the bottom of the stairs or the landing above.
- Textures that read well here include a woven tapestry, a large framed textile, or an oversized mirror that bounces light back down the stairwell.
A guide from The Spruce lists exactly this kind of single-piece solution among its practical stair wall ideas, alongside gallery walls and riser treatments. For low-damage mounting, adhesive strips rated for the piece’s weight beat traditional hooks on plaster or rental-friendly walls, and if you’re hanging a mirror, always check it’s rated for vertical mounting before you commit to a spot near a stair edge.
Pro Tip: If you’re torn between a gallery and a single statement piece, measure your stairwell’s longest unbroken wall run. Anything under about 1.8 metres usually looks better with one strong piece than a dozen competing frames.
For more on how a single focal artwork can transform a room’s feel, see this piece on how statement wall art changes a room.
Wallpaper, paint and colour-blocking ideas for stairwells
Stairwells are one of the few spots in a home where a bold pattern or saturated colour rarely feels like too much, because the vertical transition frames it differently than a flat wall would. Homes and Gardens notes that designers deliberately push colour further in stairwells than they would elsewhere in the house, precisely because the space reads as a transition rather than a room you sit in.
- Go large scale with pattern. Oversized botanicals, geometric repeats, or a diagonal stripe that echoes the stair pitch all read well from a distance.
- Try a two-tone colour block, splitting the wall horizontally at handrail height, or a full colour-drench that wraps skirting, wall, and trim in one shade.
- Choose peel-and-stick wallpaper when the wall belongs to a landlord. It gives you the pattern without the commitment, and D and G Flooring recommends exactly this kind of removable treatment for renters wanting a stairwell transformation without permanent works.
- Match colour intensity to the light the stairwell actually gets. A north facing or windowless stairwell can carry a deeper, moodier tone than one flooded with natural light all day.
Architectural treatments: panelling, moulding and wood slats
Panel details add a sense of craft to a stairwell that flat paint alone cannot. Board-and-batten brings a cottage or coastal feel, picture-frame moulding suits a more traditional or heritage-style home, and vertical wood slats read as contemporary and warm at once. Houzz’s staircase galleries show all three treatments working across very different home styles, from character villas to new-build apartments.
- Board-and-batten suits homes with existing skirting or wainscoting detail elsewhere.
- Picture-frame moulding adds formality and works especially well below a handrail line.
- Vertical slats create a modern, textured feature without needing a full renovation budget.
- For renters or anyone wary of permanent changes, thinner MDF battens or peel-on slat panels mimic the look with far less commitment.
- If the treatment involves structural fixing into a stairwell with load-bearing considerations, bring in a professional rather than guessing.
Shelves, ledges and curated objects along the climb
Picture ledges let you display far more than you could hang conventionally, and you can rearrange the pieces on them whenever the mood strikes, without a single new hole.
- Stagger the ledges to follow the stair line, spacing each one roughly 30 to 40 centimetres above the last for a rhythm that matches your step.
- Respect the depth limit of a narrow staircase. A shelf under 10 centimetres deep keeps clearance safe on tight stairs, since anything deeper starts to intrude on the walking line.
- Mix textures on each ledge. Combine a framed print, a small trailing plant, and one or two ceramic objects rather than lining up identical frames.
- Use a renter-friendly shelf system with rated adhesive mounts, and distribute weight across multiple fixing points instead of relying on a single centre bracket.
3D objects, mirrors, clocks and stair riser decorating
Flat art is not the only option. Clustered mirrors amplify whatever light a stairwell has and can visually widen a narrow run, since each one throws a little more brightness back into the space. Woven baskets, ceramic plates, and small sculptural pieces add texture that a print never quite can.
- Group three to five mirrors of varying shapes rather than one large piece if the stairwell already has a big mirror elsewhere.
- Mount baskets or plates on adhesive picture hangers rated for their exact weight, checking the limit before you commit to a spot.
- Stair risers are an easy, low-cost canvas: peel-and-stick tile decals, hand-painted stencils, or a subtle painted gradient running from dark at the bottom to light at the top all work well, an approach HGTV’s stairway decor roundup highlights as a way to tie decor to a home’s existing style.
- Keep scale in check. A cluster of small objects needs breathing room around it, or the whole wall starts to feel cluttered rather than curated.
Lighting and safety: how to light and protect stair displays
A dark stairwell flattens even the best decor, and a poorly mounted piece near a busy stair is a genuine hazard, not just an aesthetic misstep. Get the lighting and the mounting right and everything above suddenly reads properly.
- Space wall sconces every 6 to 8 feet along the run, a rule of thumb D and G Flooring uses to avoid the dark tunnel effect that plagues so many stairwells.
- Warm white light (around 2700K to 3000K) keeps colours reading true and avoids the cool, clinical cast that fluorescent-style bulbs give timber and paint alike.
- Never let a decorative object protrude at head height near the stair line. Anything with depth needs to sit flush or well clear of where a hand naturally reaches for the rail.
- Secure every mount properly, particularly near high-traffic steps, since a loose adhesive pad near a stairwell carries more risk than the same pad on a bedroom wall.
- Renters can skip hardwired fittings entirely. Cordless, battery, or plug-in sconces and picture lights deliver the same warm glow without an electrician.
Renter-friendly feature wall options and DwellForms™ expertise
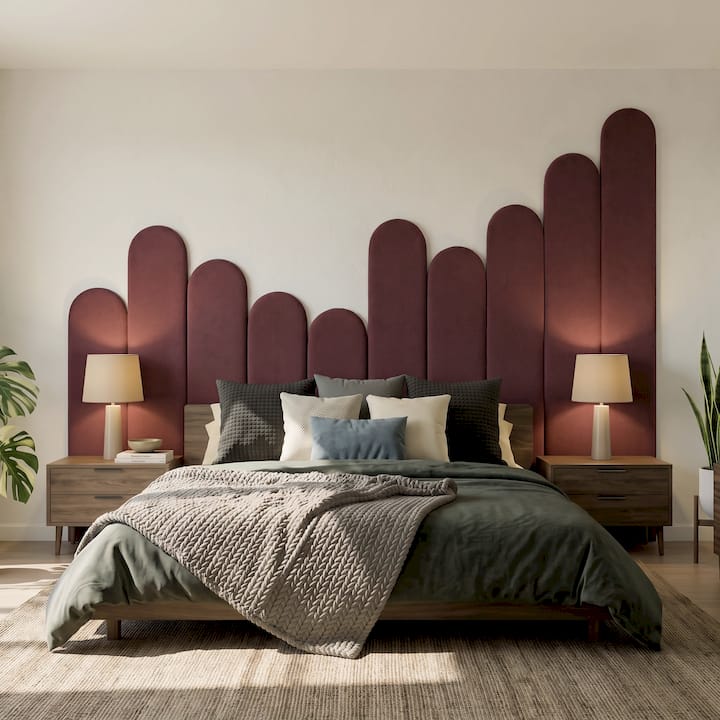
DwellForms™ was built for exactly the scenario most of this article describes: a wall you want to transform without asking a landlord’s permission or picking up a drill. It’s a modular PET felt system, made from 100% recycled material, designed so the sculptural, colour-led panels click into place using tested adhesive pads, rather than screws or construction adhesive.
- Panels rearrange easily, so a layout that worked in one stairwell can shift shape entirely in your next home.
- Colour Samples let you test a shade against your actual stairwell light before committing to a full kit.
- Kit sizing scales to the wall. A narrow stair run needs far less coverage than a double-height entry stairwell, so measure your longest sightline first.
- Styling works best when one colour or panel shape carries the whole run, echoing the “pick one strategy” principle that applies to gallery walls and paint alike.
Pro Tip: Measure the tallest single wall segment on your stair run, not the whole staircase, before ordering a kit. That segment tells you how much coverage you actually need.
For more on planning a removable feature wall without paint, see feature wall ideas without paint, and for hanging templates specific to a climbing layout, this staircase gallery wall layout guide is worth a look before you start marking up the wall.
Choosing art and decor styles to complement different stairwell aesthetics
The decor that lifts a modern apartment stairwell will fall flat in a heritage villa, and the reverse is just as true. Matching your approach to the house’s existing character saves you from a stairwell that feels bolted on rather than built in.
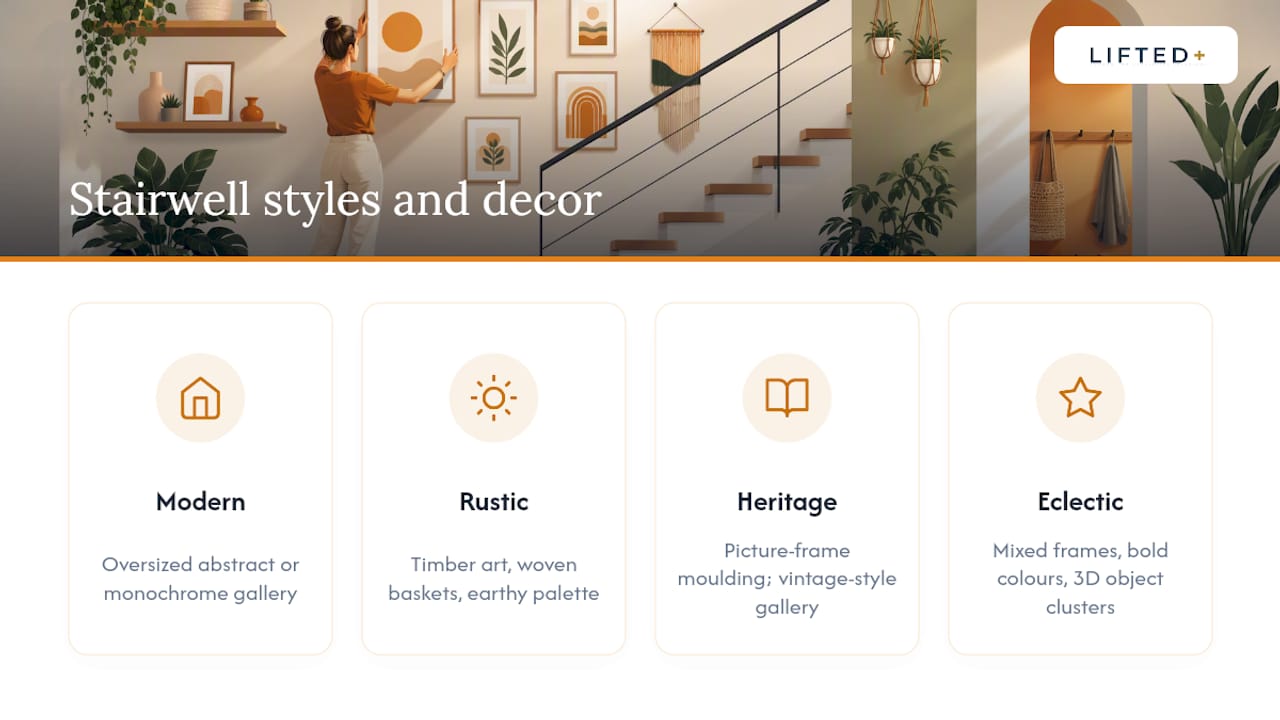
In a modern or new-build home, lean into clean lines: a single oversized abstract print, a monochrome gallery in matched frames, or a bold colour-blocked wall. Geometric wall panels and sculptural mirror clusters suit this aesthetic particularly well, since the architecture already favours simplicity over ornament.
A rustic or coastal home calls for warmer, more textured choices. Timber-framed art, woven baskets, and a board-and-batten treatment all read as considered rather than decorative for decoration’s sake. Muted, earthy colour palettes tend to suit these spaces better than high-saturation brights.
Traditional or heritage homes carry detail already, in skirting, cornices, and often an existing bannister with character. Picture-frame moulding, a curated gallery of varied vintage-style frames, or richly saturated wallpaper all sit comfortably here, since the existing architecture can carry more visual weight without feeling busy.
For eclectic or maximalist interiors, the stairwell is often the best place in the house to go further than you would elsewhere: mixed frame styles, an unexpected colour pairing, or a cluster of 3D objects alongside flat art. The vertical, transitional nature of a stairwell gives boldness room to work without dominating a room you actually sit in.
Seasonal or thematic decoration ideas for stairs wall decor
A stairwell is one of the easiest places in a home to layer in seasonal touches, because most of the display sits on ledges, hooks, or lightweight fixings that can be swapped without disturbing the main gallery or feature wall underneath.
For spring and summer, swap in lighter botanical prints, add a trailing plant to a picture ledge, or introduce a fresh pastel or citrus tone through a removable panel or a runner along the stair treads.
Come autumn and winter, richer tones work well: deep greens, burgundy, or warm ochre through a wallpaper panel, a textured throw draped over a landing bannister, or warmer-toned picture lights that shift the whole stairwell’s mood.
Festive periods are where stair walls genuinely shine. A garland woven through the bannister pairs naturally with a gallery wall above it, and small seasonal ornaments slot easily onto an existing picture ledge without any extra fixings.
For a quick refresh with no seasonal theme at all, simply rotate two or three frames in an existing gallery, swap out a colour sample panel, or move a mirror cluster to a different spot on the run. None of this requires new holes or a fresh coat of paint. It just means treating the stairwell as changeable rather than fixed, which is really the whole idea behind a renter-friendly feature wall in the first place.
Why most stair wall advice misses the point
Most guides to staircase decor treat the wall like a gallery in a house museum: static, precious, permanent. That advice suits homeowners planning to stay put for a decade. It fails almost everyone else, and in 2026, that’s most people, given how often renters and even owner-occupiers move or simply change their minds about a colour.
The conventional wisdom also over-indexes on symmetry and matching frames, when the designer consensus actually favours one bold, confident choice over a dozen safe, coordinated ones. A single strong colour or one oversized piece beats a perfectly matched gallery nine times out of ten, particularly in a stairwell where you’re glimpsing the wall in motion, not studying it from a sofa.
What the reader should prioritise first is reversibility, not perfection. Choose a strategy you can undo or reconfigure without regret, because your taste, your rental agreement, or your next house will all shift before that wall does. Colour confidence matters more than getting every measurement exact on the first attempt.
— Michelle
How DwellForms™ helps you create a no-drill staircase feature wall
DwellForms™ gives you colour without commitment on the one wall in the house every visitor sees first. Where a full repaint or a professional panelling job demands a weekend of disruption and a wall you can’t easily undo, DwellForms™ Core Kits click onto the wall using tested adhesive pads, with no drilling, no paint, and no permanent alteration to a rental wall.

Start with a Colour Sample pack to see how a shade actually reads against your stairwell’s light before committing to a full run. If your stair wall is a longer, double-height space, an Extension Kit scales the same panel design across the extra coverage. Sample orders credit toward a full kit purchase, so testing costs you nothing extra in the end. Browse the DwellForms™ Core Kits range to check sizing against your own stair run, and see which colour and panel shape suits the aesthetic you landed on above.
Sources
- How can you decorate staircase walls? | Homes and Gardens
- 30 Staircase wall ideas you never thought to try | The Spruce
- Stair wall: complete guide for homeowners – D and G Flooring
- 20 stunning stairway decor ideas for every style | HGTV
FAQ
What can I put on my stairs wall?
A gallery of framed art, one oversized statement piece, wallpaper or paint treatments, floating shelves, mirrors, or a removable panel system like DwellForms™ all work, provided you commit to one cohesive strategy rather than mixing several at once.
What are the staircase trends for 2026?
Bold, saturated colour on stair walls, removable and peel-and-stick treatments for renters, and mixed-texture displays combining art with 3D objects like mirrors and ceramics are all gaining ground, alongside a continued preference for one strong statement element over busy, matchy galleries.
How can I make my stairs look beautiful?
Pick one decorating strategy, whether that’s a climbing gallery, a single large piece, or a colour-led feature wall, and plan the layout on the floor before you hang anything, checking spacing and sightlines against the stair’s actual slope.
What to do with the wall at the top of the stairs?
The landing wall at the top of the stairs is a natural spot for a single anchor piece, since it’s often the first thing you see reaching the top; a large mirror, an oversized print, or a DwellForms™ panel arrangement all suit this high-visibility position well.