
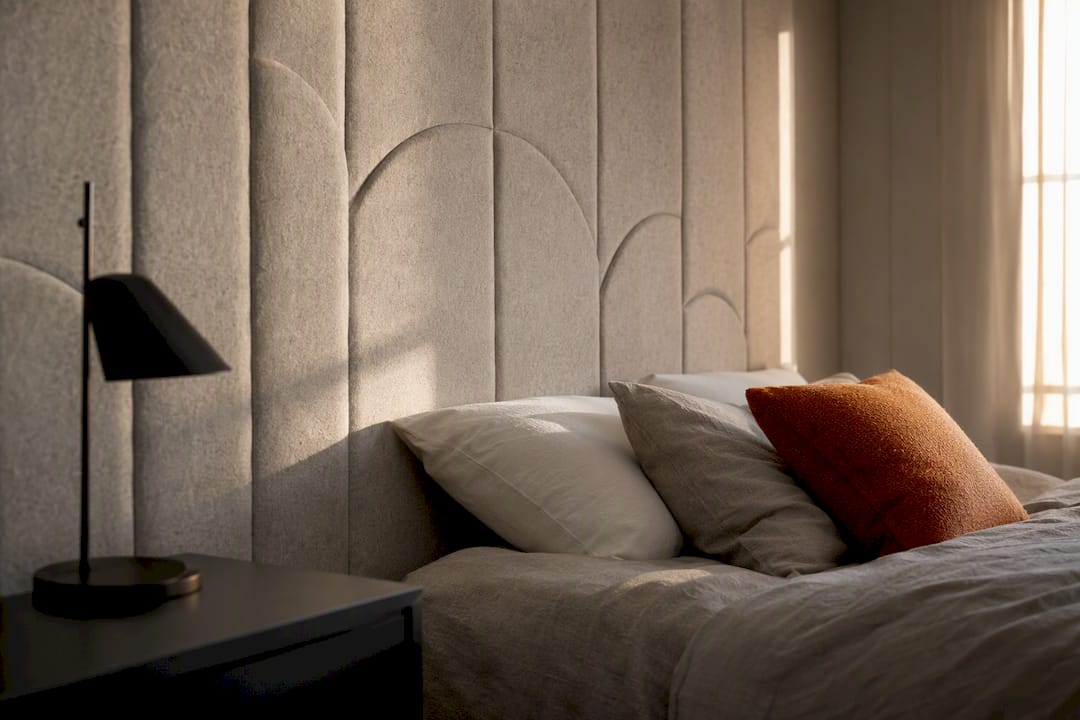
The fastest way to transform a bare bedroom wall is a removable PET felt modular kit like DwellForms™ by Lifted+, installed with tested adhesive pads rather than drills or screws. It brings colour, sculptural texture, and genuine visual weight to a rental or owned bedroom in an afternoon, and the panels can be removed when you’re ready to change the room or move house.
TL;DR:
- Removable PET felt panels support experimentation with various visual styles, including geometric mosaics, vertical stripes, and organic shapes, without permanent wall damage.
- Proper installation with tested adhesive pads and pre-mockup testing ensures clean removal suitable for rental walls, with setup typically taking a few hours for small designs.
- Placement behind the bed and opposite windows optimizes sound diffusion and reflection control, improving room acoustics without overhauling the entire space.
- Combining textured panels with soft fabrics and careful color coordination enhances both the aesthetic and acoustic comfort of the room.
- DIY modular kits from Lifted+ allow gradual expansion, color testing, and easy reconfiguration, making them an economical solution for renters seeking style and function.
Table of Contents
- Six removable, colour-led bedroom feature-wall ideas you can copy
- How to install renter-friendly felt panels without drilling
- Styling the feature wall: colour, bedding, lighting and scale rules
- Care, reconfiguration and moving: maintain panels and take them to a new home
- The basics: how sound behaves in a bedroom
- Common bedroom sound problems and how to spot them
- Types of wall treatments people use in bedrooms
- Where to place panels for the best result
- Getting the balance between form and function right
- DIY versus professional treatment for a bedroom
- Why removable colour-led walls matter for renters
- Get started with DwellForms™: sample kits, core kits and layout guides
- Sources
- FAQ
Six removable, colour-led bedroom feature-wall ideas you can copy
A feature wall behind the bed works like a headboard that never needs assembling. Textured, modular panels create that architectural feature-wall look, and because snap-together or adhesive-mounted systems can be rearranged without permanent fixings, you get to experiment before you commit to a final layout. Here are six directions worth trying, each scaled for a standard queen or king bedhead.
1. Geometric mosaic
Mix triangles, hexagons, and rectangles in an offset grid for a wall that reads as deliberately architectural rather than decorative. Bold contrast (charcoal against burnt orange, for instance) reads more dramatic than a tonal mix, but either works if the shapes stay consistent in scale. Aim to cover a substantial portion of the headboard’s width so the composition anchors the bed rather than floating above it.
2. Fluted vertical stripes
Vertical panels create rhythm and visual height, which is especially useful in a room with a low ceiling. Alternate two panel widths (say, a narrow and a wide flute) and use one accent colour every third or fourth stripe rather than every one, so the eye has somewhere to rest. This idea suits renters who want texture without a busy pattern.
3. Sculptural headboard field
A central cluster of panels positioned directly above and around the bed reads like a piece of furniture rather than wall decor. Modular PET felt lets you build this kind of headboard-style feature without buying new furniture at all, which matters in a small bedroom where floor space is already tight. Keep the cluster roughly bed-width plus a small margin on each side, with breathing room above.
4. Tonal gradient wall
Banding two to four shades from dark at the base to light near the ceiling (or vice versa) gives depth without needing a single loud colour. Before ordering a full kit, arrange loose sample tiles on the floor in the sequence you’re planning. It is the cheapest way to catch a clash before it’s on your wall.
5. Stacked shapes or organic forms
For a smaller wall or an awkward alcove, an asymmetric stack of rounded or irregular forms feels playful rather than formal. This works well behind a single bed or in a nursery-adjacent guest room where a full mosaic would overwhelm the space.
6. Mini-gallery grid
Instead of covering the whole wall, arrange a handful of smaller panels like framed art; a Skyline-style kit works well here. It adds pattern and texture in short bursts, which suits a shared flat where a full feature wall isn’t practical, or a trial run before you extend further with an additional kit.
Every one of these ideas can start small with a Core Kit and grow later using extension packs, so you’re never locked into the first layout you try.
How to install renter-friendly felt panels without drilling
Preparation matters more than the install itself. Clean the wall, let it dry fully, and patch any small dents or nail holes so the adhesive pads have a flat surface to grip.
- Test with a sample tile first, in the exact spot you plan to use, and leave it a day to confirm it holds on your specific paint finish.
- Use the kit’s tested adhesive pads or the manufacturer’s recommended strips, applied exactly per the instructions. Damage-free hanging strips are designed to support light decor and remove cleanly when used within their weight guidelines, which is the same principle behind panel-specific adhesive pads.
- Skip anything improvised, like construction adhesive or double-sided carpet tape. It defeats the point of a removable system and risks the wall finish.
- Mock up the layout with paper templates or the loose colour samples before sticking anything down.
- Start with the central panels, align them against the centre of the bedhead, then work outward and finish the edges last.
A single colour sample takes an hour or two to test. A small feature wall is usually a few hours’ work solo. A full headboard wall or larger composition is realistically a half-day to full-day job, faster with a second set of hands holding panels level.
Pro Tip: Photograph the bare wall before you start, and keep the original packaging, swatches, and receipts. If a landlord ever asks about wall condition, that paper trail shows exactly what went up and confirms nothing was drilled or glued permanently.
Styling the feature wall: colour, bedding, lighting and scale rules
A feature wall reads as designed, not accidental, when the rest of the room supports it rather than competes with it.
- Pick the wall colour first, then choose no more than two supporting tones for cushions, throws, and a rug, so nothing fights for attention.
- Balance the felt’s soft, matte texture with one or two contrasting fabrics, like a linen throw or a woven cushion, to stop the room feeling flat.
- Scale your bedding pattern to the wall pattern. A busy geometric wall pairs better with plain or subtly textured bedding than with another bold print.
- Place bedside lamps or a directional spot so light rakes across the panel surface at an angle. Felt’s texture only shows properly when shadow lines fall across it, not when it’s lit flat-on.
- Let the panel composition sit slightly wider than the bed itself, roughly 60 to 80% of the headboard width, and leave clear wall space above the panels so the room doesn’t feel closed in.
Care, reconfiguration and moving: maintain panels and take them to a new home
PET felt panels are low-maintenance by design. A gentle vacuum on a low setting or a lint roller handles dust, and a slightly damp cloth lifts most marks without needing harsh cleaning products that could affect the adhesive pads nearby.
- Extend gradually with additional kits rather than committing to a full wall on day one, and use a colour library box to test new shades against your existing panels before buying more.
- When it’s time to move, follow the removal steps rather than pulling panels off at an angle, which reduces the chance of pulling paint with them.
- Store panels flat, ideally in original packaging or a padded crate, to keep edges from warping in storage.
- Expect the odd small touch-up spot on the wall underneath, particularly on lower-quality rental paint, though most tested adhesive systems are designed to minimise this.
The basics: how sound behaves in a bedroom
Every bedroom wall does three things to sound whether you notice it or not: it absorbs some, reflects some, and scatters (or diffuses) the rest. Hard, flat surfaces like painted plasterboard, glass, and bare floorboards reflect sound almost entirely, which is why an empty bedroom with bare walls often sounds sharp or “live” when you clap your hands in it.
Soft, uneven, or textured surfaces behave differently. A thick rug absorbs footstep noise. A heavy curtain absorbs some mid-range sound and blocks light at the same time. A padded headboard or a textured wall surface does a bit of both, absorbing some frequencies while scattering others in different directions rather than sending them straight back across the room.
Diffusion is the subtler of the three. Rather than soaking sound up, a diffusing surface breaks a reflected sound wave into smaller, less coherent reflections. A wall built from varied shapes and depths, rather than one flat plane, naturally diffuses sound simply because no two points on the surface reflect it back at exactly the same angle.
None of this requires a technical understanding to notice. Walk into a bedroom furnished with a rug, curtains, and a few soft textures, and it feels calmer and quieter than a bare room with the same dimensions. Texture changes how a room feels to be in, well beyond how it looks.
Common bedroom sound problems and how to spot them
The easiest way to identify a harsh-sounding bedroom is a simple test: clap once, sharply, and listen for a ringing echo or a flat, hard slap-back. That’s a sign the room is dominated by reflective surfaces with almost nothing to break the sound up.
Bare walls are the most common culprit, especially in apartments and newer builds with plasterboard throughout and minimal soft furnishing. A bedroom with a large uncovered window, a hard floor, and a bare wall behind the bed tends to sound sharper than the same room with curtains, a rug, and some wall texture added.
Voices and alarms can sound louder or more jarring than they should in these rooms, not because the actual volume changed, but because there’s nothing to soften the reflection bouncing back at you. Rooms with high ceilings and minimal furniture amplify this further, since sound has more open, flat surface area to bounce between.
If a bedroom feels unusually echoey compared to other rooms in the same home, look at what’s missing rather than what’s too loud. Renters and apartment dwellers often can’t change the floor or add heavy curtains overnight, but a textured wall panel does some of that softening work while doubling as the room’s visual centrepiece. It’s a practical fix that also happens to solve the “boring wall” problem at the same time.
Types of wall treatments people use in bedrooms
Homeowners chasing a calmer, more considered bedroom generally reach for one of three broad approaches: flat panels, structural bass traps, and diffuser-style textured surfaces. Each does a different job, and each suits a different type of renter or homeowner.
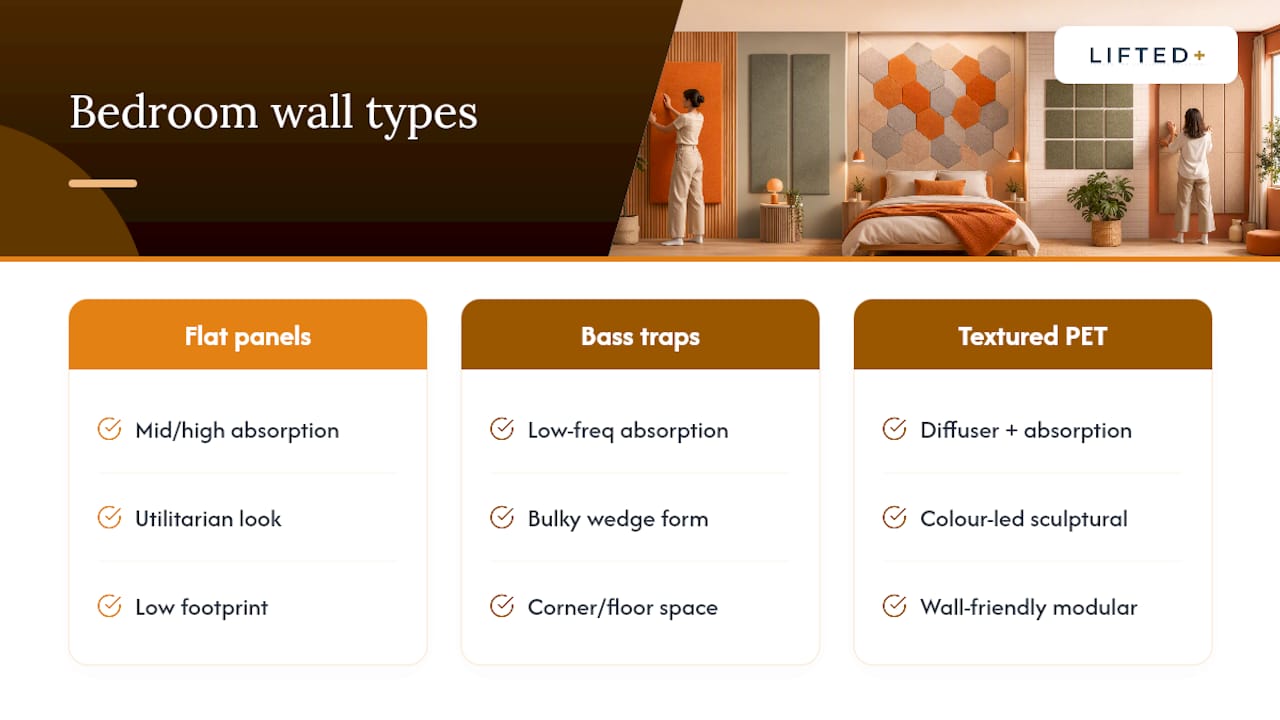
Flat foam or fabric-wrapped panels are the most common starting point because they’re cheap and widely available, though they tend to look utilitarian unless carefully framed or arranged. Bass traps, usually bulky foam wedges placed in room corners, target low-frequency build-up and are more common in home studios than bedrooms, since they take up real floor or corner space many renters simply don’t have to spare.
Textured, sculptural panels sit in a different category altogether. Rather than a flat block mounted for a single function, a PET felt panel is CNC-cut into shapes and colours, giving it both the surface variation of a diffuser and a finished, monolithic look that suits a bedroom’s aesthetic rather than fighting it. This is the category DwellForms™ occupies: panels designed first as a colour-led feature wall, with the softening, texture-driven benefit as a welcome side effect rather than the entire pitch.
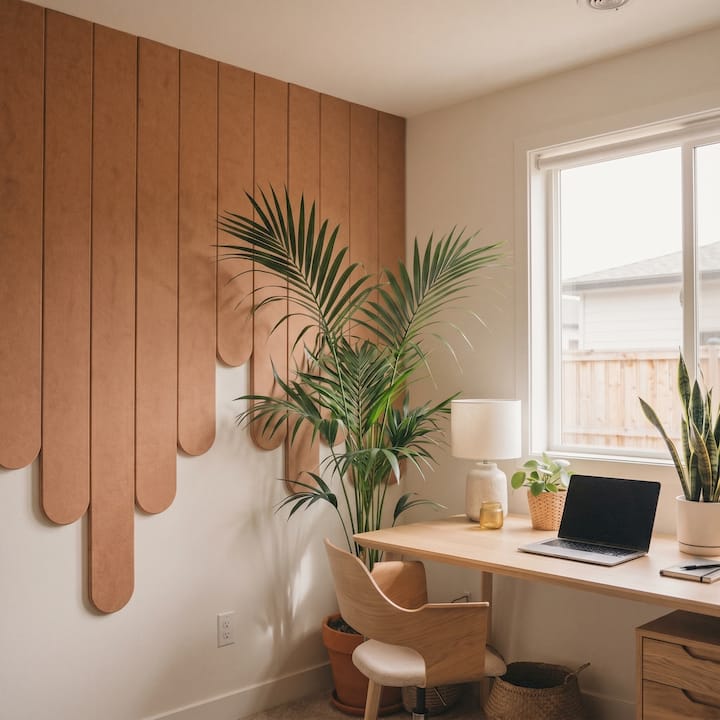
For most bedrooms, a full bass-trap setup is overkill, and plain foam panels rarely match the room’s decor. A textured modular kit tends to hit the sweet spot between visual impact and a softer-sounding room, without turning the bedroom into a studio.
Where to place panels for the best result
Placement matters as much as the panel itself. The wall directly behind the bed is the highest-impact spot in almost every bedroom, both because it’s the largest uninterrupted surface most people see first, and because it sits closest to where sound reflects back toward you at night.
Leaving clear space above the panels, rather than running them to the ceiling, avoids a boxed-in feeling, particularly in smaller bedrooms with lower ceilings.
A second, smaller placement worth considering is the wall opposite a hard window or mirror, since that’s often where sound bounces hardest between two reflective surfaces. Even a modest cluster of panels there breaks up that back-and-forth reflection without needing to treat the whole room.
Avoid scattering small panels randomly across multiple walls chasing a “treatment” outcome. A single well-placed, well-scaled composition behind the bed almost always outperforms a thin spread of panels across several surfaces, both visually and in how the room feels.
Getting the balance between form and function right
The mistake most people make with any wall treatment, acoustic or decorative, is treating it as a technical fix bolted onto a room rather than a design decision that happens to soften how the space feels. A bedroom is not a recording booth. It’s a place you want to feel calm, personal, and good to look at first thing in the morning.
Colour confidence usually comes from starting small. A wall covered edge to edge in one intense shade can feel overwhelming in a bedroom, where you’re often lying still and staring at it for long stretches. Breaking the composition into distinct shapes, or using a gradient rather than one flat block of colour, gives the eye more to explore without becoming visually loud.
Functionality still comes first. If the wall behind the bed also needs to accommodate a reading lamp, a shelf, or a headboard-mounted charging point, plan the panel layout around those fixed points rather than the other way round. A composition that looks perfect on paper but blocks your bedside lamp’s cord isn’t a win.
The best-performing feature walls, in both looks and feel, are the ones designed with the whole room in mind: the bedding, the light, the existing furniture, and the mood you’re actually trying to create before bed.
DIY versus professional treatment for a bedroom
For the vast majority of bedrooms, professional acoustic treatment is unnecessary and often disproportionate to the problem. Studio-grade treatment, custom-built diffusers, and professionally installed bass traps solve problems for home studios and dedicated listening rooms, not for a bedroom that simply feels a bit sharp or looks a bit bare.
A DIY approach using a modular, adhesive-mounted panel kit covers most of what a bedroom actually needs: some softening of hard reflections, genuine texture, and a design outcome you control entirely yourself. It’s also reversible, which matters enormously if you’re renting or simply not ready to commit to one look permanently.
The only scenario where professional input genuinely helps is a home studio, a nursery with specific noise concerns, or a room backing onto a busy road where the goal is meaningfully reducing sound transfer rather than softening reflections within the room. That’s a different project with different products, and it sits outside what a decorative wall kit is designed to do.
For everyone else chasing a calmer-feeling, better-looking bedroom, a well-planned DIY panel wall gets you most of the benefit at a fraction of the cost and disruption, without a tradesperson ever setting foot in the room.
Why removable colour-led walls matter for renters
Colour confidence is rarely about taste. It’s about commitment, and most renters have been burned once by a paint colour they grew to hate within a year. What changes that calculation is removability: when a wall treatment can come down as easily as it went up, the decision to try something bold stops feeling risky.
DwellForms™ is a system built from recycled PET felt, and its site carries layout guides and colour inspiration for this kind of decision-making before you buy. The best bedrooms I’ve seen photographed for this piece weren’t the safest ones. They were the ones where someone trusted their own colour instinct because the format let them.
— Michelle
Get started with DwellForms™: sample kits, core kits and layout guides
Liftedplus gives you a way to test a colour and texture idea before spending on a full wall, which beats guessing with paint you can’t easily undo. Start with a DwellForms™ Colour Sample box to see how a shade actually sits against your light and furniture, then move to a DwellForms™ Core Kit once you’ve settled on a layout.

Every kit ships with installation guidance, and the site carries layout ideas and styling support if you want a second opinion on scale or colour pairing before you commit. When you’re ready to grow the wall, extension kits let you add panels gradually rather than buying everything at once. Order a sample box today and see the colour on your own wall before you decide on anything bigger.
Sources
- Textured Wall Panels: Finishes, Styles & How to Choose (2026) – DecorLane
- Command™ picture hanging strips product page — 3M/Command
FAQ
Do PET felt wall panels damage rental walls?
When installed with the kit’s tested adhesive pads and removed following the manufacturer’s instructions, PET felt panels are designed to come off cleanly in most cases. Results depend on your wall’s paint quality, so it’s worth testing a sample tile first and keeping receipts as a record for your landlord.
How much wall should a bedroom feature wall cover?
Leaving space above the panels also helps avoid a boxed-in feeling, particularly in smaller rooms.
Can I move DwellForms™ panels to a new home?
Yes. DwellForms™ kits are designed to be removed, stored flat, and reinstalled elsewhere, which is one of the main reasons renters choose them over paint or permanent panelling. Following the kit’s own removal steps helps protect both the panels and the wall underneath.
How long does installing a bedroom feature wall take?
A single colour sample test takes an hour or two, a small feature wall is usually a few hours’ work, and a larger headboard composition can take half a day to a full day. Timing depends mostly on the size of the wall and whether you have a second person helping hold panels level.
Do I need professional acoustic treatment for a normal bedroom?
Most bedrooms don’t need professional-grade treatment; that level of work suits home studios or rooms with specific noise transfer problems. A textured, removable panel kit gives most bedrooms the softening and visual benefit they actually need, without the cost or disruption of a professional install.