
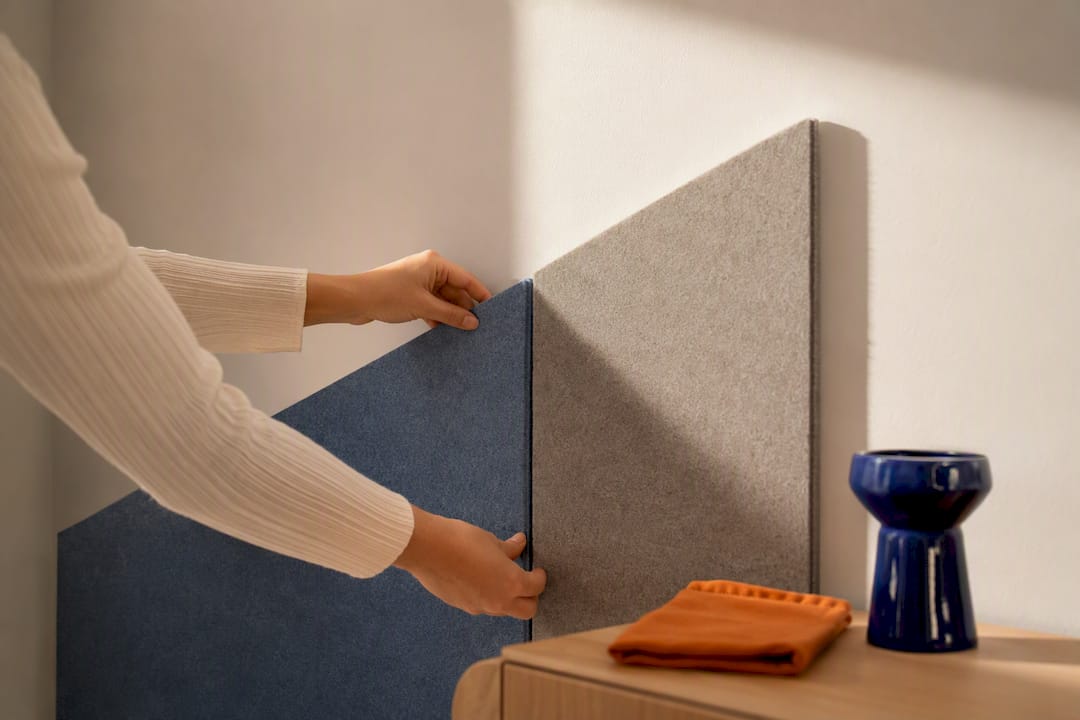
Colour blocking decor means using solid, deliberate blocks of colour to create structure, focal points and mood in a room, and it works whether you reach for paint or a removable panel system. It suits accent walls, faux headboards and zoning open-plan spaces, and most versions are a single weekend project. Pick one small wall or nook to test the idea before committing to a whole room.
TL;DR:
- Use the 60-30-10 rule to create a balanced color palette with two or three main shades and a neutral, testing samples under your room’s actual lighting.
- Horizontal color blocks in low-ceiling rooms can visually widen the space, while vertical bands help make narrow rooms appear taller.
- Choosing high-quality painter’s tape and sealing tape edges with a credit card prevents bleed and ensures crisp lines in your color-block project.
- Removable panels like DwellForms™ offer a renter-friendly, customizable alternative to paint that can be extended or removed without damage.
- Focus on repetition by matching the block’s color with accessories or artwork to ensure the design looks deliberate and cohesive.
Table of Contents
- Practical colour-block ideas you can copy
- Step-by-step: how to colour-block a wall with paint
- Rules for picking colours and sample palettes that work
- Essential tools and paint choices for a pro-like finish
- Achieve colour-block looks without paint: removable panels and DwellForms™
- How to style colour blocks so they read intentional in the whole room
- Quick checklist and final dos and don’ts
- Why colour blocking works right now
- DwellForms™: renter-friendly modular wall kits for colour-block impact
- Handy how-to and visualiser links used in research
- Sources
- FAQ
Practical colour-block ideas you can copy
The trend has genuine staying power going into 2026 because it solves a real problem: neutral walls that feel unfinished. Designers point out that colour blocking organises a room visually and draws attention to architecture when it’s applied in precise bands or shapes, rather than scattered as an afterthought.
Some approaches to try, depending on your space and appetite for commitment:
- Half walls in two tones split horizontally, with the darker shade below the chair rail line for a grounded, tailored look.
- A bottom-third band or horizontal rectangle behind a bed, acting as an oversized, painted headboard.
- Framed blocks behind a sofa or bed, sized to sit just wider than the furniture beneath them.
- Painted arches as a softer, faux-headboard alternative to sharp rectangles.
- Small-scale experiments on a splashback, ceiling, door or even a rug, before you touch a feature wall.
Scale matters more than most people expect. In low-ceiling rooms, horizontal blocks widen the room visually, while narrow rooms benefit from vertical bands for width, with vertical blocks reserved for adding a sense of height when used sparingly.
Step-by-step: how to colour-block a wall with paint
A colour-blocked wall is one of the few home makeovers that genuinely fits into a weekend, and the sequence matters more than the paint colour itself.
- Plan and sketch first. Measure the wall, mark sightlines from the doorway and note where furniture will sit, so blocks align with real fixed points, not just an eyeballed centre.
- Prep the surface. Clean off dust and grease, sand any rough patches and prime bare or heavily patched areas so the new colour goes on evenly.
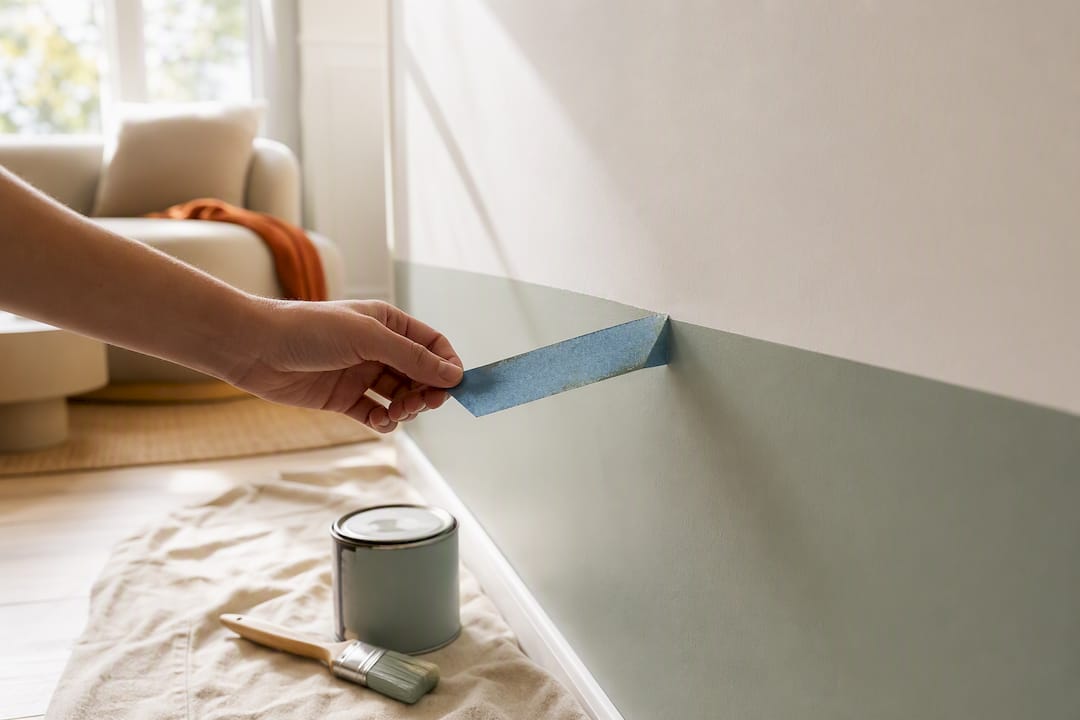
- Mark and tape. Use a laser level or chalk line to get straight lines, press the tape edges down firmly, then run a plastic card or old credit card along the seam to seal it and stop paint creeping underneath.
- Paint the lighter colour first when doing a two-tone split, then let it cure before masking off and painting the darker colour second, so the first coat doesn’t lift.
- Apply at least two coats for solid, even coverage, letting each dry fully before recoating.
- Remove the tape at a 45-degree angle while the paint is still slightly damp, not once it’s fully cured, then touch up any thin spots with a fine brush.
Most standard colour-block wall projects run over a weekend, with materials costing modestly more than a standard single-colour paint job because you’re buying two tins instead of one.
Pro Tip: Pull painter’s tape away at a sharp angle while the paint is still slightly damp. Waiting until it’s fully dry risks tearing the paint film and leaving a jagged, not crisp, edge.
Rules for picking colours and sample palettes that work
Colour confidence is the thing most people actually lack, not colour taste. A proportion rule fixes that faster than any amount of scrolling through inspiration boards.
Interior designers lean on the 60-30-10 rule: 60% dominant colour, 30% secondary and 10% accent, a proportion that keeps a colour-blocked room feeling composed rather than chaotic.
A few other rules worth following:
- Choose complementary colours (opposite on the colour wheel) for high contrast and energy, or analogous colours (neighbours on the wheel) for a calmer, cohesive feel.
- Test samples under your room’s actual light, morning and evening, before committing, since colour reads differently under warm bulbs than daylight.
- Cap yourself at two or three colours plus a neutral, then repeat one of those colours elsewhere in the room so the palette feels planned.
For a living room, try a deep terracotta paired with warm white and a brass accent. In a bedroom, a muted sage with soft grey and a single navy block works well. Kids’ spaces can handle more contrast: mustard, teal and white together read playful without becoming overwhelming.
Essential tools and paint choices for a pro-like finish
Cheap tape is the single biggest cause of bleed and jagged lines, so it’s worth spending a little more here. Reach for a quality painter’s tape rather than a hardware-store bargain roll, since premium tape seals tighter against textured or freshly painted surfaces.
Beyond tape, a short kit list covers most jobs:
- A laser level or chalk line for straight, accurate lines before you tape.
- A plastic putty knife or old credit card to seal tape edges and stop seep-through.
- A roller with a short nap for flat walls and an angled brush for cutting in corners and edges.
- A paint-and-primer combined formula, which saves a step on most interior walls.
- A digital paint visualiser tool to preview colours on a photo of your own room before buying a single tin, cutting down on wasted sample pots.
Budget for two tins of paint, a roll of quality tape and basic tools, and you’re covering most of the real cost of this project.
Achieve colour-block looks without paint: removable panels and DwellForms™
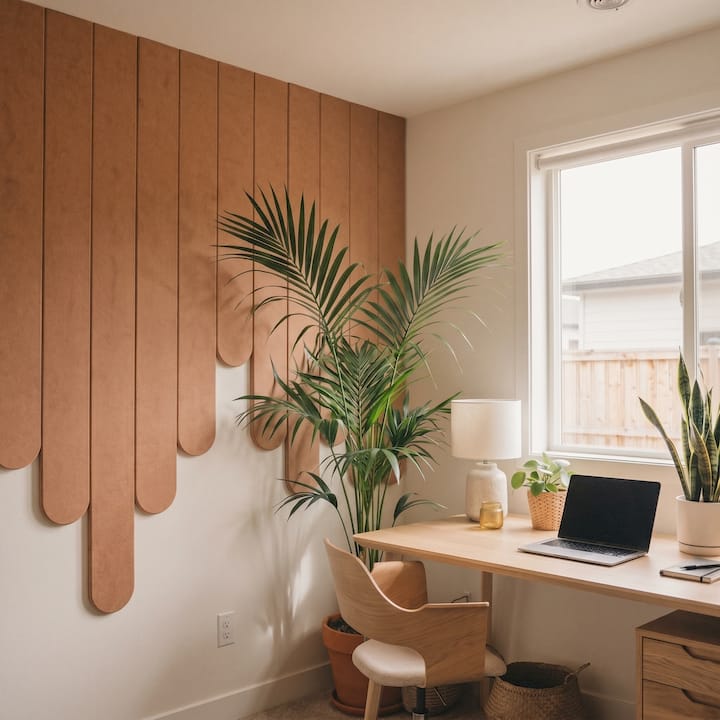
Paint isn’t always the answer, especially if you’re renting, sharing a lease, or simply not ready to commit to a colour for years. Removable, modular wall panels give you the same compositional punch as a painted block, minus the brush, the fumes and the argument with your landlord.
DwellForms™ by Liftedplus is built around exactly this problem. The kits use tested adhesive pads rather than screws or drilling, so you get a renter-friendly feature wall that lifts away cleanly when you move, made from precision-cut, recycled PET felt. Colour sample kits let you test a shade in your own space before buying a full layout, and extension packs let you grow a design over time rather than committing to the whole wall at once.
- Order a colour sample kit before buying a full panel set.
- Plan your modular layout on paper first, the same way you’d sketch a painted block.
- Test the adhesive pad on a small, discreet patch of wall before installing the full design.
Pro Tip: Treat a DwellForms™ colour sample the way you’d treat a paint tester pot: hold it against the wall at different times of day before deciding it’s the one.
How to style colour blocks so they read intentional in the whole room
A block of colour left to sit alone on one wall can look like an accident. The fix is repetition: pull that same colour into a cushion, a rug or a piece of artwork elsewhere in the room, so the eye reads it as a deliberate choice rather than a leftover test patch.
- Anchor a sofa or bed against the block so it visually “holds” the furniture in place.
- Use the block to define zones in an open-plan room, marking where the living area ends and the dining space begins.
- Balance a solid colour plane with one or two textured or patterned pieces nearby, so the wall doesn’t compete with everything else in the room.
- Position the block where it catches natural light for part of the day, since flat, shaded colour can read dull rather than deliberate.
- If you already run a gallery wall or open shelving, let the colour block sit behind or beside it rather than competing directly for attention.
Quick checklist and final dos and don’ts
Measure, test, tape, paint, remove tape at 45 degrees, then style with repeated colour. Stick to three main colours at most, always test samples under real light, and consider removable panels whenever you’re renting, unsure, or simply not ready to commit to paint.
Why colour blocking works right now
Colour blocking earns its place in 2026 because it gives a room character without asking you to gamble on a full renovation. It’s one of the few decorating moves that’s genuinely reversible, whether that’s a fresh coat next year or a DwellForms™ layout lifted straight off the wall. Start small: one block, one sample kit, one weekend.
— Michelle
DwellForms™: renter-friendly modular wall kits for colour-block impact
If painting sounds like more commitment than you want, Modular, no-drill panels offer a colour-block impact that can be rearranged, extended, or taken with you when you move. These kits are built from precision-cut recycled PET felt, designed for those who want texture and colour without using a drill or paint roller.

Unsure which shade suits your wall? Order from the DwellForms™ Colour Samples range first, and once you’ve settled on a direction, build out your feature wall with the DwellForms™ Core Kits. Already have a layout you love and want to grow it? Check the Extension Kits to add on without starting over.
Handy how-to and visualiser links used in research
For hands-on technique, see Food52’s tape and paint guide and try a paint visualiser before buying tins.
Sources
- How to Paint a Color Block Wall Like a Pro | Purdy®
- Paint experts say color blocking is trending for interiors
- Color blocking walls: what it means and how to do it
- 6 tips for colour-blocking walls with paint | This Old House
- How to color-block your walls for an instant pop | Food52
FAQ
Is colour blocking still in fashion in 2026?
Yes. Designers continue to recommend it as a way to organise a room visually and highlight architectural features, and the rise of removable panel systems like DwellForms™ has made it more accessible for renters, which is keeping the trend active rather than fading.
What are the rules for colour blocking?
The main rule is proportion: use the 60-30-10 ratio of dominant, secondary and accent colour, and stick to two or three colours plus a neutral. Choose complementary colours for contrast or analogous colours for a calmer look, and repeat one colour elsewhere in the room.
Is colour blocking outdated?
No. It’s had staying power precisely because it’s flexible: a painted block, a panel kit or even a rug can carry the look, and it adapts easily to whatever palette is currently popular.
What are the current trends in colour blocking?
Soft, tonal palettes paired with one bold accent are leading right now, alongside renter-friendly, no-drill wall decor like modular panel kits that deliver colour without commitment. Faux headboards, half walls and small-scale experiments on doors or ceilings are also popular starting points.
How much does DwellForms™ cost?
Pricing for DwellForms™ Core Kits, Extension Kits and Colour Samples is available directly on the Liftedplus site, where you can check current options for your space.