
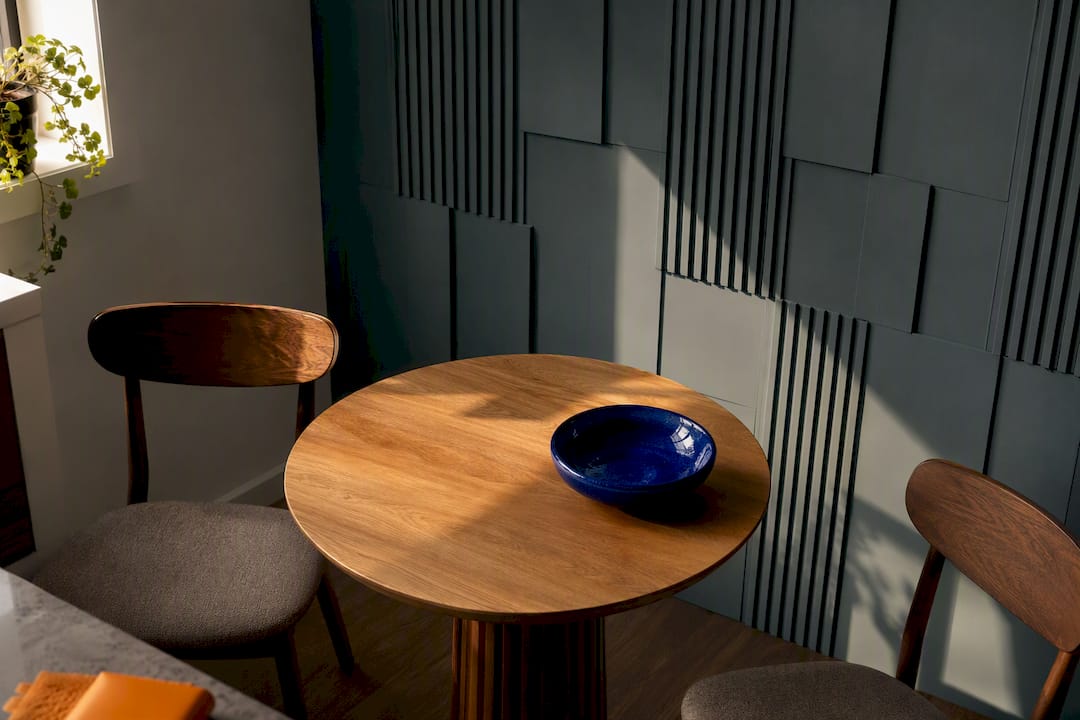
The best dining nook feature wall is a colour-led, removable treatment: paint, a peel-and-stick mural, or a modular no-drill panel kit, chosen by how permanent you want the change to be. Removable, colourful options usually win in nooks because they let you commit to bold colour without the risk that scares most renters off. Read on for idea categories, then jump to the renter-friendly section for how to install without touching a drill.
TL;DR:
- Removable panel kits and peel-and-stick murals offer flexible, renter-friendly options for adding texture and pattern without damaging walls.
- The ideal feature wall spans about 60 to 80 percent of the table width and is hung 6 to 12 inches below the cushions for optimal visual balance.
- Materials like vinyl wallpaper or PET felt panels balance durability with ease of removal, while natural textures like grasscloth are harder to maintain or remove.
- Proper wall preparation, including cleaning and testing adhesive suitability, is crucial to prevent peeling or wall damage during removal.
- Layering lighting, soft furnishings, and restrained art enhances the cozy, intentional feel of a defined dining nook space.
Table of Contents
- What are the best feature wall ideas for a dining nook?
- Materials and finishes: what actually suits a rental?
- How big should the art or feature area be?
- How do lighting and styling finish the look?
- Why removable, no-drill panels suit rental walls
- How do you choose the right treatment for your space?
- Step-by-step installation for each material type
- How do you prepare the wall before you start?
- How do you maintain each type of feature wall?
- What should renters watch for to avoid wall damage?
- Why a colour-led, removable wall changes how a nook feels
- Get the look without picking up a drill
- Sources
- FAQ
What are the best feature wall ideas for a dining nook?
A dining nook rewards a single, decisive move rather than five timid ones. Because the space is small and viewed at close range, texture and colour choices read more intensely than they would on a living room wall, so it pays to pick a category first and commit.
- Paint moves: A tonal wash (one hue, several shades) feels calm; a moody dark colour makes the nook feel cocooned rather than cramped; colour-blocking two tones at table height adds graphic energy without covering the whole wall.
- Wallpaper and peel-and-stick murals: These add pattern and scale fast, and are genuinely renter-friendly ways to add pattern without a full redecorate.
- Architectural panelling: Board-and-batten or wainscoting behind a banquette is a frequently used way to add texture, though it usually means screws and filler when you move out.
- Textural treatments: Woven hangings, grasscloth, or PET felt panels bring tactile depth without a hard pattern to tire of.
- Art-led walls: One bold statement piece, a gallery cluster, or a narrow vertical print all work, and vertical art in particular is effective in slim nook walls because it draws the eye up.
Design galleries covering compact dining nooks consistently layer at least two of these categories, pairing panelling with a textile or art with a tonal paint base, rather than relying on one flat surface.
Materials and finishes: what actually suits a rental?
Every material trades off texture, permanence and upkeep differently, and the right pick depends on whether you’re renting, owning, or somewhere in between.
- Paint: Cheapest and fastest to change, but full commitment. Reversing a bold colour means repainting before you leave.
- Vinyl wallpaper: Durable and wipeable, good near a dining table, but pulling it down cleanly from plaster is a genuine risk for bond returns.
- Grasscloth: Beautiful texture, poor around food splashes, and one of the trickier papers to remove without wall damage.
- PET felt panels: Soft, dimensional texture that reads as architectural rather than “wallpapered”, and increasingly used in no-drill, removable formats.
- Peel-and-stick wallpaper: The easiest fully removable pattern option, though thin adhesive can lift in humid kitchens over time.
Matte finishes soften a colour and hide minor wall imperfections; satin and semi-gloss bounce more light, which helps a dark tonal wall feel less heavy in a nook with limited natural light. Textured, neutral panels such as felt or grasscloth also tend to age better visually than a busy small-scale print, which can start to feel tired within a year or two.
Pro Tip: Order a small colour or panel sample before buying anything full-size. Tape it to the wall and check it morning, midday and after dark. A colour that looks calm at noon can turn muddy under evening pendant light.
How big should the art or feature area be?
Proportion is what separates a nook that feels designed from one that feels like an afterthought. A few working numbers make this easy to get right.
- Size art to the table, not the wall. Aim for artwork or a feature panel spanning 60 to 80% of the table or bench width.
- Hang lower than you think. Seated sightlines sit lower than standing ones. Allow roughly 6 to 12 inches of clearance above banquette cushions, rather than the standard eye-level rule you would use in a hallway.
- Match panel width to bench length. If you’re papering or panelling only the nook’s back wall, keep the treatment within the width of the seating below it so it reads as one considered zone.
- Go vertical for height, horizontal for width. A narrow, tall panel or print stretches a boxy nook upward; a horizontal run of colour or texture widens a tight corner.
- Measure twice before ordering. Record wall width, bench height, and ceiling height so any kit or mural order matches the space on the first attempt.
How do lighting and styling finish the look?
A feature wall does half the job. Lighting and soft furnishings do the rest, and they’re what make a nook feel used rather than staged.
- Hang the pendant low. Around 30 to 34 inches above the table surface is the range designers consistently recommend, and it’s one of the most transformative moves for a cosy nook, because a lower light pulls the eye down into the seating rather than up into the ceiling.
- Layer in a second light source. A small sconce or a lamp on a nearby bench adds evening warmth once the pendant’s task light isn’t needed.
- Mix textiles deliberately. Cushions, a table runner and a rug can carry two patterns at most before the corner feels busy; pick one dominant colour from the wall and repeat it in fabric.
- Style the wall itself with restraint. A floating shelf for a single object, one leaning print, or a mirror angled to bounce window light all work better in a nook than a crowded gallery wall.
Why removable, no-drill panels suit rental walls
Modular PET felt kits like DwellForms™ give you colour, texture and a sculptural, architectural rhythm on a wall without a single screw. They’re designed to sit on tested adhesive pads, which makes them a genuinely different proposition to timber trim or nailed panelling, and different again to standard peel-and-stick paper.
Compared with peel-and-stick, panels hold their shape and shadow lines rather than lying flat, so the wall reads as considered rather than papered. Compared with timber battens, there’s no filling holes when you move out. And because kits are modular, you can rearrange or extend a pattern rather than starting again if you change your mind or shift the panels to a new home.
- Order a colour sample first and live with it for a few days before committing to a full kit.
- Follow the manufacturer’s alignment guidance closely, since panel kits rely on a template to sit straight.
- Keep photos of the wall before and after installation, useful evidence for both you and a landlord.
- Tell your landlord what you’re planning. A quick message describing a reversible, adhesive-based installation heads off disputes later.
A sample-first approach is the standard advice from renter-focused design guidance, and it matters more for panels than paint, since you’re judging texture and shadow as well as colour. Never assume any wall treatment is guaranteed damage-free. Wall condition, paint type and how long panels stay up all affect what happens when they come down.
How do you choose the right treatment for your space?
Match the treatment to four practical constraints before you fall for a Pinterest board: permanence, budget, landlord rules, and how much maintenance you’re willing to do.
- Low budget, high flexibility: Paint one wall, swap the pendant shade, and add a table lamp. That trio alone is one of the cheapest ways to lift a nook, with big perceptual gain for very little outlay.
- Medium budget, removable: Peel-and-stick wallpaper or a no-drill panel kit sits here, giving texture and pattern without permanent commitment.
- Higher budget, permanent: Custom murals or built-in panelling suit owned homes where you’re happy to repaint or refit later.
Before buying anything, record wall width, bench height, and which direction the light comes from at dinner time. Watch for red flags: humid kitchen walls that resist adhesive, uneven or textured plaster that panels won’t sit flush against, and any landlord agreement that doesn’t clearly permit wall changes.
Pro Tip: If your lease is vague on wall changes, ask in writing rather than assuming. A one-line email confirming “adhesive-mounted, fully removable panels” is often all it takes to get a clear yes.
Step-by-step installation for each material type
Paint: Clean the wall, fill any small holes, apply painter’s tape to skirting and trim, then roll on two coats with a short rest between them. Remove tape while the second coat is still slightly tacky for the cleanest line.
Peel-and-stick wallpaper: Measure and cut strips slightly oversized. Peel back a small section of backing, align it to a pencil guideline, and smooth outward from the centre with a squeegee to push out air bubbles as you go.
Vinyl or grasscloth wallpaper: Apply adhesive per the product’s instructions, hang from the top down, and use a smoothing tool rather than your hands to avoid stretching the material unevenly.
Board-and-batten panelling: Mark stud lines, cut timber to length, and fix with construction adhesive and finishing nails, then fill and paint. This is a permanent installation better suited to owned homes than rentals.
Modular no-drill panels: Clean and dry the wall thoroughly, dry-fit the layout using the kit’s alignment template, then press each panel’s pre-fitted adhesive pads firmly against the wall, holding for the time the manufacturer specifies. Working from a bottom corner upward keeps rows level.
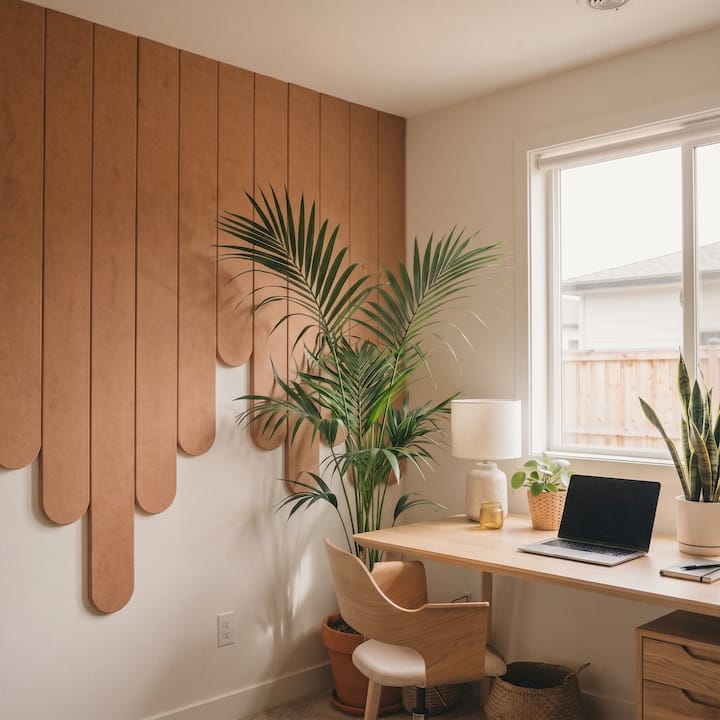
Art and mirrors: Mark hanging height at 6 to 12 inches above bench cushions, use a level, and choose picture hooks rated for the frame’s weight rather than relying on adhesive strips for anything heavier than a light print.
How do you prepare the wall before you start?
Surface prep decides whether a treatment lasts or peels within a fortnight. Skipping this step is the single biggest reason removable products fail.
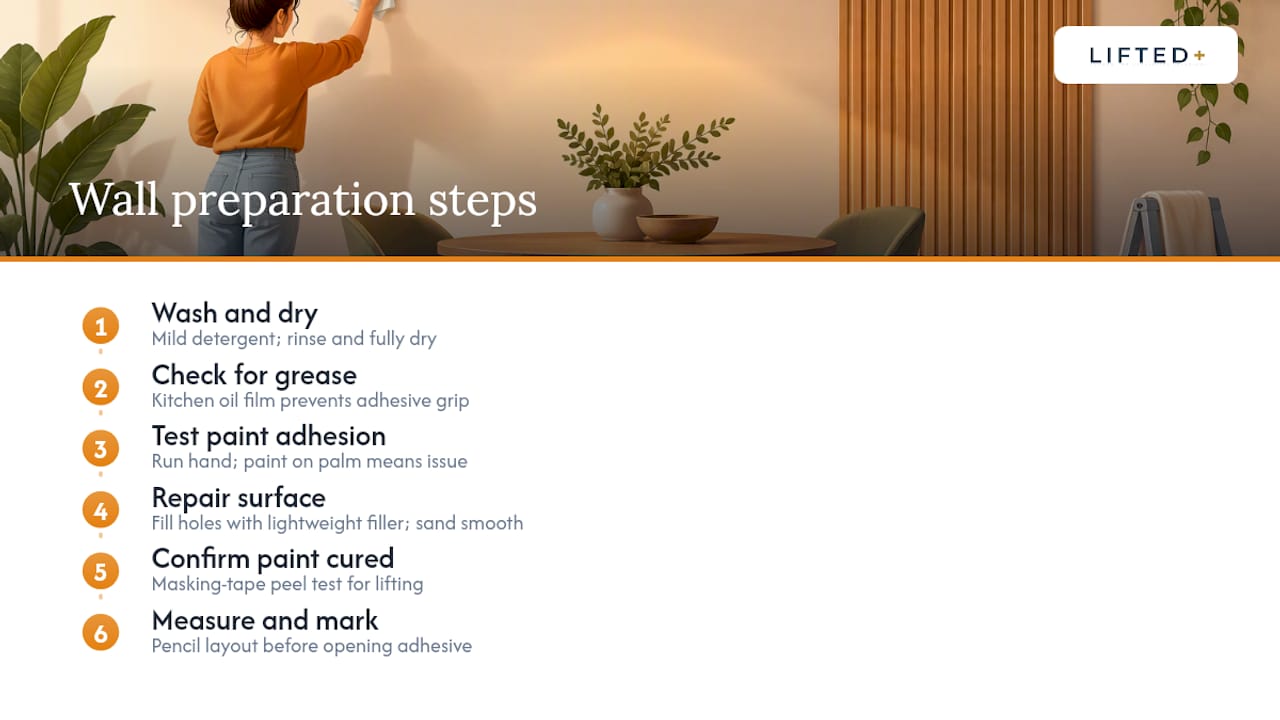
Start by washing the wall with a mild detergent solution to remove cooking grease, a particular risk near a dining nook, then rinse and let it dry completely. Kitchen-adjacent walls collect a fine film of oil from cooking that most people never notice until adhesive won’t grip.
Check for flaking or chalky paint by running a hand across the surface; if paint transfers to your palm, it needs a light sand or a fresh coat before anything sticks reliably. Fill any holes or dents with a lightweight filler and sand smooth, since panels and vinyl wallpaper both show through uneven texture rather than hiding it.
For modular panel kits specifically, confirm the wall is fully cured if it’s been freshly painted. Fresh paint can stay slightly soft for weeks, and adhesive pads bond better to a hardened surface. A quick tape test, pressing a small piece of masking tape on and peeling it off, tells you whether paint is lifting before you commit a full kit to the same wall.
Finally, measure and mark your layout in pencil before opening any adhesive backing. Removable treatments are forgiving of many things, but not of guesswork once the adhesive has made contact.
How do you maintain each type of feature wall?
Maintenance needs differ enough between materials that it’s worth matching your cleaning routine to what’s actually on the wall.
Painted walls near a dining table cop the most splashes, so a satin or semi-gloss finish that wipes clean with a damp cloth outperforms flat matte in this specific spot. Vinyl wallpaper is similarly wipeable, but avoid abrasive scrubbing, which can dull the printed pattern over time.
Grasscloth and other natural-fibre papers should never get wet. Dust them gently with a soft brush or the low suction setting on a vacuum, and treat any spill as a job for a barely damp cloth blotted rather than rubbed.
PET felt panels are low-maintenance by design: a soft brush or vacuum attachment lifts dust, and the felt surface doesn’t stain or mark the way painted plaster can. Because panels aren’t porous the way wallpaper is, they cope better with the occasional splash near a dining table.
Art and mirrors just need an occasional dust and, for glass, a standard glass cleaner. Check picture hooks periodically, since the vibration from daily meals and pulled-out chairs can loosen a fixing over months.
What should renters watch for to avoid wall damage?
Wall damage in a rental usually comes from rushing the install or ignoring what a wall is actually made of, not from the product itself.
Test any adhesive product on a small, hidden patch first, particularly on textured, freshly painted, or older plaster walls where bond strength can vary. Painted plasterboard usually takes adhesive pads well; heavily textured or very old paint layers are less predictable.
Avoid layering heavy items, mirrors, framed art, shelving, over adhesive-mounted panels unless the specific product is rated for that weight. Panels designed for colour and texture aren’t automatically rated as structural hanging points.
Keep a paper trail. Photograph the wall before you start, keep any written landlord permission, and note the installation date. If a dispute ever comes up over a bond, that record does the arguing for you.
Removing any adhesive-based treatment slowly and at the angle the manufacturer recommends, rather than pulling straight off, reduces the chance of paint lifting with it. And never assume a product is damage-free on every wall type; wall age, paint condition and humidity all play a part, so testing first is the only way to know how your specific wall will respond.
Why a colour-led, removable wall changes how a nook feels
Committing to one bold, reversible wall does more for a small dining nook than a dozen cautious tweaks. The decisiveness itself is the design move, not just the colour.
Once that one wall is settled, the rest of the room stops competing for attention, and the whole space starts to feel considered rather than accumulated. That’s the real value of designing with removable materials: confidence without the risk.
— Michelle
Get the look without picking up a drill
Modular wall panel kits deliver exactly what a dining nook needs: colour, sculptural texture, and a fully removable, no-drill installation. Where paint demands full commitment and timber panelling means holes to fill later, removable wall panels use tested adhesive pads that let you reconfigure, extend, or take the whole wall with you to your next home.

Start by measuring your nook’s back wall, then order a colour sample to test against your lighting before buying anything full-size. From there, browse the Core Kits for your starting layout, and add an Extension Kit if your wall runs wider than a single kit covers. It’s texture without renovation, and colour without commitment, exactly what a dining nook needs to feel like yours.
Sources
For measurement rules and styling detail, see the Houzz panelling gallery and Architectural Digest’s nook roundup. For product detail, visit the DwellForms™ product range.
- Wall paneling dining room ideas — Houzz
- How to style a dining nook — Atelier Printworks
- Dining nook ideas — Home Decor Aura
- Breakfast nook wallpaper ideas — Mattress Nut
FAQ
Are dining nooks a good idea?
Yes. A dining nook makes efficient use of an awkward corner and, with the right lighting and a considered feature wall, feels more intentional than an open dining area against a plain wall.
What are some good feature wall ideas for a dining area?
The strongest options are a tonal or colour-blocked paint finish, a peel-and-stick mural, architectural panelling like board-and-batten, or a modular no-drill panel kit such as DwellForms™. Choose based on how permanent you want the result and whether you’re renting.
What is a dining nook called?
“Dining nook” and “breakfast nook” are used interchangeably, and both describe a compact, often built-in dining area tucked into a corner or alcove, typically with a banquette or bench seat.
Are accent walls out of style in 2026?
No, but the style has shifted toward removable, colour-led treatments rather than one permanently painted wall. Renter-friendly options like peel-and-stick murals and no-drill panel kits let people commit to bold colour without the long-term risk, which is part of why they’ve stayed popular.