

Yes, you can put decorative panels on plasterboard, but the method depends on what the panel is made of and whether the wall is yours to change. Heavy timber or MDF panelling is a fixing job that belongs to owners. Lightweight, removable panels can go up with adhesive pads and no tools at all. Either way, the plasterboard behind them matters more than most guides admit.
Most New Zealand homes are lined with it, so this is the wall you are almost certainly standing in front of. Let’s look at what it is, how to read its condition, and which approach fits your situation.
Key takeaways
- Plasterboard is a common lining in NZ homes and sometimes doubles as bracing, so treat it as a working part of the building, not a blank canvas to cut into.
- A flat, clean, sound wall is the starting point for any panel, whether it is screwed, glued or stuck on with pads.
- Rigid timber or MDF panelling suits owners who are happy to make permanent changes. Renters need written consent for anything that alters the property.
- Removable, lightweight panels with adhesive pads give colour and texture without drilling, but no adhesive can promise a wall will come away unmarked.
- Test a small area first, and stay in the conversation with your landlord.
Table of Contents
- Why plasterboard is not just a blank surface
- Read your wall before you choose a panel
- Three ways to put panels on plasterboard
- If you rent: consent comes before colour
- A word about adhesives, and a word of honesty
- Our perspective: colour without commitment
- Choosing colour and pattern when you cannot repaint
- Fitting around corners, power points and uneven areas
- Where DwellForms™ fits
- A short checklist before you stick or screw anything
- FAQ
- Sources
Why plasterboard is not just a blank surface
It is easy to think of a plasterboard wall as a flat sheet of nothing. It is a manufactured lining with a paper face, fixed to framing behind it, and in many New Zealand homes it is doing structural work. Building.govt.nz notes that plasterboard is a common wall and ceiling lining and often provides bracing against wind and earthquakes.
That has a practical consequence for anyone planning to cut, chase or heavily fix into it. The government’s own guidance says that if you are unsure, it is safer to treat all plasterboard wall linings as bracing elements, and to consult an engineer, designer or licensed building practitioner before removing large areas or carrying out repairs.
For decorating, the lesson is simple. Small fixings and surface treatments are one thing. Large cut-outs, new openings or removing lining are another, and they are not a weekend project to improvise.
Read your wall before you choose a panel
The best panel in the world looks poor on a wall that is wavy, dusty or flaking. Spend ten minutes on the wall before you spend anything on the panel.
Flatness
Plasterboard is only as flat as the framing behind it. New Zealand installation guidance is strict about this: GIB’s site guide says the framing or backing surface should be flat, with nogs flush and nails below the surface, and that insulation must not bulge between studs. Another manufacturer’s guide says that for higher finish levels, framing deviation is limited to 2 mm over a 1.8 m straightedge.
You can borrow that idea at home. Hold a long, straight length of timber or a spirit level against the wall and look for daylight underneath. Dips and ridges that you can slip a coin into will show through rigid panels and can stop large, flat pads from gripping evenly.
Surface condition
Run your hand across the wall. You are looking for:
- Dust or chalkiness, which weakens any adhesive bond.
- Flaking or peeling paint, which will come away with whatever you stick to it.
- Damp patches, stains or bubbling, which point to a moisture problem that needs fixing before anything covers it.
- Cracks along joints and screw pops, which suggest movement in the framing. GIB warns that timber framing wetter than 18% moisture content raises the risk of screw pops and joint cracking, so these are worth noticing in a newer build.
One more thing: paint type. A matt or chalky finish behaves differently from a satin or gloss one, and a freshly painted wall can stay soft for weeks. Wait before applying anything adhesive to a fresh coat.
Services in the wall
Pipes, wiring and switch boxes sit behind that lining. For installers, guidance says services should be recessed so they do not protrude beyond the framing face. For you, it means keep deep screws and heavy fixings away from outlets, switches and anywhere a pipe may run. Another good reason to consider options that need no fixings at all.
Three ways to put panels on plasterboard
The search results for this topic are dominated by timber and MDF panelling guides, which makes sense: it is a popular, substantial project. It is not the only route, and it is not the right one for everybody.
| Approach | Best for | Wall impact | Reversible? |
|---|---|---|---|
| Rigid timber or MDF panelling, screwed or glued | Owners wanting a built-in, permanent look | High: fixings and adhesive remain in the lining | No, and repair work follows |
| Lightweight panels held with adhesive pads | Renters, owners wanting flexibility, temporary spaces | Low, but never zero | Designed to be, subject to wall condition |
| Art, mirrors and shelving on conventional fixings | Small, targeted statements | Medium: holes in the lining | Fill and repaint |
Rigid panelling for owners
If you own the home and want that classic, built-in feeling, rigid panelling is a legitimate choice. The usual approach is to prepare the wall (clean it, correct bumps, mark studs), dry-fit the layout and then fix. Where adhesive is involved, there is an important distinction. Soudal’s New Zealand appraisal for its construction adhesives explains that adhesive can supplement mechanical fixing in non-structural situations but must not replace specified mechanical fixings, and that load-bearing, bracing, fire-rated and acoustic systems must follow the relevant manufacturer’s instructions.
In plain terms: do not glue heavy panels to a wall and hope. Check the product’s instructions, locate the framing, and if the wall may be bracing, ask a professional before you do anything beyond surface fixing.
A dry run pays for itself. Lay panels on the floor or hold them up, work out where the joins fall, and decide how you will handle power points and corners before any adhesive comes out. It is far cheaper to move a pencil mark than a panel.
Lightweight panels with adhesive pads
This is the route for people who want colour and texture without the commitment: rented homes, apartments with strict body corporate rules, a first flat you will leave in two years, or a home office you may rearrange after the next job change. Felt panels are light, so they can be held by pads rather than screws, and they lift away rather than needing to be filled and painted over.
Light does not mean careless. Pads still need a clean, sound, appropriately cured surface, and you should always test first.
Conventional hanging for small features
A framed print or a mirror on a picture hook is the most familiar answer. It also leaves a hole in the lining, which in a rental brings us to the next question.
If you rent: consent comes before colour
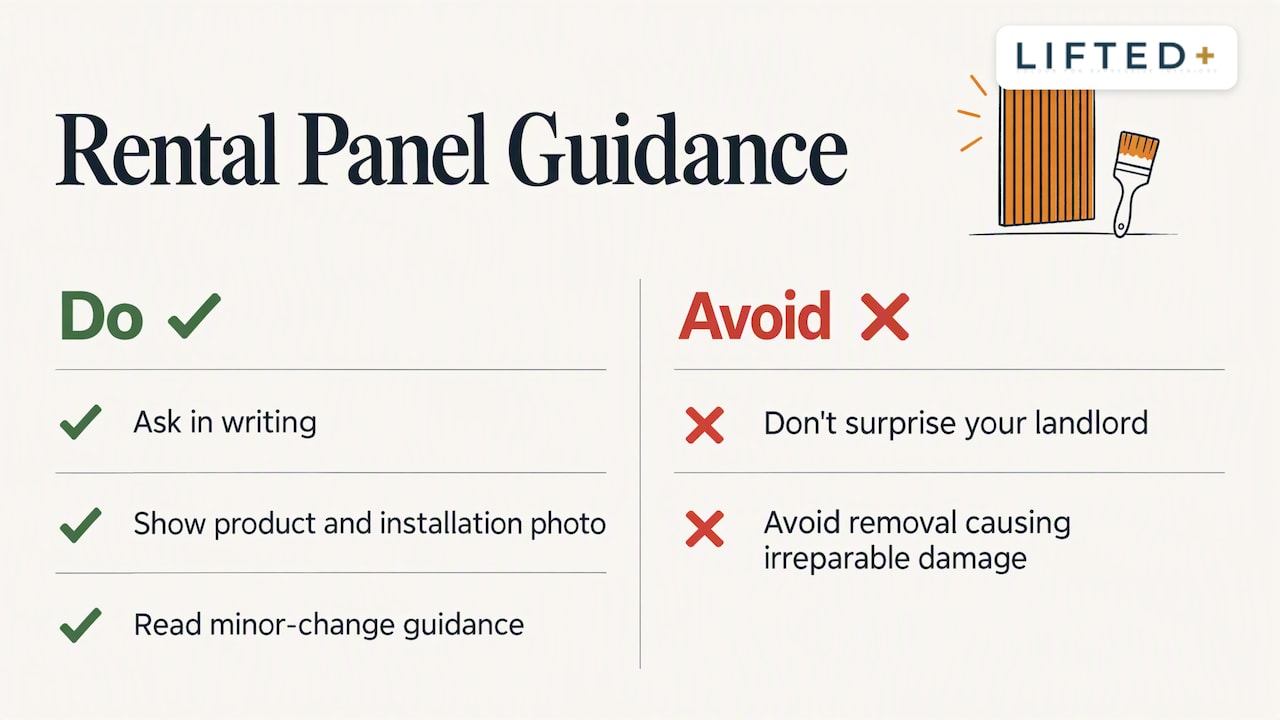
Renting in New Zealand does not mean living with bare walls, but it does mean checking what your tenancy allows. Tenancy Services says tenants must have the landlord’s written consent for changes that are not in line with the tenancy agreement, and that the landlord cannot unreasonably withhold it. It also states that tenants cannot remove fixtures if doing so would cause damage that cannot be repaired, and that if you do cause damage when removing something you should tell the landlord.
There is a useful distinction in that guidance as well: landlords must not decline a change if it is minor. What counts as minor is set out on the Tenancy Services page, so read it before you decide whether to ask.
Our practical advice is to ask anyway, in writing, and show your landlord what you plan to use. A short message with a product description and a photo of a tidy, adhesive-mounted installation tends to be received better than a surprise. We have written more on the practical side in our guide to protecting your bond with no-drill panels, and on the common shortcuts that can backfire in why Blu Tack can cost renters their bond.
A word about adhesives, and a word of honesty
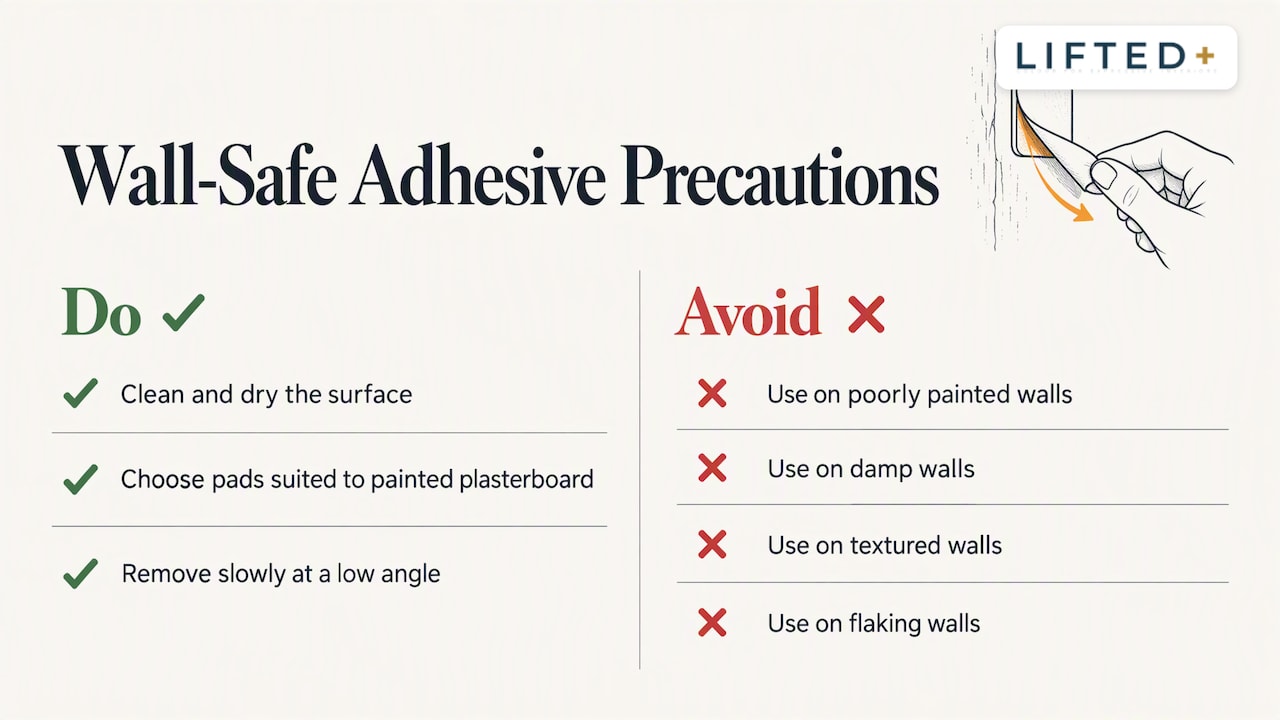
Plasterboard has a paper face. Pull something off it too quickly or too hard, and the paper can come with it. That is true of tape, hooks, putty and pads alike, and it is why no honest supplier can promise that removal is damage-free on every wall.
What you can do is reduce the odds. Clean and dry the surface. Choose a pad system with a track record on painted plasterboard. Remove slowly and at a low angle rather than pulling straight out. And avoid walls that are poorly painted, damp, textured or flaking.
We tested several pull-tab and pad systems while developing DwellForms™ and deliberately discounted one very popular brand, because our selected nano-adhesive pads performed significantly better in our own testing at minimising wall damage. “Minimising” is the honest word. We never claim any adhesive is completely damage-proof, and our results come from our own tests, not an independent standard. For a broader look at the options, see our guide to renter-safe adhesives.
Our perspective: colour without commitment
We started DwellForms™ because the standard advice for a dull wall (paint it, wallpaper it, panel it) assumes you can. Many people in New Zealand cannot, or should not, or simply do not want to make that kind of change to a home they will leave.
The usual alternative is not much better. Neutral walls with a small print in the middle are the safe, polite middle that a lot of rentals settle into. We think a wall can hold a room, and that texture and shape do more for a space than another beige coat ever will.
So we designed precision-cut PET felt panels, made from 100% recycled plastic, that arrange into sculptural patterns and fix with pads rather than screws. The idea is texture without renovation: you build a feature wall in an afternoon, and when you move, it comes with you. We are careful about what we claim. We do not describe the kits as soundproofing or acoustic treatment, and we do not suggest they suit every wall. A sound, clean, painted plasterboard wall is where they are at their best, and a patch test is always the first step.
What we do believe is that you should not have to choose between a landlord’s rules and a home that feels like yours.
— Michelle
Choosing colour and pattern when you cannot repaint
The fear with a first bold wall is commitment. With removable panels, the fear largely disappears, because a mistake is a ten-minute rearrangement rather than a weekend with a roller. A few principles help.
Start with the room’s light. North-facing rooms in New Zealand take saturated colour well. Cooler, shadier rooms can feel heavy with dark tones, so go for mid-tones or contrasting accents there.
Anchor one wall. A single feature wall behind a bed, sofa or desk gives the eye a place to land. Surrounding walls can stay quiet.
Mix scale, not just colour. A pattern of larger and smaller shapes creates hierarchy. It reads as designed rather than decorated.
Order samples first. Colour on a screen lies, and plasterboard walls under your own lighting lie differently. Our colour sample kits let you hold the felt against your wall at different times of day, and the cost of a sample purchase is credited towards a full kit order. If you want pattern inspiration, our removable wall panel ideas and colour-led panel patterns show layouts that can be installed in a weekend.
Fitting around corners, power points and uneven areas
Whichever panel you choose, the awkward spots are where a finish is won or lost.
- Corners: leave a small, consistent gap rather than forcing panels tight. Our wall panel corners guide covers the detail.
- Power points: keep panels clear of switches and sockets, and never cover them without a surround that allows access.
- Uneven areas: a slightly bumpy wall is better treated with smaller panels that follow it than with one large rigid sheet that bridges the dips.
- Behind furniture: if the real goal is protecting a wall from a sofa or bed head, see our notes on wall protection behind furniture.
As a rule, do a full dry layout on the floor first. Photograph it. Then transfer it to the wall one piece at a time, working from the centre outwards.
Where DwellForms™ fits
If your plasterboard wall is sound and you want a renter-friendly feature wall without drilling, DwellForms™ is built for exactly that. The kits are modular, the panels are cut from recycled PET felt, and they are installed with tested adhesive pads. Everything is designed to be lifted off, rearranged and taken to a new home.
The Core Kits are the place to start for a single wall. If you later want to grow the design, Extension Kits let you keep building, and our guide to extending wall panels without drilling walks through it.
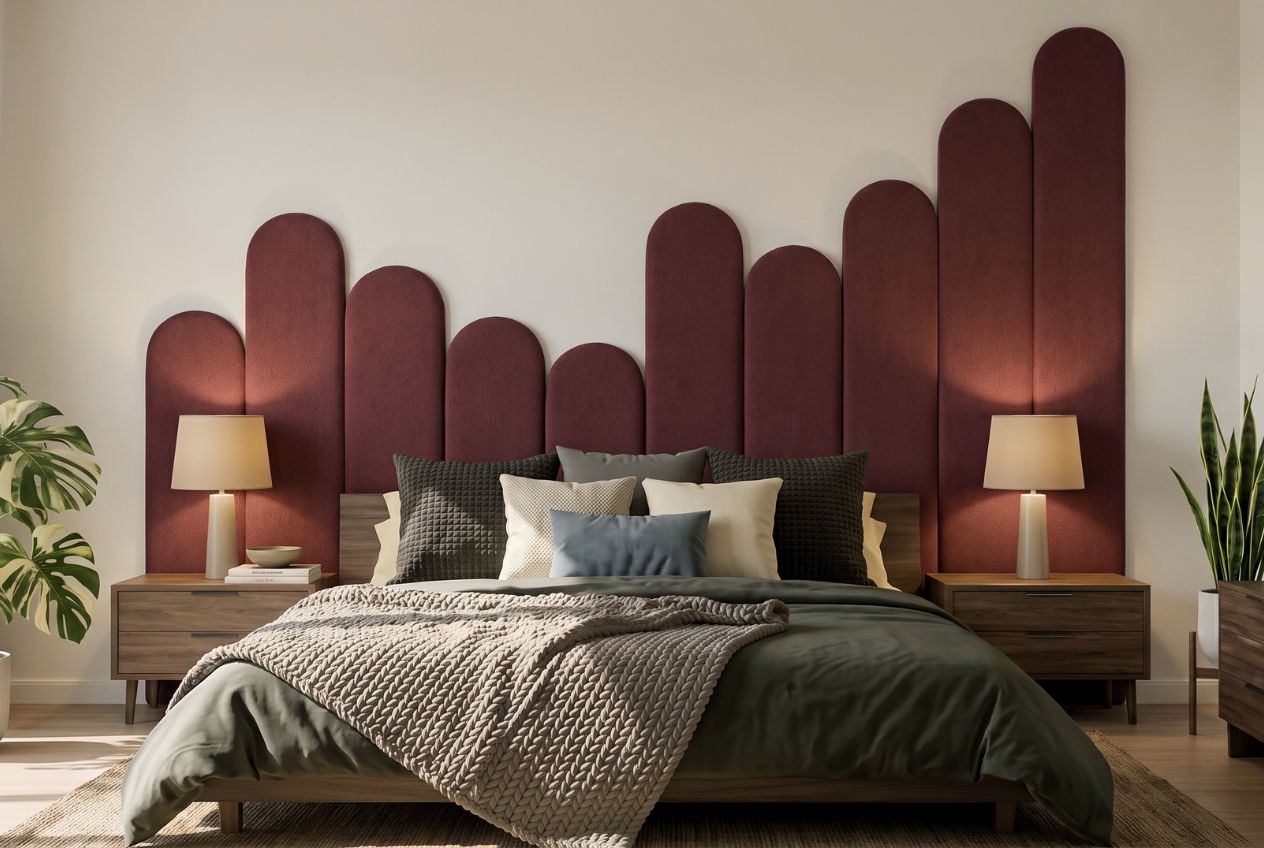
Not sure about colour or your wall? Begin with samples, test a small area, and take your time. Our Skyline Kit and Linear Feature Kit show two very different personalities from the same system.
A short checklist before you stick or screw anything
- Identify the wall: plasterboard, plaster, or something else. Tap it and check behind it where you can.
- Ask whether it might be bracing. If you are unsure, treat it as bracing and do not cut into it.
- Check flatness with a straightedge.
- Clean, dry and check the paint. Wait for fresh paint to cure.
- Read your tenancy agreement and get consent in writing if needed.
- Test one pad or panel in a hidden spot, leave it, and remove it slowly.
- Dry-fit the layout on the floor, then commit.
FAQ
Can you put panels directly on plasterboard?
Yes, provided the plasterboard is flat, clean, dry and sound. Heavy rigid panels need proper fixings into the framing, and adhesive alone should not replace specified fixings. Lightweight felt panels can go up with adhesive pads, though you should still test a small area first.
Will adhesive pads damage plasterboard?
They can. The paper face can lift if a pad is removed too fast or the paint is poorly bonded. Good preparation, a patch test and slow, angled removal reduce the risk, but no adhesive is completely damage-proof. Tell your landlord if damage does occur.
Do renters need permission to put panels on a wall in NZ?
Tenancy Services says changes need the landlord’s written consent unless they are in line with the tenancy agreement, and consent cannot be unreasonably withheld. Landlords must also not decline minor changes. Check the Tenancy Services page and ask in writing before you start.
Is it safe to cut into plasterboard for panels?
Small surface work is one thing, but cutting into or removing sections of lining is another, because plasterboard often provides bracing. Government guidance recommends consulting an engineer, designer or licensed building practitioner before major work, and treating the lining as bracing if you are unsure.
Sources
- Building.govt.nz: Damage to wall linings (plasterboard) caused by flooding
- Building.govt.nz: Repair and replacement of plasterboard quick guide
- GIB Site Guide: General wall and ceiling installation, May 2025
- Plasterboard installation guide, December 2025
- Soudal NZ appraisal: Gorilla Grip adhesives
- Tenancy Services: Tenants making changes to the property
Recommended
- No Drill: 3 Ways To Fit Panels On Textured Walls For Renters
- Panels On Concrete Walls: What Works Without Drilling
- Panels Around Switches: A Clean, No-Drill Approach
- Getting Panels On Curved Walls Right Without A Single Drill Hole
This article is for general information and inspiration only. Product performance and results may vary depending on individual circumstances, surfaces and installation.
