
Table of Contents
- Why Order Custom Felt Wall Panels Instead of Off-the-Shelf
- Recycled PET Felt Wall Panels: What You’re Actually Buying
- How to Measure and Specify Before You Order
- Colours, Shapes and Printed Artwork: Customisation Options
- How to Arrange Acoustic Wall Panels for the Best Effect
- Felt Panels for Home Office Setups That Actually Work
- Budgeting, Lead Times and the Step-by-Step Ordering Workflow
- Installation and Wall Mounting Without Drilling
- Frequently Asked Questions
Last Updated: October 21, 2026
Why Order Custom Felt Wall Panels Instead of Off-the-Shelf
When you order custom felt wall panels, you get a wall treatment sized to your actual room rather than a compromise. Standard panels rarely fit awkward walls, and renters need something that comes down cleanly.
Off-the-shelf acoustic tiles come in fixed squares, which works in a perfect rectangle but falls apart beside a window, a sloped ceiling, or a doorway.
The real reason to order custom felt wall panels is fit, not fashion. A wall measured properly and specified to those measurements looks intentional. A wall of standard tiles looks like a wall of standard tiles.
Recycled PET Felt Wall Panels: What You’re Actually Buying
Recycled PET felt wall panels are sound-absorbing panels made from compressed, non-woven polyester fibre, usually sourced from recycled plastic bottles. The dense fibre structure traps airborne sound and softens echo, which is why the material shows up in commercial interiors as well as homes. Two things separate a good panel from a flimsy one: thickness and density, both of which should appear on a specification sheet before you order custom felt wall panels.
Panel thickness, density and what they mean for sound
Thicker, denser felt absorbs more mid and low frequencies; thin felt mostly kills high-frequency flutter echo, the sharp slap you hear in a bare room. For a home office, a mid-weight panel is the sensible middle ground. Ask any supplier for the acoustic performance specification before you order custom felt wall panels, if they cannot supply absorption data, treat that as a warning sign.
Reading acoustic performance specifications
Acoustic performance is usually expressed as a sound absorption coefficient at a set of frequencies, or as a single-number rating derived from those coefficients. The two ratings you will see most often are the Noise Reduction Coefficient (NRC) and the Sound Absorption Average (SAA). Both run from 0 to 1, where a higher number means more sound is absorbed rather than reflected: a panel rated around 0.5 absorbs roughly half the sound energy that hits it, while one rated above 0.8 is highly absorptive.
Three practical points follow from this:
- Thickness changes the curve, not just the number. A 9 mm panel and a 24 mm panel may both look like felt, but the thicker panel will absorb meaningfully more in the low and mid ranges. If the specification only gives one thickness, ask what the rating refers to.
- Coverage changes the result. Absorption scales with the area covered. A single panel on a large wall softens some flutter echo but will not transform the room. Covering roughly 20-30% of a wall surface produces a noticeable change in a domestic room, and more coverage produces more absorption up to the practical limit of the wall.
- Placement changes the result. Panels work best spread across the surfaces that generate the strongest reflections, the wall behind the listener, the wall opposite, and any parallel hard surfaces. Clustering all the panels in one corner concentrates the benefit and leaves the rest of the room live.
Safety, sustainability and day-to-day care
PET felt is durable, low-shedding and easy to live with: dust it with a vacuum brush attachment, and spot-clean marks with a damp cloth and mild soap, then blot dry.
On fire performance, ask for the test report rather than a claim. In New Zealand, interior wall linings are assessed under the Building Code and the relevant test standards, and a supplier should be able to tell you whether a test report is available.
A felt panel is a specification, not a colour. Thickness, density, recycled content, fire test report and absorption rating are the five things to confirm before you order custom felt wall panels, and any supplier who cannot answer all five is asking you to guess.
How to Measure and Specify Before You Order
Measure the full wall width and height, then measure again at three points: top, middle and bottom. Walls are rarely square, and the smallest measurement is the one that matters. Next, map the fixed obstacles:
- Power outlets, switches and data points
- Window and door reveals
- Skirting boards and ceiling cornices
Sketch the wall on paper, mark the obstacles, and note where you want coverage to stop. That sketch becomes your ordering brief.
Wall compatibility: textured walls, angles and rental conditions
Textured walls and unusual angles are the most common reason a panel order goes wrong. A light plaster texture is usually fine. Heavy stucco, brick or rough render needs a different fixing approach.
For renters, the question is damage. A no-drill modular system that comes off cleanly protects your bond far better than adhesive strips on painted plasterboard. Check your tenancy agreement before you commit, and photograph the wall before installation so you have a record.
Never assume adhesive will hold on a dusty, freshly painted or wallpapered surface. Adhesion fails quietly over weeks, and a panel dropping at 2am takes paint with it.
Colours, Shapes and Printed Artwork: Customisation Options
Colour is where custom orders earn their keep: match a room palette, build a gradient across a wall, or run a single bold accent against neutral tones. Shape options typically include:
- Rectangular and square panels
- Slat and 3D sculptural profiles
- Hexagonal or geometric tiles
Printed artwork opens another route entirely. Dye sublimation printing puts branded designs, illustrations or photography directly onto the felt surface.
Always request physical swatches before you order custom felt wall panels in a specific colour. Screens lie, and a colour that reads warm on a monitor can look grey on a wall.
How to Arrange Acoustic Wall Panels for the Best Effect
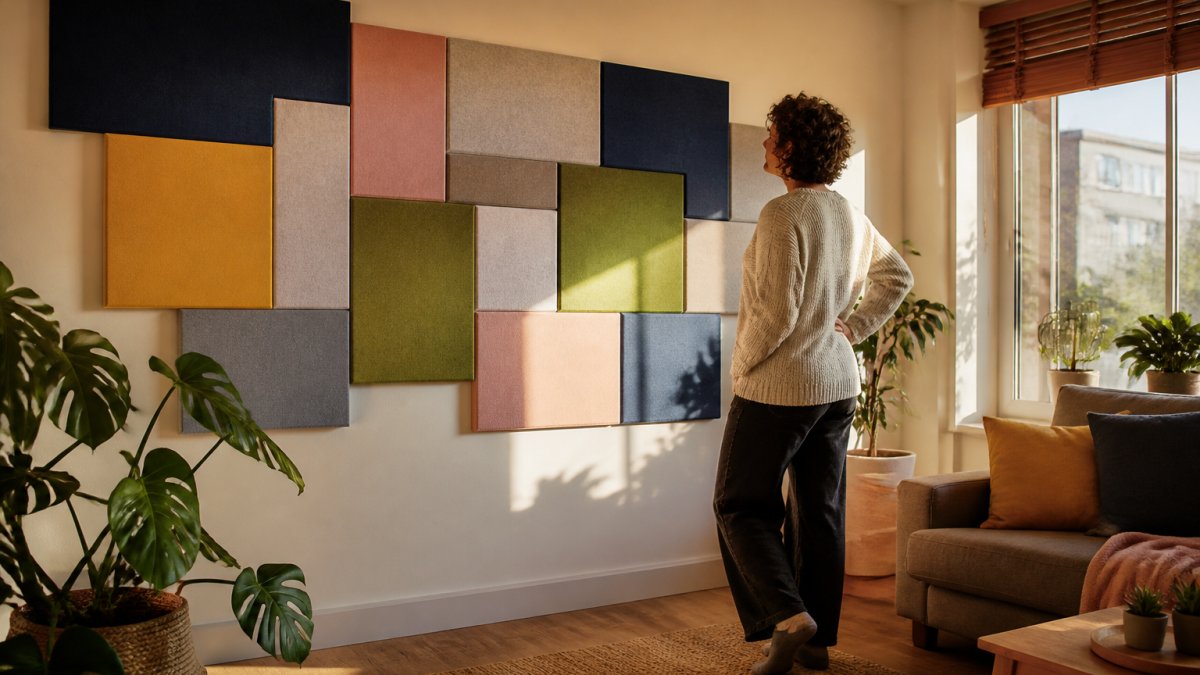
Start with the largest visual anchor in the room and build the arrangement around it. A staggered grid reads as deliberate. A perfect grid reads as office reception.
Three layouts that work:
- Staggered brick: offset each row by half a panel. Best for long walls.
- Gradient run: move from dark to light across the wall. Best for narrow spaces.
- Sculptural cluster: group mixed shapes in one zone and leave the rest bare. Best for renters who want one strong moment.
For acoustics, place panels at ear height and spread them rather than clustering. Sound absorption works best when coverage is distributed, not concentrated in one corner.
Felt Panels for Home Office Setups That Actually Work
A home office is where felt panels for home office use make the most obvious difference.
Mount panels behind you, not just in front. That is the wall your microphone reflects off during video calls.
Behind the desk, a run of panels at seated head height reduces echo without swallowing the room. Add one panel on each side wall if the space is narrow.
Hang a panel behind your monitor as well as behind your chair. Most people treat only the wall they face, then wonder why calls still sound hollow.
Budgeting, Lead Times and the Step-by-Step Ordering Workflow
Pricing depends on panel count, dimensions, thickness, print work and delivery, so we quote each project rather than publish a flat rate. A full wall costs more than a partial feature zone, and printed panels cost more than solid colours.
What drives the cost of a custom order
Five factors move the price more than anything else:
- Area covered. Cost scales with square metres of felt, not panel count. A wall of small panels costs more per square metre than the same area in large panels because there is more cutting and more edge finishing.
- Thickness and density. A thicker, denser panel uses more material. If you are comparing quotes, compare the thickness and the absorption rating, not just the total.
- Print work. Dye sublimation printing adds a setup cost per design plus a per-panel cost. A single-colour solid panel avoids both. Multi-colour artwork with fine detail may need a proof and a higher-resolution file.
- Cut shapes. Rectangles and squares are the cheapest shapes to produce. Hexagons, curves and 3D profiles add cutting time and waste.
- Delivery. Nationwide delivery is priced by size and weight, and rural delivery adds cost. If you are ordering from outside the main centres, confirm the delivery estimate before you approve the quote.
A sensible way to budget is to price the feature zone first, then the full wall, and compare the difference against the acoustic benefit you actually need. Most buyers find the feature zone delivers most of the visual and acoustic improvement for a fraction of the full-wall cost.
Preparing artwork and specifications
Printed panels need artwork prepared to the supplier’s specification. Before you send files, confirm:
- Colour mode. Supply artwork in the colour mode the supplier requests, and ask whether they colour-match to a physical swatch or to a digital reference. Screens vary, so a physical swatch is the only reliable match.
- Proof approval. Ask for a digital proof showing the artwork on the panel layout, and check orientation, scale and colour before you sign off. Once a proof is approved, the order is usually committed.
The ordering workflow, step by step
| Step | What you do | What to have ready | What to check before moving on |
|---|---|---|---|
| 1. Measure | Record width, height and obstacles at three points | Wall sketch with measurements | Smallest measurement used, obstacles marked |
| 2. Choose coverage | Decide full wall or feature zone | Layout idea and panel count | Coverage percentage and placement mapped |
| 3. Select finish | Choose colour, shape and print | Swatch choices or artwork file | Physical swatch approved, file format confirmed |
| 4. Request quote | Confirm quantity, delivery and deadline | Postcode and target date | Quote itemises thickness, print and delivery |
| 5. Approve proof | Check artwork and layout | Sign-off on final design | Orientation, scale, colour and tolerance confirmed |
| 6. Receive and install | Mount panels per guide | Clean, dry wall surface | Panels checked for damage before mounting |
Lead times and delivery
Lead time varies with custom sizing and print work, so confirm it before you commit to a date. Solid-colour panels in standard shapes move faster than printed or custom-cut panels, and a proof approval step adds time to the front of the schedule. Allow extra time for nationwide delivery if you are ordering from outside the main centres. Ask for the lead time in writing at quote stage, and ask what happens if a panel arrives damaged, a supplier who can answer both before you pay is worth ordering from.
Build your installation date around the lead time, not the other way round. The most common scheduling mistake is booking a fitter before the proof is approved.
Installation and Wall Mounting Without Drilling
No-drill wall mounting is the whole point for renters. A modular kit should go up with removable fixings, hold firmly, and come down without filling holes.
Plan the layout on the floor first. Mark panel positions lightly, mount the first panel level, then work outward from it.
Check adhesion after 24 hours. Press each panel firmly and look for lifting corners.
Skipping the 24-hour check is the most common installation mistake. A corner lifting on day one becomes a fallen panel by week three.
When you move, panels lift off, get wiped down and reconfigure in the new space. That portability is what makes a modular kit worth the spend over a one-off wall treatment.
Frequently Asked Questions
Can felt wall panels be made to order?
Yes. Custom felt wall panels are typically cut to your chosen dimensions rather than sold in fixed sizes, so you measure the wall first and specify panel lengths, heights and thickness. You can usually choose colours, shapes and even printed artwork. Because each order is cut for you, expect a lead time between confirming artwork or dimensions and dispatch. Ask for swatches before committing so the colour reads correctly in your room’s light.
What should I measure before ordering custom felt wall panels?
Measure the full width and height of the wall, then note doors, windows, power points and light switches that interrupt the surface. Check ceiling height at both ends of the wall, since older apartments are rarely perfectly square. Decide on coverage: a full feature wall, a partial panel arrangement, or a band behind a desk. Add your planned gaps between panels to the total so the coverage calculation matches the layout you actually want.
Do felt wall panels help reduce echo in a room?
They do, within reason. PET felt absorbs mid and high frequencies, which is where most of the harsh echo in a hard-floored room sits. A single small panel will make a modest difference; covering a meaningful share of one wall is where you notice the change. Ask the supplier for acoustic performance data, such as how the panel performs across frequency bands, rather than relying on a general claim that panels are acoustic.
How do you install felt wall panels without drilling?
No-drill systems use adhesive-backed mounts, removable hooks or a rail fixed with removable strips, so nothing is screwed into the wall. The key is surface preparation: clean the wall, let it dry fully, and press mounts firmly for the recommended time before hanging panels. On textured or angled walls, test one mount first and check it holds before committing the whole layout. Removal should leave the paint intact when done slowly and at the right angle.
Blank walls are the easiest thing to fix and the easiest thing to postpone. If you rent, move often, or simply refuse to repaint a room you might leave next year, a modular system solves the problem without touching the lease. Lifted Plus DwellForms™ kits use 100% recycled PET felt, mount without drilling, and reconfigure when you move. Explore DwellForms™ and turn that empty wall into something you actually chose.
